Difference between revisions of "Bundles"
Margotbean (talk | contribs) |
Margotbean (talk | contribs) m (Text replacement - "{{price|" to "{{Price|") |
||
| (356 intermediate revisions by more than 100 users not shown) | |||
| Line 1: | Line 1: | ||
{{TOC right|npt=y}} | {{TOC right|npt=y}} | ||
| + | {{For|remixed bundles chosen at game start via [[Options#Advanced Options|advanced options]]|Remixed Bundles}} | ||
| + | [[Bundles]] are donations to the [[Junimos]] given via golden scrolls inside the [[Community Center]]. When a bundle is complete, the Junimos offer the player a reward. When all bundles for a particular room in the Community Center are complete, the Junimos grant a special reward that sometimes benefits the entire community. | ||
| − | + | Bundle rewards are given immediately, but rewards for completing all bundles in a room are given at the end of the day via a cutscene depicting the Junimos fulfilling the reward. If two rooms are completed on the same day, only one of the cutscenes is shown. Note that if the player does not collect individual bundle rewards before completing the room, the rewards can be found in a small brown bag to the left of the Junimo Hut after the golden scroll disappears. This bag persists after the [[Community Center]] completion ceremony, until all items are retrieved from it. | |
| − | Bundle | + | A few bundles display more items than there are slots to fill (''e.g.,'' Artisan Bundle: 12 items, 6 slots to fill). In this case, the player can choose which of the shown items they want to use to fill the bundle. They do ''not'' have to use ''all'' shown items, only enough to fill the slots. |
| − | + | Completing all bundles restores the Community Center to its condition when it was brand new and unlocks the [[Achievements|"Local Legend"]] steam achievement. That night, the game also unlocks a cut scene that shows the grand re-opening of the Community Center. This scene is triggered by entering [[Pelican Town]] Square any time thereafter on a sunny day, unless a festival is to be held in the town that day. Mayor Lewis announces that the player has won the Stardew Hero award and gives the player a trophy. | |
| − | + | If the player opts to purchase a [[JojaMart]] Membership, the Community Center is turned into a [[Joja Warehouse]] instead. After this happens, the bundles will be completed by the Joja Corporation for a fee given to [[Morris]], the local JojaMart manager, through the [[Joja Community Development Form]]. | |
| − | + | [[File:Golden Scroll.png|thumb|right|Golden Scroll]] | |
| − | + | There is a total of 6 rooms and 30 bundles to complete in the Community Center. In the Joja Warehouse, there are 5 rewards to purchase (the "Friendship" reward is not available). | |
| − | + | '''Bundle Progress can be checked at any time''' by clicking on the Golden Scroll icon at the top right of the Player Menu (above the Garbage Can and "organize" icons). Selecting or hovering the mouse pointer over an inventory item that is needed for a bundle makes the Golden Scroll icon pulsate. | |
| − | ''' | + | '''Bundles that do not specify quality will accept items of any quality.''' For bundles that need multiple items, multiple stacks of different qualities are acceptable as long as they add up to the required amount. For bundles that do specify a quality, a better quality is also acceptable. |
| − | == | + | ==Traveling Cart Availability== |
| − | All items required for bundles have a small chance of appearing in the [[ | + | All items required for bundles have a small chance of appearing in the [[Traveling Cart]], except for the items listed below. These items will never be sold at the Traveling Cart: |
{| | {| | ||
| − | |||
|style="vertical-align: top; padding-right: 12px;"| | |style="vertical-align: top; padding-right: 12px;"| | ||
{| | {| | ||
| − | + | *'''Any''' starred (silver or higher quality) item | |
| − | | | + | *{{name|Aged Roe|class=inline}}* |
| − | | | + | *{{name|Amethyst|class=inline}}* |
| − | | | + | *{{name|Ancient Doll|class=inline}}* |
| − | + | *{{name|Ancient Fruit|class=inline}} | |
| − | + | *{{name|Aquamarine|class=inline}} | |
| − | + | *{{name|Blobfish|class=inline}}* | |
| + | *{{name|Bone Fragment|class=inline}}* | ||
| + | *{{name|Diamond|class=inline}}* | ||
|} | |} | ||
|style="vertical-align: top; padding-right: 12px;"| | |style="vertical-align: top; padding-right: 12px;"| | ||
| − | + | {| | |
| − | *{{name| | + | *{{name|Dinosaur Mayonnaise|class=inline}} |
*{{name|Earth Crystal|class=inline}} | *{{name|Earth Crystal|class=inline}} | ||
| − | *{{name| | + | *{{name|Emerald|class=inline}}* |
| − | |||
*{{name|Fire Quartz|class=inline}} | *{{name|Fire Quartz|class=inline}} | ||
*{{name|Frozen Geode|class=inline}} | *{{name|Frozen Geode|class=inline}} | ||
| + | *{{name|Frozen Tear|class=inline}} | ||
*{{name|Hay|class=inline}} | *{{name|Hay|class=inline}} | ||
| − | |- | + | *{{name|Lava Eel|class=inline}}* |
| + | *{{name|Prismatic Shard|class=inline}} | ||
| + | |} | ||
| + | |style="vertical-align: top;"| | ||
| + | *{{name|Quartz|class=inline}} | ||
| + | *{{name|Roe|class=inline}}* | ||
| + | *{{name|Ruby|class=inline}}* | ||
| + | *{{name|Squid Ink|class=inline}}* | ||
| + | *{{name|Sweet Gem Berry|class=inline}}* | ||
| + | *{{name|Topaz|class=inline}}* | ||
| + | *{{name|Void Salmon|class=inline}} | ||
| + | *{{name|Wheat Flour|class=inline}}* | ||
| + | *{{name|White Algae|class=inline}}* | ||
|} | |} | ||
| + | <nowiki>*</nowiki>Used only in [[Remixed Bundles]] | ||
| − | ==Crafts Room== | + | ==Standard Bundles== |
| + | ===Crafts Room=== | ||
[[File:Community Center Crafts Room.png|thumb|right|Crafts Room Before Completion]] | [[File:Community Center Crafts Room.png|thumb|right|Crafts Room Before Completion]] | ||
[[File:Finished Crafts Room.png|right|thumb|Crafts Room After Completion]] | [[File:Finished Crafts Room.png|right|thumb|Crafts Room After Completion]] | ||
| − | The Crafts Room contains the first group of bundles available. Completing all Crafts Room bundles repairs the bridge east of [[The Mines]], | + | The Crafts Room contains the first group of bundles available. Completing all Crafts Room bundles repairs the bridge east of [[The Mines]], unlocking the [[Quarry]]. |
| − | {| class="wikitable" style="border-collapse: collapse;" | + | {|class="wikitable" style="border-collapse: collapse;" |
|- | |- | ||
!style="background-color: #41AEFF !important; border-right: 0 !important;"|[[File:Bundle Complete Balloon.png|link=]] | !style="background-color: #41AEFF !important; border-right: 0 !important;"|[[File:Bundle Complete Balloon.png|link=]] | ||
| Line 56: | Line 73: | ||
|} | |} | ||
| − | {| class="wikitable" | + | {|class="wikitable" |
!id="Spring Foraging Bundle" colspan="4" |[[File:Bundle Green.png|32px|link=]] Spring Foraging Bundle | !id="Spring Foraging Bundle" colspan="4" |[[File:Bundle Green.png|32px|link=]] Spring Foraging Bundle | ||
|- | |- | ||
| rowspan="4" style="width: 136px !important;"|[[File:Spring Foraging Bundle.png|center]] | | rowspan="4" style="width: 136px !important;"|[[File:Spring Foraging Bundle.png|center]] | ||
| rowspan="4" |[[File:Bundle Slot.png|center|link=]][[File:Bundle Slot.png|center|link=]][[File:Bundle Slot.png|center|link=]][[File:Bundle Slot.png|center|link=]] | | rowspan="4" |[[File:Bundle Slot.png|center|link=]][[File:Bundle Slot.png|center|link=]][[File:Bundle Slot.png|center|link=]][[File:Bundle Slot.png|center|link=]] | ||
| − | | {{name| | + | | {{name|Wild Horseradish}} |
| [[Spring]] [[Foraging]] | | [[Spring]] [[Foraging]] | ||
|- | |- | ||
| Line 73: | Line 90: | ||
| [[Spring]] [[Foraging]], buy from [[Pierre]] at [[Flower Dance]] | | [[Spring]] [[Foraging]], buy from [[Pierre]] at [[Flower Dance]] | ||
|- | |- | ||
| − | | colspan="2" | + | | colspan="2" style="text-align: center;"|[[File:Bundle Reward.png|18px|link=]] Reward: |
| colspan="2" | {{name|Spring Seeds|30}} | | colspan="2" | {{name|Spring Seeds|30}} | ||
|} | |} | ||
| − | {| class="wikitable" | + | {|class="wikitable" |
!id="Summer Foraging Bundle" colspan="4" |[[File:Bundle Yellow.png|32px|link=]] Summer Foraging Bundle | !id="Summer Foraging Bundle" colspan="4" |[[File:Bundle Yellow.png|32px|link=]] Summer Foraging Bundle | ||
|- | |- | ||
| Line 91: | Line 108: | ||
| [[Summer]] [[Foraging]] | | [[Summer]] [[Foraging]] | ||
|- | |- | ||
| − | | colspan="2" | + | | colspan="2" style="text-align: center;"|[[File:Bundle Reward.png|18px|link=]] Reward: |
| colspan="3" | {{name|Summer Seeds|30}} | | colspan="3" | {{name|Summer Seeds|30}} | ||
|} | |} | ||
| − | {| class="wikitable" | + | {|class="wikitable" |
! id="Fall Foraging Bundle" colspan="4" |[[File:Bundle Orange.png|32px|link=]] Fall Foraging Bundle | ! id="Fall Foraging Bundle" colspan="4" |[[File:Bundle Orange.png|32px|link=]] Fall Foraging Bundle | ||
|- | |- | ||
| Line 101: | Line 118: | ||
| rowspan="4" |[[File:Bundle Slot.png|center|link=]][[File:Bundle Slot.png|center|link=]][[File:Bundle Slot.png|center|link=]][[File:Bundle Slot.png|center|link=]] | | rowspan="4" |[[File:Bundle Slot.png|center|link=]][[File:Bundle Slot.png|center|link=]][[File:Bundle Slot.png|center|link=]][[File:Bundle Slot.png|center|link=]] | ||
| {{name|Common Mushroom}} | | {{name|Common Mushroom}} | ||
| − | | [[Fall]] [[Foraging]], [[Spring]] & | + | | [[Fall]] [[Foraging]], [[Spring]] & [[Fall]] [[Foraging]] in the [[Secret Woods]], [[The Cave|The Farm Cave]] (mushroom option), [[Tapper|Tapping]] a [[Mushroom Tree]] |
|- | |- | ||
| {{name|Wild Plum}} | | {{name|Wild Plum}} | ||
| − | | [[Fall]] [[Foraging]] | + | | [[Fall]] [[Foraging]], [[The Cave|The Farm Cave]] (fruit bat option) |
|- | |- | ||
| {{name|Hazelnut}} | | {{name|Hazelnut}} | ||
| Line 112: | Line 129: | ||
| [[Fall]] [[Foraging]], [[The Cave|The Farm Cave]] (fruit bat option) | | [[Fall]] [[Foraging]], [[The Cave|The Farm Cave]] (fruit bat option) | ||
|- | |- | ||
| − | | colspan="2" | + | | colspan="2" style="text-align: center;"|[[File:Bundle Reward.png|18px|link=]] Reward: |
| colspan="2" | {{name|Fall Seeds|30}} | | colspan="2" | {{name|Fall Seeds|30}} | ||
|} | |} | ||
| − | {| class="wikitable" | + | {|class="wikitable" |
!id="Winter Foraging Bundle" colspan="4" |[[File:Bundle Teal.png|32px|link=]] Winter Foraging Bundle | !id="Winter Foraging Bundle" colspan="4" |[[File:Bundle Teal.png|32px|link=]] Winter Foraging Bundle | ||
|- | |- | ||
| Line 122: | Line 139: | ||
| rowspan="4" |[[File:Bundle Slot.png|center|link=]][[File:Bundle Slot.png|center|link=]][[File:Bundle Slot.png|center|link=]][[File:Bundle Slot.png|center|link=]] | | rowspan="4" |[[File:Bundle Slot.png|center|link=]][[File:Bundle Slot.png|center|link=]][[File:Bundle Slot.png|center|link=]][[File:Bundle Slot.png|center|link=]] | ||
| {{name|Winter Root}} | | {{name|Winter Root}} | ||
| − | | [[ | + | | [[Hoes|Tilling]] soil or [[Artifact Spot]]s in [[Winter]], dropped by Blue [[Slimes]] on floors 41-79 of [[The Mines]] |
|- | |- | ||
| {{name|Crystal Fruit}} | | {{name|Crystal Fruit}} | ||
| − | | [[Winter]] [[Foraging]], dropped by [[Dust Sprite]]s on | + | | [[Winter]] [[Foraging]], dropped by [[Dust Sprite]]s on floors 41-79 of [[The Mines]] |
|- | |- | ||
| {{name|Snow Yam}} | | {{name|Snow Yam}} | ||
| − | | [[ | + | | [[Hoes|Tilling]] soil or [[Artifact Spot]]s in [[Winter]] |
|- | |- | ||
| {{name|Crocus}} | | {{name|Crocus}} | ||
| [[Winter]] [[Foraging]] | | [[Winter]] [[Foraging]] | ||
|- | |- | ||
| − | | colspan="2" | + | | colspan="2" style="text-align: center;"|[[File:Bundle Reward.png|18px|link=]] Reward: |
| colspan="2" | {{name|Winter Seeds|30}} | | colspan="2" | {{name|Winter Seeds|30}} | ||
|} | |} | ||
| − | {| class="wikitable" | + | {|class="wikitable" |
!id="Construction Bundle" colspan="4" |[[File:Bundle Red.png|32px|link=]] Construction Bundle | !id="Construction Bundle" colspan="4" |[[File:Bundle Red.png|32px|link=]] Construction Bundle | ||
|- | |- | ||
| Line 143: | Line 160: | ||
| rowspan="4" |[[File:Bundle Slot.png|center|link=]][[File:Bundle Slot.png|center|link=]][[File:Bundle Slot.png|center|link=]][[File:Bundle Slot.png|center|link=]] | | rowspan="4" |[[File:Bundle Slot.png|center|link=]][[File:Bundle Slot.png|center|link=]][[File:Bundle Slot.png|center|link=]][[File:Bundle Slot.png|center|link=]] | ||
| {{name|Wood|99}} | | {{name|Wood|99}} | ||
| − | | Chopping [[Trees]] or branches with an [[Axe]] | + | | Chopping [[Trees]] or branches with an [[Axes|Axe]], [[Carpenter's Shop]] |
|- | |- | ||
| {{name|Wood|99}} | | {{name|Wood|99}} | ||
| − | | Chopping [[Trees]] or branches with an [[Axe]] | + | | Chopping [[Trees]] or branches with an [[Axes|Axe]], [[Carpenter's Shop]] |
|- | |- | ||
| {{name|Stone|99}} | | {{name|Stone|99}} | ||
| − | | Smashing stones with a [[Pickaxe]] | + | | Smashing stones with a [[Pickaxes|Pickaxe]], [[Carpenter's Shop]] |
|- | |- | ||
| {{name|Hardwood|10}} | | {{name|Hardwood|10}} | ||
| − | | Chopping [[Large Stump]]s or [[Large Log]]s with an upgraded [[Axe]], smashing crates in [[The Mines]] | + | | Chopping [[Large Stump]]s or [[Large Log]]s with an upgraded [[Axes|Axe]], smashing crates in [[The Mines]], chopping [[Mahogany Tree]]s |
|- | |- | ||
| − | | colspan="2" | + | | colspan="2" style="text-align: center;"|[[File:Bundle Reward.png|18px|link=]] Reward: |
| colspan="2" | {{name|Charcoal Kiln|1}} | | colspan="2" | {{name|Charcoal Kiln|1}} | ||
|} | |} | ||
| − | {| class="wikitable" | + | {|class="wikitable" |
!id="Exotic Foraging Bundle" colspan="4" |[[File:Bundle Purple.png|32px|link=]] Exotic Foraging Bundle | !id="Exotic Foraging Bundle" colspan="4" |[[File:Bundle Purple.png|32px|link=]] Exotic Foraging Bundle | ||
|- | |- | ||
| Line 164: | Line 181: | ||
| rowspan="9" |[[File:Bundle Slot.png|center|link=]][[File:Bundle Slot.png|center|link=]][[File:Bundle Slot.png|center|link=]][[File:Bundle Slot.png|center|link=]][[File:Bundle Slot.png|center|link=]] | | rowspan="9" |[[File:Bundle Slot.png|center|link=]][[File:Bundle Slot.png|center|link=]][[File:Bundle Slot.png|center|link=]][[File:Bundle Slot.png|center|link=]][[File:Bundle Slot.png|center|link=]] | ||
| {{name|Coconut}} | | {{name|Coconut}} | ||
| − | | [[Desert]] [[Foraging]] | + | | [[The Desert|Desert]] [[Foraging]], [[Oasis]], shaking a [[Palm Tree]] in [[the Desert]] and on [[Ginger Island]] |
|- | |- | ||
| {{name|Cactus Fruit}} | | {{name|Cactus Fruit}} | ||
| − | | [[Desert]] [[Foraging]] | + | | [[The Desert|Desert]] [[Foraging]], [[Oasis]] |
|- | |- | ||
| {{name|Cave Carrot}} | | {{name|Cave Carrot}} | ||
| − | | [[The Mines]], either smashing boxes or [[ | + | | [[The Mines]], either smashing boxes or [[Hoes|tilling]] soil |
|- | |- | ||
| {{name|Red Mushroom}} | | {{name|Red Mushroom}} | ||
| − | | [[Foraging]] in [[The Mines]], [[Summer]] or [[Fall]] [[Foraging]] in the [[Secret Woods]], [[The Cave|The Farm Cave]] (mushroom option), [[Tapper|Tapping]] a [[Mushroom Tree]] | + | | [[Foraging]] in [[The Mines]], [[Summer]] or [[Fall]] [[Foraging]] in the [[Secret Woods]], [[The Cave|The Farm Cave]] (mushroom option), [[Tapper|Tapping]] a [[Mushroom Tree]], [[Farm Maps|Forest Farm Map]] in [[Fall]]. |
|- | |- | ||
| {{name|Purple Mushroom}} | | {{name|Purple Mushroom}} | ||
| Line 182: | Line 199: | ||
|- | |- | ||
| {{name|Oak Resin}} | | {{name|Oak Resin}} | ||
| − | | [[Tapper|Tapped]] [[Oak Tree]] | + | | [[Tapper|Tapped]] [[Oak Tree]], [[Haunted Skull]] |
|- | |- | ||
| {{name|Pine Tar}} | | {{name|Pine Tar}} | ||
| Line 188: | Line 205: | ||
|- | |- | ||
| {{name|Morel}} | | {{name|Morel}} | ||
| − | | [[Foraging]] in the [[Secret Woods]] in [[Spring]], [[The Cave|The Farm Cave]] (mushroom option) | + | | [[Foraging]] in the [[Secret Woods]] or [[Farm Maps|Forest Farm Map]] in [[Spring]], [[The Cave|The Farm Cave]] (mushroom option) |
|- | |- | ||
| − | | colspan="2" | + | | colspan="2" style="text-align: center;"|[[File:Bundle Reward.png|18px|link=]] Reward: |
| colspan="2" | {{name|Autumn's Bounty|5}} | | colspan="2" | {{name|Autumn's Bounty|5}} | ||
|} | |} | ||
| − | ==Pantry== | + | ===Pantry=== |
[[File:Community Center Pantry.png|thumb|right|Pantry Before Completion]] | [[File:Community Center Pantry.png|thumb|right|Pantry Before Completion]] | ||
[[File:Finished Pantry.png|thumb|right|Pantry After Completion]] | [[File:Finished Pantry.png|thumb|right|Pantry After Completion]] | ||
| − | The Pantry appears after completing one bundle. Completing all Pantry bundles will restore the dilapidated [[Greenhouse]] on | + | The Pantry appears after completing one bundle. Completing all Pantry bundles will restore the dilapidated [[Greenhouse]] on the farm, making it available to grow [[Crops]], [[Fruit Trees]], and [[Trees]] year-round. |
| − | {| class="wikitable" style="border-collapse: collapse;" | + | {|class="wikitable" style="border-collapse: collapse;" |
|- | |- | ||
!style="background-color: #41AEFF !important; border-right: 0 !important;"|[[File:Bundle Complete Balloon.png|link=]] | !style="background-color: #41AEFF !important; border-right: 0 !important;"|[[File:Bundle Complete Balloon.png|link=]] | ||
| Line 207: | Line 224: | ||
|} | |} | ||
| − | {| class="wikitable" | + | {|class="wikitable" |
!id="Spring Crops Bundle" colspan="4" |[[File:Bundle Green.png|32px|link=]] Spring Crops Bundle | !id="Spring Crops Bundle" colspan="4" |[[File:Bundle Green.png|32px|link=]] Spring Crops Bundle | ||
|- | |- | ||
| Line 224: | Line 241: | ||
| [[Spring]] [[Crops]] | | [[Spring]] [[Crops]] | ||
|- | |- | ||
| − | | colspan="2" | + | | colspan="2" style="text-align: center;"|[[File:Bundle Reward.png|18px|link=]] Reward: |
| colspan="2" | {{name|Speed-Gro|20}} | | colspan="2" | {{name|Speed-Gro|20}} | ||
|} | |} | ||
| − | {| class="wikitable" | + | {|class="wikitable" |
!id="Summer Crops Bundle" colspan="4" |[[File:Bundle Yellow.png|32px|link=]] Summer Crops Bundle | !id="Summer Crops Bundle" colspan="4" |[[File:Bundle Yellow.png|32px|link=]] Summer Crops Bundle | ||
|- | |- | ||
| Line 245: | Line 262: | ||
| [[Summer]] [[Crops]] | | [[Summer]] [[Crops]] | ||
|- | |- | ||
| − | | colspan="2" | + | | colspan="2" style="text-align: center;"|[[File:Bundle Reward.png|18px|link=]] Reward: |
| colspan="2" | {{name|Quality Sprinkler|1}} | | colspan="2" | {{name|Quality Sprinkler|1}} | ||
|} | |} | ||
| − | {| class="wikitable" | + | {|class="wikitable" |
!id="Fall Crops Bundle" colspan="4" |[[File:Bundle Orange.png|32px|link=]] Fall Crops Bundle | !id="Fall Crops Bundle" colspan="4" |[[File:Bundle Orange.png|32px|link=]] Fall Crops Bundle | ||
|- | |- | ||
| Line 264: | Line 281: | ||
|- | |- | ||
| {{name|Yam}} | | {{name|Yam}} | ||
| − | | [[Fall]] [[Crops]] | + | | [[Fall]] [[Crops]], dropped by [[Duggy|Duggies]] on floors 6-29 of [[The Mines]] (3%) |
|- | |- | ||
| − | | colspan="2" | + | | colspan="2" style="text-align: center;"|[[File:Bundle Reward.png|18px|link=]] Reward: |
| colspan="2" | {{name|Bee House|1}} | | colspan="2" | {{name|Bee House|1}} | ||
|} | |} | ||
| − | {| class="wikitable" | + | {|class="wikitable" |
!id="Quality Crops Bundle" colspan="4" |[[File:Bundle Teal.png|32px|link=]] Quality Crops Bundle | !id="Quality Crops Bundle" colspan="4" |[[File:Bundle Teal.png|32px|link=]] Quality Crops Bundle | ||
|- | |- | ||
| Line 287: | Line 304: | ||
| Gold quality [[Summer]] / [[Fall]] [[Crops]] | | Gold quality [[Summer]] / [[Fall]] [[Crops]] | ||
|- | |- | ||
| − | | colspan="2" | + | | colspan="2" style="text-align: center;"|[[File:Bundle Reward.png|18px|link=]] Reward: |
| colspan="2" | {{name|Preserves Jar|1}} | | colspan="2" | {{name|Preserves Jar|1}} | ||
|} | |} | ||
| − | {| class="wikitable" | + | {|class="wikitable" |
!id="Animal Bundle" colspan="4" |[[File:Bundle Red.png|32px|link=]] Animal Bundle | !id="Animal Bundle" colspan="4" |[[File:Bundle Red.png|32px|link=]] Animal Bundle | ||
|- | |- | ||
| Line 300: | Line 317: | ||
|- | |- | ||
| {{name|Large Brown Egg|link=Large Egg|Brown}} | | {{name|Large Brown Egg|link=Large Egg|Brown}} | ||
| − | | [[Chicken|Chickens]] | + | | Brown [[Chicken|Chickens]] |
|- | |- | ||
| {{name|Large Egg}} | | {{name|Large Egg}} | ||
| − | | [[Chicken|Chickens]] | + | | White [[Chicken|Chickens]] |
|- | |- | ||
| {{name|Large Goat Milk}} | | {{name|Large Goat Milk}} | ||
| Line 314: | Line 331: | ||
| [[Duck|Ducks]] | | [[Duck|Ducks]] | ||
|- | |- | ||
| − | | colspan="2" | + | | colspan="2" style="text-align: center;"|[[File:Bundle Reward.png|18px|link=]] Reward: |
| colspan="2" | {{name|Cheese Press|1}} | | colspan="2" | {{name|Cheese Press|1}} | ||
|} | |} | ||
| − | {| class="wikitable" | + | {|class="wikitable" |
!id="Artisan Bundle" colspan="4" |[[File:Bundle Purple.png|32px|link=]] Artisan Bundle | !id="Artisan Bundle" colspan="4" |[[File:Bundle Purple.png|32px|link=]] Artisan Bundle | ||
|- | |- | ||
| rowspan="12" style="width: 136px !important;"|[[File:Artisan Bundle.png|center]] | | rowspan="12" style="width: 136px !important;"|[[File:Artisan Bundle.png|center]] | ||
| rowspan="12"|[[File:Bundle Slot.png|center|link=]][[File:Bundle Slot.png|center|link=]][[File:Bundle Slot.png|center|link=]][[File:Bundle Slot.png|center|link=]][[File:Bundle Slot.png|center|link=]][[File:Bundle Slot.png|center|link=]] | | rowspan="12"|[[File:Bundle Slot.png|center|link=]][[File:Bundle Slot.png|center|link=]][[File:Bundle Slot.png|center|link=]][[File:Bundle Slot.png|center|link=]][[File:Bundle Slot.png|center|link=]][[File:Bundle Slot.png|center|link=]] | ||
| − | | {{name|Truffle Oil | + | | {{name|Truffle Oil}} |
| Made from [[Truffle]]s using an [[Oil Maker]] | | Made from [[Truffle]]s using an [[Oil Maker]] | ||
|- | |- | ||
| − | | {{name| | + | | {{name|Cloth}} |
| − | | [[Loom]], [[Recycling Machine|Recycling]] a [[Soggy Newspaper]] | + | | [[Loom]], [[Recycling Machine|Recycling]] a [[Soggy Newspaper]], [[Desert Trader]], dropped by [[Mummy|Mummies]] in [[Skull Cavern]] |
|- | |- | ||
| {{name|Goat Cheese}} | | {{name|Goat Cheese}} | ||
| Line 333: | Line 350: | ||
|- | |- | ||
| {{name|Cheese}} | | {{name|Cheese}} | ||
| − | | [[Cheese Press]] | + | | [[Cheese Press]], [[Desert Trader]] |
|- | |- | ||
| {{name|Honey}} | | {{name|Honey}} | ||
| − | | [[Bee House]] | + | | [[Bee House]], [[Oasis]] |
|- | |- | ||
| − | | {{name|Jelly}} | + | | {{name|Jelly|link=Jellies and Pickles{{!}}Jelly}} |
| [[Preserves Jar]] | | [[Preserves Jar]] | ||
|- | |- | ||
| Line 359: | Line 376: | ||
| [[Cherry Tree]]s during [[Spring]], [[The Cave|The Farm Cave]] (fruit bat option) | | [[Cherry Tree]]s during [[Spring]], [[The Cave|The Farm Cave]] (fruit bat option) | ||
|- | |- | ||
| − | | colspan="2" | + | | colspan="2" style="text-align: center;"|[[File:Bundle Reward.png|18px|link=]] Reward: |
| colspan="2" |{{name|Keg|1}} | | colspan="2" |{{name|Keg|1}} | ||
|} | |} | ||
| − | ==Fish Tank== | + | ===Fish Tank=== |
[[File:Community Center Fish Tank.png|thumb|right|Fish Tank Before Completion]] | [[File:Community Center Fish Tank.png|thumb|right|Fish Tank Before Completion]] | ||
[[File:Finished Fish Tank.png|thumb|right|Fish Tank After Completion]] | [[File:Finished Fish Tank.png|thumb|right|Fish Tank After Completion]] | ||
| − | The Fish Tank appears after completing one bundle. | + | The Fish Tank appears after completing one bundle. Completing all Fish Tank bundles will remove the Glittering Boulder to the left of [[The Mines]] entrance. [[Willy]] will also give the player a [[Pans|Copper Pan]] that can be used to collect metal ores and other items from bodies of water. Upon completion, the broken fish tank will turn into an [[Fish Tank#Types|actual Fish Tank]], containing 1 [[Catfish]], 1 [[Sunfish]], and 1 [[Snail]]. Players can then add up to 5 bottom creatures and 5 swimming creatures into the tank and 1 of each decoration type: [[Coral]], [[Seaweed]], [[Stone]], [[Anchor]], [[Treasure Chest]], and [[Pearl]], similarly to other fish tanks like the [[Deluxe Fish Tank]] and the [[Aquatic Sanctuary]]. The appearance and location of [[Seaweed]], [[Coral]], and other stationary objects in the tank can't be changed because the tank can't be moved by players. |
| − | Note: | + | '''Note:''' Access to [[the Desert]] is required to get a [[Sandfish]]. Therefore, unless it becomes available at the [[Traveling Cart]], it is not possible to finish the Specialty Fish Bundle before finishing the entire Vault section. |
| − | {| class="wikitable" style="border-collapse: collapse;" | + | {|class="wikitable" style="border-collapse: collapse;" |
|- | |- | ||
!style="background-color: #41AEFF !important; border-right: 0 !important;"|[[File:Bundle Complete Balloon.png|link=]] | !style="background-color: #41AEFF !important; border-right: 0 !important;"|[[File:Bundle Complete Balloon.png|link=]] | ||
| Line 378: | Line 395: | ||
|} | |} | ||
| − | {| class="wikitable" | + | {|class="wikitable" |
!id="River Fish Bundle" colspan="4" |[[File:Bundle Teal.png|32px|link=]] River Fish Bundle | !id="River Fish Bundle" colspan="4" |[[File:Bundle Teal.png|32px|link=]] River Fish Bundle | ||
| + | |- | ||
| + | | colspan="4" | All River Fish can be found in the [[Farm Maps|Riverlands Farm]], [[Farm Maps|Hill-Top Farm]], or [[Farm Maps|Forest Farm]]. | ||
|- | |- | ||
| rowspan="4" style="width: 136px !important;"|[[File:River Fish Bundle.png|center]] | | rowspan="4" style="width: 136px !important;"|[[File:River Fish Bundle.png|center]] | ||
| rowspan="4"|[[File:Bundle Slot.png|center|link=]][[File:Bundle Slot.png|center|link=]][[File:Bundle Slot.png|center|link=]][[File:Bundle Slot.png|center|link=]] | | rowspan="4"|[[File:Bundle Slot.png|center|link=]][[File:Bundle Slot.png|center|link=]][[File:Bundle Slot.png|center|link=]][[File:Bundle Slot.png|center|link=]] | ||
| {{name|Sunfish}} | | {{name|Sunfish}} | ||
| − | | Found in Rivers, | + | | Found in Rivers, 6am – 7pm, [[Spring]] and [[Summer]] during sunny weather. |
|- | |- | ||
| {{name|Catfish}} | | {{name|Catfish}} | ||
| − | | Found in Rivers, | + | |Found in Rivers and [[Secret Woods]], 6am – midnight, [[Spring]] and [[Fall]]. Only when raining. <br /> Can be found in [[Summer]] during rain in the [[Secret Woods]] and [[Witch's Swamp]], [[Winter]] with a [[Rain Totem]]. |
|- | |- | ||
| {{name|Shad}} | | {{name|Shad}} | ||
| − | | Found in Rivers, | + | | Found in Rivers, 9am – 2am, [[Spring]], [[Summer]], and [[Fall]]. Only when raining. |
|- | |- | ||
| {{name|Tiger Trout}} | | {{name|Tiger Trout}} | ||
| − | | Found in Rivers, | + | | Found in Rivers, 6am – 7pm, [[Fall]] and [[Winter]]. Can be found in any [[weather]]. |
|- | |- | ||
| − | | colspan="2" | + | | colspan="2" style="text-align: center;"|[[File:Bundle Reward.png|18px|link=]] Reward: |
| − | | colspan="2" |[[File:Bait.png|24px|link=]] [[ | + | | colspan="2" |[[File:Deluxe Bait.png|24px|link=]] [[Deluxe Bait]] (30) |
|} | |} | ||
| − | {| class="wikitable" | + | {|class="wikitable" |
!id="Lake Fish Bundle" colspan="4" |[[File:Bundle Green.png|32px|link=]] Lake Fish Bundle | !id="Lake Fish Bundle" colspan="4" |[[File:Bundle Green.png|32px|link=]] Lake Fish Bundle | ||
| + | |- | ||
| + | | colspan="4" | All Mountain Lake Fish can be found in any [[weather]], and in the [[Farm Maps|Wilderness Farm]]. | ||
|- | |- | ||
| rowspan="4" style="width: 136px !important;"|[[File:Lake Fish Bundle.png|center]] | | rowspan="4" style="width: 136px !important;"|[[File:Lake Fish Bundle.png|center]] | ||
| rowspan="4"|[[File:Bundle Slot.png|center|link=]][[File:Bundle Slot.png|center|link=]][[File:Bundle Slot.png|center|link=]][[File:Bundle Slot.png|center|link=]] | | rowspan="4"|[[File:Bundle Slot.png|center|link=]][[File:Bundle Slot.png|center|link=]][[File:Bundle Slot.png|center|link=]][[File:Bundle Slot.png|center|link=]] | ||
| {{name|Largemouth Bass}} | | {{name|Largemouth Bass}} | ||
| − | | Found in | + | | Found in the Mountain Lake, 6am – 7pm, All Seasons. |
|- | |- | ||
| {{name|Carp}} | | {{name|Carp}} | ||
| − | | Found in | + | | Found in the Mountain Lake, Anytime, during [[Spring]], [[Summer]], or [[Fall]].<br />Found in [[Secret Woods]] or [[The Sewers|Sewer]], Anytime, All Seasons. |
|- | |- | ||
| {{name|Bullhead}} | | {{name|Bullhead}} | ||
| − | | Found in | + | | Found in the Mountain Lake, Anytime, All Seasons. |
|- | |- | ||
| {{name|Sturgeon}} | | {{name|Sturgeon}} | ||
| − | | Found in | + | | Found in the Mountain Lake, 6am – 7pm, [[Summer]] and [[Winter]]. |
|- | |- | ||
| − | | colspan="2" | + | | colspan="2" style="text-align: center;"|[[File:Bundle Reward.png|18px|link=]] Reward: |
| colspan="2" | {{name|Dressed Spinner|1}} | | colspan="2" | {{name|Dressed Spinner|1}} | ||
|} | |} | ||
| − | {| class="wikitable" | + | {|class="wikitable" |
!id="Ocean Fish Bundle" colspan="4" |[[File:Bundle Blue.png|32px|link=]] Ocean Fish Bundle | !id="Ocean Fish Bundle" colspan="4" |[[File:Bundle Blue.png|32px|link=]] Ocean Fish Bundle | ||
|- | |- | ||
| Line 426: | Line 447: | ||
| rowspan="4"|[[File:Bundle Slot.png|center|link=]][[File:Bundle Slot.png|center|link=]][[File:Bundle Slot.png|center|link=]][[File:Bundle Slot.png|center|link=]] | | rowspan="4"|[[File:Bundle Slot.png|center|link=]][[File:Bundle Slot.png|center|link=]][[File:Bundle Slot.png|center|link=]][[File:Bundle Slot.png|center|link=]] | ||
| {{name|Sardine}} | | {{name|Sardine}} | ||
| − | | Found in the Ocean, | + | | Found in the Ocean, 6am – 7pm, [[Spring]], [[Fall]], and [[Winter]]. |
|- | |- | ||
| {{name|Tuna}} | | {{name|Tuna}} | ||
| − | | Found in the Ocean, | + | | Found in the Ocean, 6am – 7pm, [[Summer]] and [[Winter]]. |
|- | |- | ||
| {{name|Red Snapper}} | | {{name|Red Snapper}} | ||
| − | | Found in the Ocean, | + | | Found in the Ocean, 6am – 7pm, [[Summer]] and [[Fall]]. Only when raining. |
|- | |- | ||
| {{name|Tilapia}} | | {{name|Tilapia}} | ||
| − | | Found in the Ocean, | + | | Found in the Ocean, 6am – 2pm, [[Summer]] and [[Fall]]. |
|- | |- | ||
| − | | colspan="2" | + | | colspan="2" style="text-align: center;"|[[File:Bundle Reward.png|18px|link=]] Reward: |
| − | | colspan="2" | | + | | colspan="2" | {{name|Warp Totem Beach|5}} |
|} | |} | ||
| − | {| class="wikitable" | + | {|class="wikitable" |
| − | ! colspan="4" |[[File:Bundle Purple.png|32px|link=]] | + | ! id="Night Fishing Bundle" colspan="4" |[[File:Bundle Purple.png|32px|link=]] Night Fishing Bundle |
|- | |- | ||
| rowspan="3" |[[File:Night Fishing Bundle.png|center]] | | rowspan="3" |[[File:Night Fishing Bundle.png|center]] | ||
| rowspan="3" |[[File:Bundle Slot.png|center|link=]][[File:Bundle Slot.png|center|link=]][[File:Bundle Slot.png|center|link=]] | | rowspan="3" |[[File:Bundle Slot.png|center|link=]][[File:Bundle Slot.png|center|link=]][[File:Bundle Slot.png|center|link=]] | ||
| {{name|Walleye}} | | {{name|Walleye}} | ||
| − | | Found in Rivers, | + | <!--Note that 12pm = NOON. Please stop changing the time!--> |
| + | | Found in Rivers, the Mountain Lake, and Cindersap Forest Pond, 12pm – 2am, [[Fall]] ([[Winter]] with [[Rain Totem]].) Only when raining. | ||
|- | |- | ||
| {{name|Bream}} | | {{name|Bream}} | ||
| − | | Found in Rivers, | + | | Found in Rivers, 6pm – 2am, All Seasons. |
|- | |- | ||
| {{name|Eel}} | | {{name|Eel}} | ||
| − | | Found in the Ocean, | + | | Found in the Ocean, 4pm – 2am, [[Spring]] or [[Fall]]. Only when raining. |
|- | |- | ||
| − | | colspan="2" | + | | colspan="2" style="text-align: center;"|[[File:Bundle Reward.png|18px|link=]] Reward: |
| colspan="2" | {{name|Small Glow Ring|1}} | | colspan="2" | {{name|Small Glow Ring|1}} | ||
|} | |} | ||
| − | {| class="wikitable" | + | {|class="wikitable" |
!id="Crab Pot Bundle" colspan="4" |[[File:Bundle Purple.png|32px|link=]] Crab Pot Bundle | !id="Crab Pot Bundle" colspan="4" |[[File:Bundle Purple.png|32px|link=]] Crab Pot Bundle | ||
|- | |- | ||
| Line 465: | Line 487: | ||
| rowspan="10"|[[File:Bundle Slot.png|center|link=]][[File:Bundle Slot.png|center|link=]][[File:Bundle Slot.png|center|link=]][[File:Bundle Slot.png|center|link=]][[File:Bundle Slot.png|center|link=]] | | rowspan="10"|[[File:Bundle Slot.png|center|link=]][[File:Bundle Slot.png|center|link=]][[File:Bundle Slot.png|center|link=]][[File:Bundle Slot.png|center|link=]][[File:Bundle Slot.png|center|link=]] | ||
| {{name|Lobster}} | | {{name|Lobster}} | ||
| − | | Caught in [[Crab Pot]]s | + | | Caught in [[Crab Pot]]s (ocean) |
|- | |- | ||
| {{name|Crayfish}} | | {{name|Crayfish}} | ||
| − | | Caught in [[Crab Pot]]s | + | | Caught in [[Crab Pot]]s (freshwater) |
|- | |- | ||
| {{name|Crab}} | | {{name|Crab}} | ||
| − | | Caught in [[Crab Pot]]s, drops from [[Rock Crab]]s in [[The Mines]] | + | | Caught in [[Crab Pot]]s (ocean), drops from [[Rock Crab]]s or [[Lava Crab]]s in [[The Mines]] |
|- | |- | ||
| {{name|Cockle}} | | {{name|Cockle}} | ||
| − | | Caught in [[Crab Pot]]s, [[The Beach|Beach]] [[Foraging]] | + | | Caught in [[Crab Pot]]s (ocean), [[The Beach|Beach]] [[Foraging]] |
|- | |- | ||
| {{name|Mussel}} | | {{name|Mussel}} | ||
| − | | Caught in [[Crab Pot]]s, [[The Beach|Beach]] [[Foraging]] | + | | Caught in [[Crab Pot]]s (ocean), [[The Beach|Beach]] [[Foraging]] |
|- | |- | ||
| {{name|Shrimp}} | | {{name|Shrimp}} | ||
| − | | Caught in [[Crab Pot]]s | + | | Caught in [[Crab Pot]]s (ocean) |
|- | |- | ||
| {{name|Snail}} | | {{name|Snail}} | ||
| − | | Caught in [[Crab Pot]]s | + | | Caught in [[Crab Pot]]s (freshwater) |
|- | |- | ||
| {{name|Periwinkle}} | | {{name|Periwinkle}} | ||
| − | | Caught in [[Crab Pot]]s | + | | Caught in [[Crab Pot]]s (freshwater) |
|- | |- | ||
| {{name|Oyster}} | | {{name|Oyster}} | ||
| − | | Caught in [[Crab Pot]]s, [[The Beach|Beach]] [[Foraging]] | + | | Caught in [[Crab Pot]]s (ocean), [[The Beach|Beach]] [[Foraging]] |
|- | |- | ||
| {{name|Clam}} | | {{name|Clam}} | ||
| − | | Caught in [[Crab Pot]]s, [[The Beach|Beach]] [[Foraging]] | + | | Caught in [[Crab Pot]]s (ocean), [[The Beach|Beach]] [[Foraging]] |
|- | |- | ||
| − | | colspan="2" | + | | colspan="2" style="text-align: center;"|[[File:Bundle Reward.png|18px|link=]] Reward: |
| colspan="2" | {{name|Crab Pot|3}} | | colspan="2" | {{name|Crab Pot|3}} | ||
|} | |} | ||
| − | {| class="wikitable" | + | {|class="wikitable" |
!id="Specialty Fish Bundle" colspan="4" |[[File:Bundle Red.png|32px|link=]] Specialty Fish Bundle | !id="Specialty Fish Bundle" colspan="4" |[[File:Bundle Red.png|32px|link=]] Specialty Fish Bundle | ||
|- | |- | ||
| Line 504: | Line 526: | ||
| rowspan="4"|[[File:Bundle Slot.png|center|link=]][[File:Bundle Slot.png|center|link=]][[File:Bundle Slot.png|center|link=]][[File:Bundle Slot.png|center|link=]] | | rowspan="4"|[[File:Bundle Slot.png|center|link=]][[File:Bundle Slot.png|center|link=]][[File:Bundle Slot.png|center|link=]][[File:Bundle Slot.png|center|link=]] | ||
| {{name|Pufferfish}} | | {{name|Pufferfish}} | ||
| − | | Found in the Ocean, | + | | Found in the Ocean, 12pm – 4pm, [[Summer]] during sunny weather. |
|- | |- | ||
| {{name|Ghostfish}} | | {{name|Ghostfish}} | ||
| − | | Found in ponds in [[The Mines]], Anytime, All Seasons. May also be dropped by [[Ghost|Ghosts]]. | + | | Found in ponds in [[The Mines]] floors 20 and 60, Anytime, All Seasons. May also be dropped by [[Ghost|Ghosts]]. |
|- | |- | ||
| {{name|Sandfish}} | | {{name|Sandfish}} | ||
| − | | Found in the pond in [[The Desert]], | + | | Found in the pond in [[The Desert]], 6am – 8pm, All Seasons. |
|- | |- | ||
| {{name|Woodskip}} | | {{name|Woodskip}} | ||
| − | | Found in the [[Secret Woods]], Anytime, All Seasons. | + | | Found in the [[Secret Woods]] and the [[Farm Maps|Forest Farm]], Anytime, All Seasons. |
|- | |- | ||
| − | | colspan="2" | + | | colspan="2" style="text-align: center;"|[[File:Bundle Reward.png|18px|link=]] Reward: |
| − | | colspan="2" | {{name|Dish | + | | colspan="2" | {{name|Dish O' The Sea|5}} |
|} | |} | ||
| − | ==Boiler Room== | + | ===Boiler Room=== |
[[File:Community Center Boiler Room.png|thumb|right|Boiler Room Before Completion]] | [[File:Community Center Boiler Room.png|thumb|right|Boiler Room Before Completion]] | ||
[[File:Finished Boiler Room.png|thumb|right|Boiler Room After Completion]] | [[File:Finished Boiler Room.png|thumb|right|Boiler Room After Completion]] | ||
| − | The Boiler Room appears after completing two bundles. Completing all Boiler Room bundles repairs the [[Minecart]]s, allowing | + | The Boiler Room appears after completing two bundles. Completing all Boiler Room bundles repairs the [[Minecart]]s, allowing the player to fast travel between distant locations. The Locations are [[Bus Stop]], [[The Mines|Mines]], [[Quarry]] and [[Pelican Town|Town]]. |
| − | {| class="wikitable" style="border-collapse: collapse;" | + | {|class="wikitable" style="border-collapse: collapse;" |
|- | |- | ||
!style="background-color: #41AEFF !important; border-right: 0 !important;"|[[File:Bundle Complete Balloon.png|link=]] | !style="background-color: #41AEFF !important; border-right: 0 !important;"|[[File:Bundle Complete Balloon.png|link=]] | ||
| Line 532: | Line 554: | ||
|} | |} | ||
| − | {| class="wikitable" | + | {|class="wikitable" |
!id="Blacksmiths Bundle" colspan="4" |[[File:Bundle Orange.png|32px|link=]] Blacksmith's Bundle | !id="Blacksmiths Bundle" colspan="4" |[[File:Bundle Orange.png|32px|link=]] Blacksmith's Bundle | ||
|- | |- | ||
| Line 546: | Line 568: | ||
| Smelting [[Gold Ore]] in the [[Furnace]], [[Crafting]] the "Transmute (Au)" recipe | | Smelting [[Gold Ore]] in the [[Furnace]], [[Crafting]] the "Transmute (Au)" recipe | ||
|- | |- | ||
| − | | colspan="2" | + | | colspan="2" style="text-align: center;"|[[File:Bundle Reward.png|18px|link=]] Reward: |
| colspan="2" | {{name|Furnace|1}} | | colspan="2" | {{name|Furnace|1}} | ||
|} | |} | ||
| − | {| class="wikitable" | + | {|class="wikitable" |
!id="Geologists Bundle" colspan="4" |[[File:Bundle Purple.png|32px|link=]] Geologist's Bundle | !id="Geologists Bundle" colspan="4" |[[File:Bundle Purple.png|32px|link=]] Geologist's Bundle | ||
|- | |- | ||
| Line 556: | Line 578: | ||
| rowspan="4"|[[File:Bundle Slot.png|center|link=]][[File:Bundle Slot.png|center|link=]][[File:Bundle Slot.png|center|link=]][[File:Bundle Slot.png|center|link=]] | | rowspan="4"|[[File:Bundle Slot.png|center|link=]][[File:Bundle Slot.png|center|link=]][[File:Bundle Slot.png|center|link=]][[File:Bundle Slot.png|center|link=]] | ||
| {{name|Quartz}} | | {{name|Quartz}} | ||
| − | | [[Minerals#Foraged Minerals|Foraging]] on all | + | | [[Minerals#Foraged Minerals|Foraging]] on all floors of [[The Mines]] |
|- | |- | ||
| {{name|Earth Crystal}} | | {{name|Earth Crystal}} | ||
| − | | [[Minerals#Foraged Minerals|Foraging]] on | + | | [[Minerals#Foraged Minerals|Foraging]] on floors 1-39 of [[The Mines]], [[Geode]]s, [[Omni Geode]]s, drop from [[Duggy|Duggies]] in the Mines (floors 6-29) |
|- | |- | ||
| {{name|Frozen Tear}} | | {{name|Frozen Tear}} | ||
| − | | [[Minerals#Foraged Minerals|Foraging]] on | + | | [[Minerals#Foraged Minerals|Foraging]] on floors 41-79 of [[The Mines]], [[Frozen Geode]]s, [[Omni Geode]]s, drop from [[Dust Sprite]]s in the Mines (floors 41-79) |
|- | |- | ||
| {{name|Fire Quartz}} | | {{name|Fire Quartz}} | ||
| − | | [[Minerals#Foraged Minerals|Foraging]] on | + | | [[Minerals#Foraged Minerals|Foraging]] on floors 81-119 of [[The Mines]], [[Magma Geode]]s, [[Omni Geode]]s |
|- | |- | ||
| − | | colspan="2" | + | | colspan="2" style="text-align: center;"|[[File:Bundle Reward.png|18px|link=]] Reward: |
| colspan="2" | {{name|Omni Geode|5}} | | colspan="2" | {{name|Omni Geode|5}} | ||
|} | |} | ||
| − | {| class="wikitable" | + | {|class="wikitable" |
!id="Adventurers Bundle" colspan="4" |[[File:Bundle Purple.png|32px|link=]] Adventurer's Bundle | !id="Adventurers Bundle" colspan="4" |[[File:Bundle Purple.png|32px|link=]] Adventurer's Bundle | ||
|- | |- | ||
| Line 580: | Line 602: | ||
|- | |- | ||
| {{name|Bat Wing|10}} | | {{name|Bat Wing|10}} | ||
| − | | Dropped by [[Bats]] in [[The Mines]] | + | | Dropped by [[Bats]] in [[The Mines]] or the [[Skull Cavern]] |
|- | |- | ||
| {{name|Solar Essence}} | | {{name|Solar Essence}} | ||
| − | | Dropped by [[Ghost]]s, [[Squid Kid]]s, or [[Metal Head]]s in [[The Mines]], dropped by [[Mummy|Mummies]] in the [[Skull Cavern]] | + | | Dropped by [[Ghost]]s, [[Squid Kid]]s, or [[Metal Head]]s in [[The Mines]], dropped by [[Mummy|Mummies]] or [[Bats|Iridium Bats]] in the [[Skull Cavern]]; produced by [[Sunfish]] in [[Fish Pond]]s; buy from [[Krobus]] |
|- | |- | ||
| {{name|Void Essence}} | | {{name|Void Essence}} | ||
| − | | Dropped by [[Shadow Brute]]s in [[The Mines]] or [[Serpent]]s in the [[Skull Cavern]] | + | | Dropped by [[Shadow Brute]]s or [[Shadow Shaman]]s in [[The Mines]] or [[Serpent]]s in the [[Skull Cavern]]; produced by [[Void Salmon]] in [[Fish Pond]]s; buy from [[Krobus]] |
|- | |- | ||
| − | | colspan="2" | + | | colspan="2" style="text-align: center;"|[[File:Bundle Reward.png|18px|link=]] Reward: |
| colspan="2" | {{name|Small Magnet Ring|1}} | | colspan="2" | {{name|Small Magnet Ring|1}} | ||
|} | |} | ||
| − | ==Bulletin Board== | + | ===Bulletin Board=== |
[[File:Community Center Bulletin Board.png|thumb|right|Bulletin Board Before Completion]] | [[File:Community Center Bulletin Board.png|thumb|right|Bulletin Board Before Completion]] | ||
| − | [[File:Finished Bulletin Board.png|thumb|right|Bulletin Board After Completion]] | + | [[File:Finished Bulletin Board.png|thumb|right|288px|Bulletin Board After Completion]] |
The Bulletin Board appears after completing three bundles. | The Bulletin Board appears after completing three bundles. | ||
| − | Completing all Bulletin Board bundles improves the player's [[friendship]] rating with every [[Villagers#Non-marriage candidates|non-datable villager]] by two hearts (500 points). | + | Completing all Bulletin Board bundles improves the player's [[friendship]] rating with every [[Villagers#Non-marriage candidates|non-datable villager]] by two hearts (500 points). Note that this applies only to non-datable villagers whom the player has met in person. Villagers who do not show on the "Social" tab of the player menu and villagers whose names appear as "???' will not receive 500 points. If the player completes all the bundles before [[Kent]] arrives on 1 Spring, Year 2, he will not benefit from the friendship increase, and will start at 0 hearts. The [[Dwarf]]'s friendship will be unaffected if the player does not have the [[Dwarvish Translation Guide]]. |
| − | The morning after, Mayor [[Lewis]] will send a letter saying that packages containing items posted about "years ago" on the community center bulletin board have been appearing in villagers' homes. He says the packages are all addressed from "your farm. | + | The morning after, Mayor [[Lewis]] will send a letter saying that packages containing items posted about "years ago" on the community center bulletin board have been appearing in villagers' homes. He says the packages are all addressed from "your farm". He expresses his gratitude and says "all of us in town are delighted!" |
| − | {| class="wikitable" style="border-collapse: collapse;" | + | {|class="wikitable" style="border-collapse: collapse;" |
|- | |- | ||
!style="background-color: #41AEFF !important; border-right: 0 !important;"|[[File:Bundle Complete Balloon.png|link=]] | !style="background-color: #41AEFF !important; border-right: 0 !important;"|[[File:Bundle Complete Balloon.png|link=]] | ||
| Line 609: | Line 631: | ||
|} | |} | ||
| − | {| class="wikitable" | + | {|class="wikitable" |
!id="Chefs Bundle" colspan="4" |[[File:Bundle Red.png|32px|link=]] Chef's Bundle | !id="Chefs Bundle" colspan="4" |[[File:Bundle Red.png|32px|link=]] Chef's Bundle | ||
|- | |- | ||
| Line 617: | Line 639: | ||
| [[Tapper|Tapped]] [[Maple Tree]] | | [[Tapper|Tapped]] [[Maple Tree]] | ||
|- | |- | ||
| − | | {{name| | + | | {{name|Fiddlehead Fern}} |
| − | | [[Summer]] [[Foraging]] in the [[Secret Woods]] | + | | [[Summer]] [[Foraging]] in the [[Secret Woods]], Foraging on Prehistoric Floors at the [[Skull Cavern]], Cutting down [[Green Rain Trees]] |
|- | |- | ||
| {{name|Truffle}} | | {{name|Truffle}} | ||
| Line 632: | Line 654: | ||
| [[Cooking]] | | [[Cooking]] | ||
|- | |- | ||
| − | | colspan="2" | + | | colspan="2" style="text-align: center;"|[[File:Bundle Reward.png|18px|link=]] Reward: |
| colspan="2" |{{name|Pink Cake|3}} | | colspan="2" |{{name|Pink Cake|3}} | ||
|} | |} | ||
| − | {| class="wikitable" | + | {|class="wikitable" |
!id="Dye Bundle" colspan="4" |[[File:Bundle Teal.png|32px|link=]] Dye Bundle | !id="Dye Bundle" colspan="4" |[[File:Bundle Teal.png|32px|link=]] Dye Bundle | ||
|- | |- | ||
| Line 645: | Line 667: | ||
|- | |- | ||
| {{name|Sea Urchin}} | | {{name|Sea Urchin}} | ||
| − | | [[The Beach|Beach]] [[Foraging]], after using 300 wood to fix the bridge to the right side of the beach | + | | [[The Beach|Beach]] [[Foraging]], after using 300 [[wood]] to fix the bridge to the right side of [[The Beach]] or any side of the beach during [[The Beach#Summer Bonus Foraging|crab mating season]]; foraging in the Beach Farm |
|- | |- | ||
| − | | {{name| | + | | {{name|Sunflower}} |
| [[Summer]] / [[Fall]] [[Crops]] | | [[Summer]] / [[Fall]] [[Crops]] | ||
|- | |- | ||
| Line 654: | Line 676: | ||
|- | |- | ||
| {{name|Aquamarine}} | | {{name|Aquamarine}} | ||
| − | | [[Mining#Mining Nodes|Aquamarine Nodes]] | + | | [[Mining#Mining Nodes|Aquamarine Nodes]], boxes in [[The Mines]], [[Fishing#Treasure Chests|Fishing Treasure Chests]] |
|- | |- | ||
| {{name|Red Cabbage}} | | {{name|Red Cabbage}} | ||
| − | | [[Summer]] [[Crops]] ([[Red Cabbage Seeds]] are available at [[Pierre's General Store]] in year 2+) | + | | [[Summer]] [[Crops]] ([[Red Cabbage Seeds]] are available at [[Pierre's General Store]] in year 2+, at the [[Traveling Cart]], or dropped by [[Serpent]]s, [[Mummy|Mummies]], and [[Slimes|Purple Slimes]]) |
|- | |- | ||
| − | | colspan="2" | + | | colspan="2" style="text-align: center;"|[[File:Bundle Reward.png|18px|link=]] Reward: |
| colspan="2" |{{name|Seed Maker|1}} | | colspan="2" |{{name|Seed Maker|1}} | ||
|} | |} | ||
| − | {| class="wikitable" | + | {|class="wikitable" |
!id="Field Research Bundle" colspan="4" |[[File:Bundle Blue.png|32px|link=]] Field Research Bundle | !id="Field Research Bundle" colspan="4" |[[File:Bundle Blue.png|32px|link=]] Field Research Bundle | ||
|- | |- | ||
| Line 672: | Line 694: | ||
|- | |- | ||
| {{name|Nautilus Shell}} | | {{name|Nautilus Shell}} | ||
| − | | [[Winter]] [[The Beach|Beach]] [[Foraging]] (Note: NOT the [[Nautilus Fossil]] artifact) | + | | [[Winter]] [[The Beach|Beach]] [[Foraging]], [[Farm Maps#Beach|Beach Farm Map]] [[Foraging]] during any season, Random gift from [[Demetrius]] <br />''(Note: NOT the [[Nautilus Fossil]] artifact)'' |
|- | |- | ||
| {{name|Chub}} | | {{name|Chub}} | ||
| − | | Can be found in the mountain lake and river during all seasons. | + | | Can be found in the mountain lake and river during all seasons, any time. |
|- | |- | ||
| {{name|Frozen Geode}} | | {{name|Frozen Geode}} | ||
| − | | [[The Mines]] | + | | [[The Mines]] floors 41-79 |
|- | |- | ||
| − | | colspan="2" | + | | colspan="2" style="text-align: center;"|[[File:Bundle Reward.png|18px|link=]] Reward: |
| colspan="2" |{{name|Recycling Machine|1}} | | colspan="2" |{{name|Recycling Machine|1}} | ||
|} | |} | ||
| − | {| class="wikitable" | + | {|class="wikitable" |
!id="Fodder Bundle" colspan="4" |[[File:Bundle Yellow.png|32px|link=]] Fodder Bundle | !id="Fodder Bundle" colspan="4" |[[File:Bundle Yellow.png|32px|link=]] Fodder Bundle | ||
|- | |- | ||
| Line 693: | Line 715: | ||
|- | |- | ||
| {{name|Hay|10}} | | {{name|Hay|10}} | ||
| − | | Purchase | + | | Purchase at [[Marnie's Ranch]] or [[Desert Trader]], or harvest from [[Grass]] or [[Wheat]]. |
|- | |- | ||
| {{name|Apple|3}} | | {{name|Apple|3}} | ||
| − | | [[Apple Tree]]s during [[Fall]] | + | | [[Apple Tree]]s during [[Fall]], [[The Cave|The Farm Cave]] (fruit bat option) |
|- | |- | ||
| − | | colspan="2" | + | | colspan="2" style="text-align: center;"|[[File:Bundle Reward.png|18px|link=]] Reward: |
| colspan="2" |{{name|Heater|1}} | | colspan="2" |{{name|Heater|1}} | ||
|} | |} | ||
| − | {| class="wikitable" | + | {|class="wikitable" |
!id="Enchanters Bundle" colspan="4" |[[File:Bundle Purple.png|32px|link=]] Enchanter's Bundle | !id="Enchanters Bundle" colspan="4" |[[File:Bundle Purple.png|32px|link=]] Enchanter's Bundle | ||
|- | |- | ||
| Line 719: | Line 741: | ||
| [[Pomegranate Tree]]s during [[Fall]], [[The Cave|The Farm Cave]] (fruit bat option) | | [[Pomegranate Tree]]s during [[Fall]], [[The Cave|The Farm Cave]] (fruit bat option) | ||
|- | |- | ||
| − | | colspan="2" | + | | colspan="2" style="text-align: center;"|[[File:Bundle Reward.png|18px|link=]] Reward: |
| colspan="2" |{{name|Gold Bar|5}} | | colspan="2" |{{name|Gold Bar|5}} | ||
|} | |} | ||
| − | ==Vault== | + | ===Vault=== |
[[File:Community Center Vault.png|thumb|right|Vault Before Completion]] | [[File:Community Center Vault.png|thumb|right|Vault Before Completion]] | ||
[[File:Finished Vault Room.png|thumb|right|Vault After Completion]] | [[File:Finished Vault Room.png|thumb|right|Vault After Completion]] | ||
| − | The Vault becomes available after completing four bundles. Pressing the large "purchase" button will purchase the bundle and deduct the gold from | + | The Vault becomes available after completing four bundles. Pressing the large "purchase" button will purchase the bundle and deduct the gold from the total. |
Completing all Vault bundles costs {{Price|42500}}, and repairs the [[Bus Stop]]. Taking the Bus grants access to [[The Desert|The Calico Desert]]. | Completing all Vault bundles costs {{Price|42500}}, and repairs the [[Bus Stop]]. Taking the Bus grants access to [[The Desert|The Calico Desert]]. | ||
| − | {| class="wikitable" style="border-collapse: collapse;" | + | {|class="wikitable" style="border-collapse: collapse;" |
|- | |- | ||
!style="background-color: #41AEFF !important; border-right: 0 !important;"|[[File:Bundle Complete Balloon.png|link=]] | !style="background-color: #41AEFF !important; border-right: 0 !important;"|[[File:Bundle Complete Balloon.png|link=]] | ||
| Line 738: | Line 760: | ||
|} | |} | ||
| − | {| class="wikitable" | + | {|class="wikitable" |
!id="g2500 Bundle" colspan="2"|[[File:Bundle Red.png|32px|link=]] 2,500 Bundle | !id="g2500 Bundle" colspan="2"|[[File:Bundle Red.png|32px|link=]] 2,500 Bundle | ||
|- | |- | ||
| style="width: 136px !important;"|[[File:2500 Bundle.png|center]] | | style="width: 136px !important;"|[[File:2500 Bundle.png|center]] | ||
| − | | style="text-align: center;"|[[File:Bundle Purchase.png|center|link=]] <p>{{ | + | | style="text-align: center;"|[[File:Bundle Purchase.png|center|link=]] <p>{{Price|2500}}</p> |
|- | |- | ||
| − | | | + | | style="text-align: center;"|[[File:Bundle Reward.png|18px|link=]] Reward: |
| {{name|Chocolate Cake|3}} | | {{name|Chocolate Cake|3}} | ||
|} | |} | ||
| − | {| class="wikitable" | + | {|class="wikitable" |
!id="g5000 Bundle" colspan="2"|[[File:Bundle Orange.png|32px|link=]] 5,000 Bundle | !id="g5000 Bundle" colspan="2"|[[File:Bundle Orange.png|32px|link=]] 5,000 Bundle | ||
|- | |- | ||
| style="width: 136px !important;"|[[File:5000 Bundle.png|center]] | | style="width: 136px !important;"|[[File:5000 Bundle.png|center]] | ||
| − | | style="text-align: center;"|[[File:Bundle Purchase.png|center|link=]] <p>{{ | + | | style="text-align: center;"|[[File:Bundle Purchase.png|center|link=]] <p>{{Price|5000}}</p> |
|- | |- | ||
| − | | | + | | style="text-align: center;"|[[File:Bundle Reward.png|18px|link=]] Reward: |
| {{name|Quality Fertilizer|30}} | | {{name|Quality Fertilizer|30}} | ||
|} | |} | ||
| − | {| class="wikitable" | + | {|class="wikitable" |
!id="g10000 Bundle" colspan="2"|[[File:Bundle Yellow.png|32px|link=]] 10,000 Bundle | !id="g10000 Bundle" colspan="2"|[[File:Bundle Yellow.png|32px|link=]] 10,000 Bundle | ||
|- | |- | ||
| style="width: 136px !important;"|[[File:10000 Bundle.png|center]] | | style="width: 136px !important;"|[[File:10000 Bundle.png|center]] | ||
| − | | style="text-align: center;"|[[File:Bundle Purchase.png|center|link=]] <p>{{ | + | | style="text-align: center;"|[[File:Bundle Purchase.png|center|link=]] <p>{{Price|10000}}</p> |
|- | |- | ||
| − | | | + | | style="text-align: center;"|[[File:Bundle Reward.png|18px|link=]] Reward: |
| {{name|Lightning Rod|1}} | | {{name|Lightning Rod|1}} | ||
|} | |} | ||
| − | {| class="wikitable" | + | {|class="wikitable" |
!id="g25000 Bundle" colspan="2"|[[File:Bundle Purple.png|32px|link=]] 25,000 Bundle | !id="g25000 Bundle" colspan="2"|[[File:Bundle Purple.png|32px|link=]] 25,000 Bundle | ||
|- | |- | ||
| style="width: 136px !important;"|[[File:25000 Bundle.png|center]] | | style="width: 136px !important;"|[[File:25000 Bundle.png|center]] | ||
| − | | style="text-align: center;"|[[File:Bundle Purchase.png|center|link=]] <p>{{ | + | | style="text-align: center;"|[[File:Bundle Purchase.png|center|link=]] <p>{{Price|25000}}</p> |
|- | |- | ||
| − | | | + | | style="text-align: center;"|[[File:Bundle Reward.png|18px|link=]] Reward: |
| {{name|Crystalarium|1}} | | {{name|Crystalarium|1}} | ||
|} | |} | ||
| + | |||
| + | ===Abandoned JojaMart=== | ||
| + | [[File:JojaMart Abandoned.png|thumb|right|160px|The Missing Bundle]] | ||
| + | After completing the [[Community Center]], the first night before a rainy or stormy day, a cutscene will trigger in which a bolt of lightning strikes the abandoned [[JojaMart]], opening its doors. Inside, the Missing Bundle can be found. | ||
| + | {|class="wikitable" style="border-collapse: collapse;" | ||
| + | |- | ||
| + | !style="background-color: #41AEFF !important; border-right: 0 !important;"|[[File:Bundle Complete Balloon.png|link=]] | ||
| + | !style="background-color: #41AEFF !important; border-left: 0 !important;"|Missing<br />Bundle<br />Reward | ||
| + | |style="padding-left: 8px; min-width: 200px;"|[[Movie Theater]] | ||
| + | |} | ||
| + | |||
| + | {|class="wikitable" | ||
| + | !id="The Missing Bundle" colspan="4"|[[File:Bundle Purple.png|32px|link=]] The Missing Bundle | ||
| + | |- | ||
| + | | style="width: 136px !important;" rowspan="7"|[[File:The Missing Bundle.png|center]] | ||
| + | | rowspan="7"|[[File:Bundle Slot.png|center|link=]][[File:Bundle Slot.png|center|link=]][[File:Bundle Slot.png|center|link=]][[File:Bundle Slot.png|center|link=]][[File:Bundle Slot.png|center|link=]] | ||
| + | |- | ||
| + | | | ||
| + | {| | ||
| + | |- | ||
| + | |{{Quality|Wine|silver|24}} | ||
| + | |Silver or better quality [[Wine]] (any) | ||
| + | |- | ||
| + | |} | ||
| + | |[[Cask]], [[Ginger Island#Beach Resort|Ginger Island]] resort | ||
| + | |- | ||
| + | |{{name|Dinosaur Mayonnaise}} | ||
| + | |[[Mayonnaise Machine]] | ||
| + | |- | ||
| + | |{{name|Prismatic Shard}} | ||
| + | |[[Mining]] | ||
| + | |- | ||
| + | | | ||
| + | {| | ||
| + | |{{Quality|Ancient Fruit|gold|24}} | ||
| + | |Gold quality [[Ancient Fruit]] (5) | ||
| + | |} | ||
| + | |[[Crops]] | ||
| + | |- | ||
| + | | | ||
| + | {| | ||
| + | |{{Quality|Void Salmon|gold|24}} | ||
| + | |Gold or Iridium quality [[Void Salmon]] | ||
| + | |} | ||
| + | |[[Fishing]] in the [[Witch's Swamp]] | ||
| + | |- | ||
| + | |{{name|Caviar}} | ||
| + | |[[Preserves Jar]] product from [[Sturgeon]] [[roe]] | ||
| + | |- | ||
| + | |} | ||
| + | |||
| + | ==Remixed Bundles== | ||
| + | {{main article|Remixed Bundles}} | ||
| + | |||
| + | ==History== | ||
| + | {{History|1.3.27|Removed an exploit that allowed some [[furniture]] to be used in place of items to fill bundles.}} | ||
| + | {{History|1.4|Introduced the Missing Bundle. Selecting or hovering the mouse pointer over inventory items needed for a bundle now makes the Golden Scroll icon pulsate. Uncollected rewards can now be found in a bundle next to the Junimo Hut when the golden scroll disappears.}} | ||
| + | {{History|1.5|Added the ability to randomize bundles for new saves, stack different quality items, as well as an option to be able to complete all of the bundles in the first year by guaranteeing that the [[Traveling Cart]] will sell a [[Red Cabbage Seeds|Red Cabbage Seed]].}} | ||
| + | {{History|1.6|The Community Center fish tank now becomes an [[Fish Tank#Types|actual Fish Tank]] when the Fish Tank bundles are completed. The River Fish Bundle now rewards [[Deluxe Bait]] instead of [[Bait]]. "Bundle Complete" message now has clouds in background.}} | ||
[[Category:Gameplay]] | [[Category:Gameplay]] | ||
| − | |||
[[de:Bündel]] | [[de:Bündel]] | ||
[[es:Lotes]] | [[es:Lotes]] | ||
| + | [[fr:Paquets]] | ||
| + | [[it:Pacchetti]] | ||
[[ja:バンドル]] | [[ja:バンドル]] | ||
| − | [[pt: | + | [[ko:꾸러미]] |
| + | [[hu:Csomagok]] | ||
| + | [[pt:Conjuntos]] | ||
| + | [[ru:Узелки]] | ||
| + | [[tr:Yığınlar]] | ||
[[zh:收集包]] | [[zh:收集包]] | ||
Latest revision as of 20:38, 15 April 2024
- For remixed bundles chosen at game start via advanced options, see Remixed Bundles.
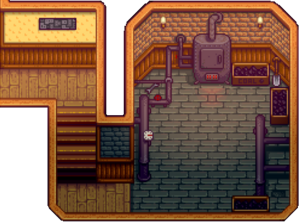
Bundles are donations to the Junimos given via golden scrolls inside the Community Center. When a bundle is complete, the Junimos offer the player a reward. When all bundles for a particular room in the Community Center are complete, the Junimos grant a special reward that sometimes benefits the entire community.
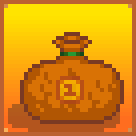
Bundle rewards are given immediately, but rewards for completing all bundles in a room are given at the end of the day via a cutscene depicting the Junimos fulfilling the reward. If two rooms are completed on the same day, only one of the cutscenes is shown. Note that if the player does not collect individual bundle rewards before completing the room, the rewards can be found in a small brown bag to the left of the Junimo Hut after the golden scroll disappears. This bag persists after the Community Center completion ceremony, until all items are retrieved from it.
A few bundles display more items than there are slots to fill (e.g., Artisan Bundle: 12 items, 6 slots to fill). In this case, the player can choose which of the shown items they want to use to fill the bundle. They do not have to use all shown items, only enough to fill the slots.
Completing all bundles restores the Community Center to its condition when it was brand new and unlocks the "Local Legend" steam achievement. That night, the game also unlocks a cut scene that shows the grand re-opening of the Community Center. This scene is triggered by entering Pelican Town Square any time thereafter on a sunny day, unless a festival is to be held in the town that day. Mayor Lewis announces that the player has won the Stardew Hero award and gives the player a trophy.
If the player opts to purchase a JojaMart Membership, the Community Center is turned into a Joja Warehouse instead. After this happens, the bundles will be completed by the Joja Corporation for a fee given to Morris, the local JojaMart manager, through the Joja Community Development Form.
There is a total of 6 rooms and 30 bundles to complete in the Community Center. In the Joja Warehouse, there are 5 rewards to purchase (the "Friendship" reward is not available).
Bundle Progress can be checked at any time by clicking on the Golden Scroll icon at the top right of the Player Menu (above the Garbage Can and "organize" icons). Selecting or hovering the mouse pointer over an inventory item that is needed for a bundle makes the Golden Scroll icon pulsate.
Bundles that do not specify quality will accept items of any quality. For bundles that need multiple items, multiple stacks of different qualities are acceptable as long as they add up to the required amount. For bundles that do specify a quality, a better quality is also acceptable.
Traveling Cart Availability
All items required for bundles have a small chance of appearing in the Traveling Cart, except for the items listed below. These items will never be sold at the Traveling Cart:
|
|
*Used only in Remixed Bundles
Standard Bundles
Crafts Room
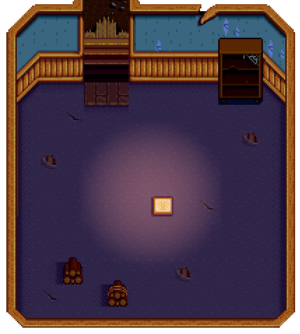
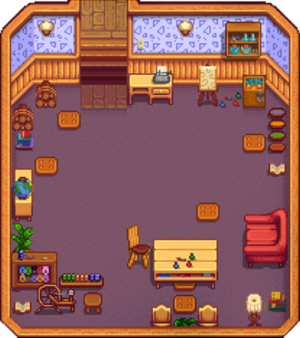
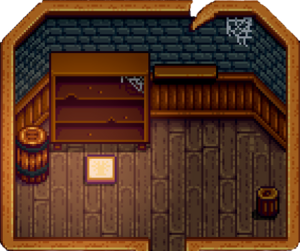
The Crafts Room contains the first group of bundles available. Completing all Crafts Room bundles repairs the bridge east of The Mines, unlocking the Quarry.
| Crafts Room Reward |
Bridge Repair |
|---|
| Spring Foraging | |||
| Spring Foraging, buy from Pierre at Flower Dance | |||
| Spring Foraging | |||
| Spring Foraging, buy from Pierre at Flower Dance | |||
| Summer Foraging, Fall Farming | ||||
| Summer Foraging, The Farm Cave (fruit bat option) | ||||
| Summer Foraging | ||||
| Fall Foraging, Spring & Fall Foraging in the Secret Woods, The Farm Cave (mushroom option), Tapping a Mushroom Tree | |||
| Fall Foraging, The Farm Cave (fruit bat option) | |||
| Fall Foraging | |||
| Fall Foraging, The Farm Cave (fruit bat option) | |||
| Tilling soil or Artifact Spots in Winter, dropped by Blue Slimes on floors 41-79 of The Mines | |||
| Winter Foraging, dropped by Dust Sprites on floors 41-79 of The Mines | |||
| Tilling soil or Artifact Spots in Winter | |||
| Winter Foraging | |||
| Chopping Trees or branches with an Axe, Carpenter's Shop | |||
| Chopping Trees or branches with an Axe, Carpenter's Shop | |||
| Smashing stones with a Pickaxe, Carpenter's Shop | |||
| Chopping Large Stumps or Large Logs with an upgraded Axe, smashing crates in The Mines, chopping Mahogany Trees | |||
| Desert Foraging, Oasis, shaking a Palm Tree in the Desert and on Ginger Island | |||
| Desert Foraging, Oasis | |||
| The Mines, either smashing boxes or tilling soil | |||
| Foraging in The Mines, Summer or Fall Foraging in the Secret Woods, The Farm Cave (mushroom option), Tapping a Mushroom Tree, Forest Farm Map in Fall. | |||
| The Mines, The Farm Cave (mushroom option), Forest Farm Map Foraging in Fall | |||
| Tapped Maple Tree | |||
| Tapped Oak Tree, Haunted Skull | |||
| Tapped Pine Tree | |||
| Foraging in the Secret Woods or Forest Farm Map in Spring, The Farm Cave (mushroom option) | |||
Pantry
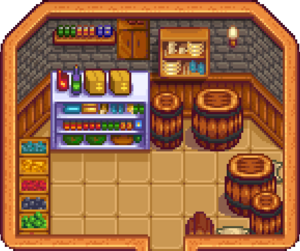
The Pantry appears after completing one bundle. Completing all Pantry bundles will restore the dilapidated Greenhouse on the farm, making it available to grow Crops, Fruit Trees, and Trees year-round.
| Pantry Reward |
Greenhouse |
|---|
| Spring Crops | |||
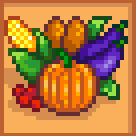
| Spring Crops | |||
| Spring Crops | |||
| Spring Crops | |||
| Summer Crops | |||
| Summer Crops | |||
| Summer Crops | |||
| Summer Crops | |||
| Summer / Fall Crops | |||
| Fall Crops | |||
| Fall Crops | |||
| Fall Crops, dropped by Duggies on floors 6-29 of The Mines (3%) | |||
|
Gold quality Spring Crops | |||||
|
Gold quality Summer Crops | |||||
|
Gold quality Fall Crops | |||||
|
Gold quality Summer / Fall Crops | |||||
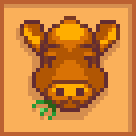
| Cows | |||
| Brown Chickens | |||
| White Chickens | |||
| Goats | |||
| Sheep, Rabbits | |||
| Ducks | |||
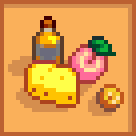
| Made from Truffles using an Oil Maker | |||
| Loom, Recycling a Soggy Newspaper, Desert Trader, dropped by Mummies in Skull Cavern | |||
| Cheese Press | |||
| Cheese Press, Desert Trader | |||
| Bee House, Oasis | |||
| Preserves Jar | |||
| Apple Trees during Fall, The Farm Cave (fruit bat option) | |||
| Apricot Trees during Spring, The Farm Cave (fruit bat option) | |||
| Orange Trees during Summer, The Farm Cave (fruit bat option) | |||
| Peach Trees during Summer, The Farm Cave (fruit bat option) | |||
| Pomegranate Trees during Fall, The Farm Cave (fruit bat option) | |||
| Cherry Trees during Spring, The Farm Cave (fruit bat option) | |||
Fish Tank
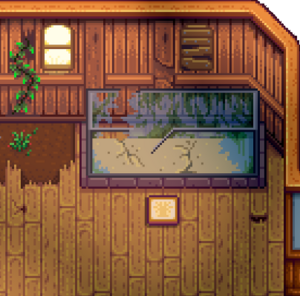
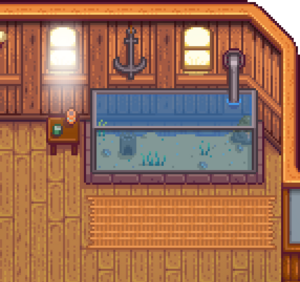
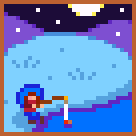
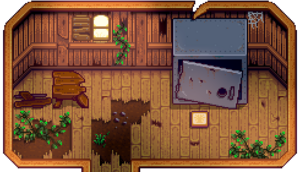
The Fish Tank appears after completing one bundle. Completing all Fish Tank bundles will remove the Glittering Boulder to the left of The Mines entrance. Willy will also give the player a Copper Pan that can be used to collect metal ores and other items from bodies of water. Upon completion, the broken fish tank will turn into an actual Fish Tank, containing 1 Catfish, 1 Sunfish, and 1 Snail. Players can then add up to 5 bottom creatures and 5 swimming creatures into the tank and 1 of each decoration type: Coral, Seaweed, Stone, Anchor, Treasure Chest, and Pearl, similarly to other fish tanks like the Deluxe Fish Tank and the Aquatic Sanctuary. The appearance and location of Seaweed, Coral, and other stationary objects in the tank can't be changed because the tank can't be moved by players.
Note: Access to the Desert is required to get a Sandfish. Therefore, unless it becomes available at the Traveling Cart, it is not possible to finish the Specialty Fish Bundle before finishing the entire Vault section.
| Fish Tank Reward |
Glittering Boulder Removed |
|---|
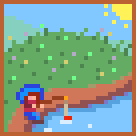
| All River Fish can be found in the Riverlands Farm, Hill-Top Farm, or Forest Farm. | |||
| Found in Rivers, 6am – 7pm, Spring and Summer during sunny weather. | |||
| Found in Rivers and Secret Woods, 6am – midnight, Spring and Fall. Only when raining. Can be found in Summer during rain in the Secret Woods and Witch's Swamp, Winter with a Rain Totem. | |||
| Found in Rivers, 9am – 2am, Spring, Summer, and Fall. Only when raining. | |||
| Found in Rivers, 6am – 7pm, Fall and Winter. Can be found in any weather. | |||
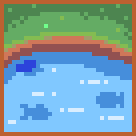
| All Mountain Lake Fish can be found in any weather, and in the Wilderness Farm. | |||
| Found in the Mountain Lake, 6am – 7pm, All Seasons. | |||
| Found in the Mountain Lake, Anytime, during Spring, Summer, or Fall. Found in Secret Woods or Sewer, Anytime, All Seasons. | |||
| Found in the Mountain Lake, Anytime, All Seasons. | |||
| Found in the Mountain Lake, 6am – 7pm, Summer and Winter. | |||
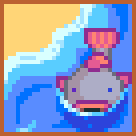
| Found in the Ocean, 6am – 7pm, Spring, Fall, and Winter. | |||
| Found in the Ocean, 6am – 7pm, Summer and Winter. | |||
| Found in the Ocean, 6am – 7pm, Summer and Fall. Only when raining. | |||
| Found in the Ocean, 6am – 2pm, Summer and Fall. | |||
| Found in Rivers, the Mountain Lake, and Cindersap Forest Pond, 12pm – 2am, Fall (Winter with Rain Totem.) Only when raining. | |||
| Found in Rivers, 6pm – 2am, All Seasons. | |||
| Found in the Ocean, 4pm – 2am, Spring or Fall. Only when raining. | |||
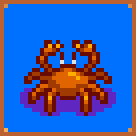
| Caught in Crab Pots (ocean) | |||
| Caught in Crab Pots (freshwater) | |||
| Caught in Crab Pots (ocean), drops from Rock Crabs or Lava Crabs in The Mines | |||
| Caught in Crab Pots (ocean), Beach Foraging | |||
| Caught in Crab Pots (ocean), Beach Foraging | |||
| Caught in Crab Pots (ocean) | |||
| Caught in Crab Pots (freshwater) | |||
| Caught in Crab Pots (freshwater) | |||
| Caught in Crab Pots (ocean), Beach Foraging | |||
| Caught in Crab Pots (ocean), Beach Foraging | |||
| Found in the Ocean, 12pm – 4pm, Summer during sunny weather. | |||
| Found in ponds in The Mines floors 20 and 60, Anytime, All Seasons. May also be dropped by Ghosts. | |||
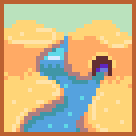
| Found in the pond in The Desert, 6am – 8pm, All Seasons. | |||
| Found in the Secret Woods and the Forest Farm, Anytime, All Seasons. | |||
Boiler Room
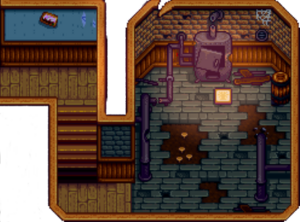
The Boiler Room appears after completing two bundles. Completing all Boiler Room bundles repairs the Minecarts, allowing the player to fast travel between distant locations. The Locations are Bus Stop, Mines, Quarry and Town.
| Boiler Room Reward |
Minecarts Repaired |
|---|
| Smelting Copper Ore in the Furnace | |||
| Smelting Iron Ore in the Furnace, Crafting the "Transmute (Fe)" recipe | |||
| Smelting Gold Ore in the Furnace, Crafting the "Transmute (Au)" recipe | |||
| Foraging on all floors of The Mines | |||
| Foraging on floors 1-39 of The Mines, Geodes, Omni Geodes, drop from Duggies in the Mines (floors 6-29) | |||
| Foraging on floors 41-79 of The Mines, Frozen Geodes, Omni Geodes, drop from Dust Sprites in the Mines (floors 41-79) | |||
| Foraging on floors 81-119 of The Mines, Magma Geodes, Omni Geodes | |||
| Dropped by Slimes | |||
| Dropped by Bats in The Mines or the Skull Cavern | |||
| Dropped by Ghosts, Squid Kids, or Metal Heads in The Mines, dropped by Mummies or Iridium Bats in the Skull Cavern; produced by Sunfish in Fish Ponds; buy from Krobus | |||
| Dropped by Shadow Brutes or Shadow Shamans in The Mines or Serpents in the Skull Cavern; produced by Void Salmon in Fish Ponds; buy from Krobus | |||
Bulletin Board
The Bulletin Board appears after completing three bundles.
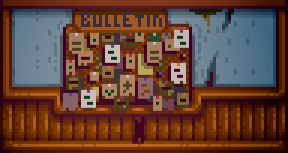
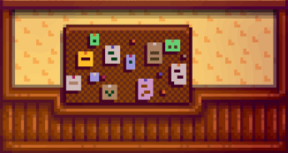
Completing all Bulletin Board bundles improves the player's friendship rating with every non-datable villager by two hearts (500 points). Note that this applies only to non-datable villagers whom the player has met in person. Villagers who do not show on the "Social" tab of the player menu and villagers whose names appear as "???' will not receive 500 points. If the player completes all the bundles before Kent arrives on 1 Spring, Year 2, he will not benefit from the friendship increase, and will start at 0 hearts. The Dwarf's friendship will be unaffected if the player does not have the Dwarvish Translation Guide.
The morning after, Mayor Lewis will send a letter saying that packages containing items posted about "years ago" on the community center bulletin board have been appearing in villagers' homes. He says the packages are all addressed from "your farm". He expresses his gratitude and says "all of us in town are delighted!"
| Bulletin Board Reward |
Friendship ♡ |
|---|
| Tapped Maple Tree | |||
| Summer Foraging in the Secret Woods, Foraging on Prehistoric Floors at the Skull Cavern, Cutting down Green Rain Trees | |||
| Pigs | |||
| Summer Crops | |||
| Cooking (recipe sources: The Queen of Sauce, The Saloon) | |||
| Cooking | |||
| Foraging in The Mines, Summer or Fall Foraging in the Secret Woods, The Farm Cave (mushroom option), Tapping a Mushroom Tree | |||
| Beach Foraging, after using 300 wood to fix the bridge to the right side of The Beach or any side of the beach during crab mating season; foraging in the Beach Farm | |||
| Summer / Fall Crops | |||
| Ducks | |||
| Aquamarine Nodes, boxes in The Mines, Fishing Treasure Chests | |||
| Summer Crops (Red Cabbage Seeds are available at Pierre's General Store in year 2+, at the Traveling Cart, or dropped by Serpents, Mummies, and Purple Slimes) | |||
| The Mines, The Farm Cave (mushroom option), Forest Farm Map Foraging in Fall | |||
| Winter Beach Foraging, Beach Farm Map Foraging during any season, Random gift from Demetrius (Note: NOT the Nautilus Fossil artifact) | |||
| Can be found in the mountain lake and river during all seasons, any time. | |||
| The Mines floors 41-79 | |||
| Summer / Fall Crops | |||
| Purchase at Marnie's Ranch or Desert Trader, or harvest from Grass or Wheat. | |||
| Apple Trees during Fall, The Farm Cave (fruit bat option) | |||
| Tapped Oak Tree | |||
| Keg | |||
| Rabbits, Serpent drop in Skull Cavern (0.8%) | |||
| Pomegranate Trees during Fall, The Farm Cave (fruit bat option) | |||
Vault
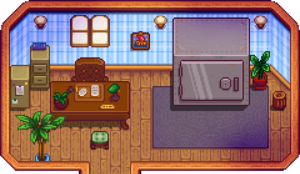
The Vault becomes available after completing four bundles. Pressing the large "purchase" button will purchase the bundle and deduct the gold from the total.
Completing all Vault bundles costs ![]() 42,500g, and repairs the Bus Stop. Taking the Bus grants access to The Calico Desert.
42,500g, and repairs the Bus Stop. Taking the Bus grants access to The Calico Desert.
| Vault Reward |
Bus Repair |
|---|
| |
| |
| |
| |
Abandoned JojaMart
After completing the Community Center, the first night before a rainy or stormy day, a cutscene will trigger in which a bolt of lightning strikes the abandoned JojaMart, opening its doors. Inside, the Missing Bundle can be found.
| Missing Bundle Reward |
Movie Theater |
|---|
|
Cask, Ginger Island resort | ||
| Mayonnaise Machine | |||
| Mining | |||
|
Crops | ||
|
Fishing in the Witch's Swamp | ||
| Preserves Jar product from Sturgeon roe | |||
Remixed Bundles
- Main article: Remixed Bundles
History
- 1.3.27: Removed an exploit that allowed some furniture to be used in place of items to fill bundles.
- 1.4: Introduced the Missing Bundle. Selecting or hovering the mouse pointer over inventory items needed for a bundle now makes the Golden Scroll icon pulsate. Uncollected rewards can now be found in a bundle next to the Junimo Hut when the golden scroll disappears.
- 1.5: Added the ability to randomize bundles for new saves, stack different quality items, as well as an option to be able to complete all of the bundles in the first year by guaranteeing that the Traveling Cart will sell a Red Cabbage Seed.
- 1.6: The Community Center fish tank now becomes an actual Fish Tank when the Fish Tank bundles are completed. The River Fish Bundle now rewards Deluxe Bait instead of Bait. "Bundle Complete" message now has clouds in background.

