Difference between revisions of "Bundles"
Technical 13 (talk | contribs) m (Fix edit conflict.) |
Margotbean (talk | contribs) m (Reverted edits by Technical 13 (talk) to last revision by Margotbean) |
||
| Line 9: | Line 9: | ||
Note: While the "minor" bundle rewards are given immediately, the "major" rewards will not be delivered until the end of the day. Each major reward features a cut-scene of the Junimos making the item available. | Note: While the "minor" bundle rewards are given immediately, the "major" rewards will not be delivered until the end of the day. Each major reward features a cut-scene of the Junimos making the item available. | ||
| − | === Travelling Cart === | + | ===Travelling Cart=== |
Most of the items required for the bundles have a small chance of appearing in the [[Travelling Cart]] stock. The following items will never be sold: | Most of the items required for the bundles have a small chance of appearing in the [[Travelling Cart]] stock. The following items will never be sold: | ||
| − | * {{ | + | *{{name|Melon|link=Melon|class=inline}} (gold quality) |
| − | * {{ | + | *{{name|Pumpkin|link=Pumpkin|class=inline}} (gold quality) |
| − | * {{ | + | *{{name|Corn|link=Corn|class=inline}} (gold quality) |
| − | * {{ | + | *{{name|Earth Crystal|link=Earth Crystal}} |
| − | * {{ | + | *{{name|Frozen Tear|link=Frozen Tear}} |
| − | * {{ | + | *{{name|Fire Quartz|link=Fire Quartz}} |
| − | * {{ | + | *{{name|Frozen Geode|link=Frozen Geode}} |
| − | * {{ | + | *{{name|Hay|link=Hay}} |
| + | |||
| + | ==Crafts Room== | ||
| + | [[File:Community Center Crafts Room.png|right]] | ||
| + | [[File:Finished Crafts Room.png|right]] | ||
| − | |||
| − | |||
| − | |||
| − | |||
| − | |||
The Crafts Room contains the first group of bundles available. These bundles are completed by collecting [[foraging|foraged]] items. For each season there are unique plants to forage, all of which are required to complete that season's bundle. The bundles range from basic wood and stone to exotic and rare foraged items. | The Crafts Room contains the first group of bundles available. These bundles are completed by collecting [[foraging|foraged]] items. For each season there are unique plants to forage, all of which are required to complete that season's bundle. The bundles range from basic wood and stone to exotic and rare foraged items. | ||
Completing the Crafts Room bundles repairs the bridge east of [[mines]], giving you access to the [[quarry]]. | Completing the Crafts Room bundles repairs the bridge east of [[mines]], giving you access to the [[quarry]]. | ||
| − | + | ||
| − | + | ||
| − | | | + | {| |
| | | | ||
| + | {| class="wikitable" | ||
| + | !Collection Reward: | ||
| + | | id="cellstretch" |[[Quarry|Bridge Repair]] | ||
| + | |} | ||
{| class="wikitable" | {| class="wikitable" | ||
! colspan=4 |[[File:Bundle Green.png|32px|link=]] <span id="Spring Foraging Bundle">Spring Foraging Bundle</span> | ! colspan=4 |[[File:Bundle Green.png|32px|link=]] <span id="Spring Foraging Bundle">Spring Foraging Bundle</span> | ||
| Line 38: | Line 41: | ||
| rowspan=4 |[[File:Spring Foraging Bundle.png|center]] | | rowspan=4 |[[File:Spring Foraging Bundle.png|center]] | ||
| rowspan=4 |[[File:Bundle Slot.png|center|link=]][[File:Bundle Slot.png|center|link=]][[File:Bundle Slot.png|center|link=]][[File:Bundle Slot.png|center|link=]] | | rowspan=4 |[[File:Bundle Slot.png|center|link=]][[File:Bundle Slot.png|center|link=]][[File:Bundle Slot.png|center|link=]][[File:Bundle Slot.png|center|link=]] | ||
| − | |{{ | + | |{{name|Wild Horseradish|link=Wild Horseradish}} |
| id="cellstretch" |[[Foraging]] during [[Spring]]. | | id="cellstretch" |[[Foraging]] during [[Spring]]. | ||
|- | |- | ||
| − | |{{ | + | |{{name|Daffodil|link=Daffodil}} |
|[[Foraging]] during [[Spring]]. Buy from [[Pierre]]'s Shop at the [[Flower Dance]]. | |[[Foraging]] during [[Spring]]. Buy from [[Pierre]]'s Shop at the [[Flower Dance]]. | ||
|- | |- | ||
| − | |{{ | + | |{{name|Leek|link=Leek}} |
|[[Foraging]] during [[Spring]]. | |[[Foraging]] during [[Spring]]. | ||
|- | |- | ||
| − | |{{ | + | |{{name|Dandelion|link=Dandelion}} |
|[[Foraging]] during [[Spring]]. Buy from [[Pierre]]'s Shop at the [[Flower Dance]]. | |[[Foraging]] during [[Spring]]. Buy from [[Pierre]]'s Shop at the [[Flower Dance]]. | ||
|- | |- | ||
| colspan=2 id="cellcenter" |[[File:Bundle Reward.png|18px|link=]] Reward: | | colspan=2 id="cellcenter" |[[File:Bundle Reward.png|18px|link=]] Reward: | ||
| − | | colspan=2 | {{ | + | | colspan=2 | {{name|Spring Seeds|30}} |
|} | |} | ||
{| class="wikitable" | {| class="wikitable" | ||
| Line 58: | Line 61: | ||
| rowspan=3 |[[File:Summer Foraging Bundle.png|center]] | | rowspan=3 |[[File:Summer Foraging Bundle.png|center]] | ||
| rowspan=3 id="cellmiddle" |[[File:Bundle Slot.png|center|link=]][[File:Bundle Slot.png|center|link=]][[File:Bundle Slot.png|center|link=]] | | rowspan=3 id="cellmiddle" |[[File:Bundle Slot.png|center|link=]][[File:Bundle Slot.png|center|link=]][[File:Bundle Slot.png|center|link=]] | ||
| − | |{{ | + | |{{name|Grape|link=Grape}} |
| id="cellstretch" |[[Foraging]] during [[Summer]]. | | id="cellstretch" |[[Foraging]] during [[Summer]]. | ||
|- | |- | ||
| − | |{{ | + | |{{name|Spice Berry|link=Spice Berry}} |
|[[Foraging]] during [[Summer]]. | |[[Foraging]] during [[Summer]]. | ||
|- | |- | ||
| − | |{{ | + | |{{name|Sweet Pea|link=Sweet Pea}} |
|[[Foraging]] during [[Summer]]. | |[[Foraging]] during [[Summer]]. | ||
|- | |- | ||
| colspan=2 id="cellcenter" |[[File:Bundle Reward.png|18px|link=]] Reward: | | colspan=2 id="cellcenter" |[[File:Bundle Reward.png|18px|link=]] Reward: | ||
| − | | colspan=3 | {{ | + | | colspan=3 | {{name|Summer Seeds|30}} |
|} | |} | ||
{| class="wikitable" | {| class="wikitable" | ||
| Line 75: | Line 78: | ||
| rowspan=4 |[[File:Fall Foraging Bundle.png|center]] | | rowspan=4 |[[File:Fall Foraging Bundle.png|center]] | ||
| rowspan=4 id="cellmiddle" |[[File:Bundle Slot.png|center|link=]][[File:Bundle Slot.png|center|link=]][[File:Bundle Slot.png|center|link=]][[File:Bundle Slot.png|center|link=]] | | rowspan=4 id="cellmiddle" |[[File:Bundle Slot.png|center|link=]][[File:Bundle Slot.png|center|link=]][[File:Bundle Slot.png|center|link=]][[File:Bundle Slot.png|center|link=]] | ||
| − | |{{ | + | |{{name|Common Mushroom|link=Common Mushroom}} |
| id="cellstretch" |[[Foraging]] during [[Fall]] Or if you have the mushroom in your cave. | | id="cellstretch" |[[Foraging]] during [[Fall]] Or if you have the mushroom in your cave. | ||
|- | |- | ||
| − | |{{ | + | |{{name|Wild Plum|link=Wild Plum}} |
|[[Foraging]] during [[Fall]]. | |[[Foraging]] during [[Fall]]. | ||
|- | |- | ||
| − | |{{ | + | |{{name|Hazelnut|link=Hazelnut}} |
|[[Foraging]] during [[Fall]]. | |[[Foraging]] during [[Fall]]. | ||
|- | |- | ||
| − | |{{ | + | |{{name|Blackberry|link=Blackberry}} |
|[[Foraging]] during [[Fall]]. | |[[Foraging]] during [[Fall]]. | ||
|- | |- | ||
| colspan=2 id="cellcenter" |[[File:Bundle Reward.png|18px|link=]] Reward: | | colspan=2 id="cellcenter" |[[File:Bundle Reward.png|18px|link=]] Reward: | ||
| − | | colspan=2 | {{ | + | | colspan=2 | {{name|Fall Seeds|30}} |
|} | |} | ||
{| class="wikitable" | {| class="wikitable" | ||
| Line 95: | Line 98: | ||
| rowspan=4 |[[File:Winter Foraging Bundle.png|center]] | | rowspan=4 |[[File:Winter Foraging Bundle.png|center]] | ||
| rowspan=4 id="cellmiddle" |[[File:Bundle Slot.png|center|link=]][[File:Bundle Slot.png|center|link=]][[File:Bundle Slot.png|center|link=]][[File:Bundle Slot.png|center|link=]] | | rowspan=4 id="cellmiddle" |[[File:Bundle Slot.png|center|link=]][[File:Bundle Slot.png|center|link=]][[File:Bundle Slot.png|center|link=]][[File:Bundle Slot.png|center|link=]] | ||
| − | |{{ | + | |{{name|Winter Root|link=Winter Root}} |
| id="cellstretch" |[[Foraging]] during [[Winter]] or dropped by slimes on 41-79 Mines levels. | | id="cellstretch" |[[Foraging]] during [[Winter]] or dropped by slimes on 41-79 Mines levels. | ||
|- | |- | ||
| − | |{{ | + | |{{name|Crystal Fruit|link=Crystal Fruit}} |
|[[Foraging]] during [[Winter]] or dropped by coal sprites on 41-79 Mines levels. | |[[Foraging]] during [[Winter]] or dropped by coal sprites on 41-79 Mines levels. | ||
|- | |- | ||
| − | |{{ | + | |{{name|Snow Yam|link=Snow Yam}} |
|[[Foraging]] during [[Winter]] (Using a {{ItemLink|Hoe}} outside the farm). | |[[Foraging]] during [[Winter]] (Using a {{ItemLink|Hoe}} outside the farm). | ||
|- | |- | ||
| − | |{{ | + | |{{name|Crocus|link=Crocus}} |
|[[Foraging]] during [[Winter]]. | |[[Foraging]] during [[Winter]]. | ||
|- | |- | ||
| colspan=2 id="cellcenter" |[[File:Bundle Reward.png|18px|link=]] Reward: | | colspan=2 id="cellcenter" |[[File:Bundle Reward.png|18px|link=]] Reward: | ||
| − | | colspan=2 | {{ | + | | colspan=2 | {{name|Winter Seeds|30}} |
|} | |} | ||
{| class="wikitable" | {| class="wikitable" | ||
| Line 115: | Line 118: | ||
| rowspan=4 |[[File:Construction Bundle.png|center]] | | rowspan=4 |[[File:Construction Bundle.png|center]] | ||
| rowspan=4 id="cellmiddle" |[[File:Bundle Slot.png|center|link=]][[File:Bundle Slot.png|center|link=]][[File:Bundle Slot.png|center|link=]][[File:Bundle Slot.png|center|link=]] | | rowspan=4 id="cellmiddle" |[[File:Bundle Slot.png|center|link=]][[File:Bundle Slot.png|center|link=]][[File:Bundle Slot.png|center|link=]][[File:Bundle Slot.png|center|link=]] | ||
| − | |{{ | + | |{{name|Wood|99}} |
| id="cellstretch" |Chopping trees or logs using an axe. | | id="cellstretch" |Chopping trees or logs using an axe. | ||
|- | |- | ||
| − | |{{ | + | |{{name|Wood|99}} |
|Chopping trees or logs using an axe. | |Chopping trees or logs using an axe. | ||
|- | |- | ||
| − | |{{ | + | |{{name|Stone|99}} |
|Smashing stones with a pickaxe. | |Smashing stones with a pickaxe. | ||
|- | |- | ||
| − | |{{ | + | |{{name|Hardwood|10}} |
|Chopping large stumps and/or logs with an upgraded axe. Also in crates in the Mines | |Chopping large stumps and/or logs with an upgraded axe. Also in crates in the Mines | ||
|- | |- | ||
| colspan=2 id="cellcenter" |[[File:Bundle Reward.png|18px|link=]] Reward: | | colspan=2 id="cellcenter" |[[File:Bundle Reward.png|18px|link=]] Reward: | ||
| − | | colspan=2 | {{ | + | | colspan=2 | {{name|Charcoal Kiln|link=Charcoal Kiln}} |
|} | |} | ||
{| class="wikitable" | {| class="wikitable" | ||
| Line 135: | Line 138: | ||
| rowspan=9 |[[File:Exotic Foraging Bundle.png|center]] | | rowspan=9 |[[File:Exotic Foraging Bundle.png|center]] | ||
| rowspan=9 |[[File:Bundle Slot.png|center|link=]][[File:Bundle Slot.png|center|link=]][[File:Bundle Slot.png|center|link=]][[File:Bundle Slot.png|center|link=]][[File:Bundle Slot.png|center|link=]] | | rowspan=9 |[[File:Bundle Slot.png|center|link=]][[File:Bundle Slot.png|center|link=]][[File:Bundle Slot.png|center|link=]][[File:Bundle Slot.png|center|link=]][[File:Bundle Slot.png|center|link=]] | ||
| − | |{{ | + | |{{name|Coconut|link=Coconut}} |
| id="cellstretch" |Found in the desert. | | id="cellstretch" |Found in the desert. | ||
|- | |- | ||
| − | |{{ | + | |{{name|Cactus Fruit|link=Cactus Fruit}} |
|Found in the desert. | |Found in the desert. | ||
|- | |- | ||
| − | |{{ | + | |{{name|Cave Carrot|link=Cave Carrot}} |
|In boxes inside the mines or using the hoe on soil spots in the Mines. | |In boxes inside the mines or using the hoe on soil spots in the Mines. | ||
|- | |- | ||
| − | |{{ | + | |{{name|Red Mushroom|link=Red Mushroom}} |
|Can be found in the mines or in the farm cave if you selected the mushroom perk. | |Can be found in the mines or in the farm cave if you selected the mushroom perk. | ||
|- | |- | ||
| − | |{{ | + | |{{name|Purple Mushroom|link=Purple Mushroom}} |
|Can be found in the mines or in the farm cave if you selected the mushroom perk. Can also grow on the Forest [[Farm Map]] during the [[fall]]. | |Can be found in the mines or in the farm cave if you selected the mushroom perk. Can also grow on the Forest [[Farm Map]] during the [[fall]]. | ||
|- | |- | ||
| − | |{{ | + | |{{name|Maple Syrup|link=Maple Syrup}} |
|Harvested from maple trees using a [[Tapper]]. | |Harvested from maple trees using a [[Tapper]]. | ||
|- | |- | ||
| − | |{{ | + | |{{name|Oak Resin|link=Oak Resin}} |
|Harvested from oak trees using a [[Tapper]]. | |Harvested from oak trees using a [[Tapper]]. | ||
|- | |- | ||
| − | |{{ | + | |{{name|Pine Tar|link=Pine Tar}} |
|Harvested from pine trees using a [[Tapper]]. | |Harvested from pine trees using a [[Tapper]]. | ||
|- | |- | ||
| − | |{{ | + | |{{name|Morel|link=Morel}} |
|In the farm cave if you selected the mushroom perk, or via [[foraging]] at [[Secret Woods]] in the [[Spring]]. | |In the farm cave if you selected the mushroom perk, or via [[foraging]] at [[Secret Woods]] in the [[Spring]]. | ||
|- | |- | ||
| colspan=2 id="cellcenter" |[[File:Bundle Reward.png|18px|link=]] Reward: | | colspan=2 id="cellcenter" |[[File:Bundle Reward.png|18px|link=]] Reward: | ||
| − | | colspan=2 | {{ | + | | colspan=2 | {{name|Autumn's Bounty|5|link=Autumn's Bounty|5}} |
|} | |} | ||
|} | |} | ||
| − | == Pantry == | + | ==Pantry== |
| − | + | [[File:Community Center Pantry.png|right]] | |
| − | + | [[File:Finished Pantry.png|right]] | |
| − | |||
| − | |||
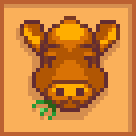
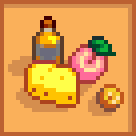
The Pantry appears after completing one bundle. These bundles are completed by collecting [[crops|crops]]. You have to grow several farm crops for spring, summer, and fall to complete three of the bundles. There are also bundles for [[Artisan Goods|Artisan Goods]], highest quality crops, and animal products such as milk and eggs. | The Pantry appears after completing one bundle. These bundles are completed by collecting [[crops|crops]]. You have to grow several farm crops for spring, summer, and fall to complete three of the bundles. There are also bundles for [[Artisan Goods|Artisan Goods]], highest quality crops, and animal products such as milk and eggs. | ||
| Line 177: | Line 178: | ||
Completing the Pantry bundles rebuilds the dilapidated [[Greenhouse]] on your farm back to brand new. The Greenhouse allows for crops inside it to grow year round, never dying to seasonal changes. | Completing the Pantry bundles rebuilds the dilapidated [[Greenhouse]] on your farm back to brand new. The Greenhouse allows for crops inside it to grow year round, never dying to seasonal changes. | ||
| − | {| | + | {| |
| − | |||
| − | |||
| | | | ||
| + | {| class="wikitable" | ||
| + | !Collection Reward: | ||
| + | | id="cellstretch" |[[Greenhouse]] | ||
| + | |} | ||
{| class="wikitable" | {| class="wikitable" | ||
! colspan=4 |[[File:Bundle Green.png|32px|link=]] <span id="Spring Crops Bundle">Spring Crops Bundle</span> | ! colspan=4 |[[File:Bundle Green.png|32px|link=]] <span id="Spring Crops Bundle">Spring Crops Bundle</span> | ||
| Line 186: | Line 189: | ||
| rowspan=4 |[[File:Spring Crops Bundle.png|center]] | | rowspan=4 |[[File:Spring Crops Bundle.png|center]] | ||
| rowspan=4 |[[File:Bundle Slot.png|center|link=]][[File:Bundle Slot.png|center|link=]][[File:Bundle Slot.png|center|link=]][[File:Bundle Slot.png|center|link=]] | | rowspan=4 |[[File:Bundle Slot.png|center|link=]][[File:Bundle Slot.png|center|link=]][[File:Bundle Slot.png|center|link=]][[File:Bundle Slot.png|center|link=]] | ||
| − | |{{ | + | |{{name|Parsnip|link=Parsnip}} |
| id="cellstretch" |[[crops|Crops]] during [[Spring]]. | | id="cellstretch" |[[crops|Crops]] during [[Spring]]. | ||
|- | |- | ||
| − | |{{ | + | |{{name|Green Bean|link=Green Bean}} |
|[[crops|Crops]] during [[Spring]]. | |[[crops|Crops]] during [[Spring]]. | ||
|- | |- | ||
| − | |{{ | + | |{{name|Cauliflower|link=Cauliflower}} |
|[[crops|Crops]] during [[Spring]]. | |[[crops|Crops]] during [[Spring]]. | ||
|- | |- | ||
| − | |{{ | + | |{{name|Potato|link=Potato}} |
|[[crops|Crops]] during [[Spring]]. | |[[crops|Crops]] during [[Spring]]. | ||
|- | |- | ||
| colspan=2 id="cellcenter" |[[File:Bundle Reward.png|18px|link=]] Reward: | | colspan=2 id="cellcenter" |[[File:Bundle Reward.png|18px|link=]] Reward: | ||
| − | | colspan=2 | {{ | + | | colspan=2 | {{name|Speed-Gro|20}} |
|} | |} | ||
{| class="wikitable" | {| class="wikitable" | ||
| Line 206: | Line 209: | ||
| rowspan=4 |[[File:Summer Crops Bundle.png|center]] | | rowspan=4 |[[File:Summer Crops Bundle.png|center]] | ||
| rowspan=4 id="cellmiddle" |[[File:Bundle Slot.png|center|link=]][[File:Bundle Slot.png|center|link=]][[File:Bundle Slot.png|center|link=]][[File:Bundle Slot.png|center|link=]] | | rowspan=4 id="cellmiddle" |[[File:Bundle Slot.png|center|link=]][[File:Bundle Slot.png|center|link=]][[File:Bundle Slot.png|center|link=]][[File:Bundle Slot.png|center|link=]] | ||
| − | |{{ | + | |{{name|Tomato|link=Tomato}} |
| id="cellstretch" |[[crops|Crops]] during [[Summer]]. | | id="cellstretch" |[[crops|Crops]] during [[Summer]]. | ||
|- | |- | ||
| − | |{{ | + | |{{name|Hot Pepper|link=Hot Pepper}} |
|[[crops|Crops]] during [[Summer]]. | |[[crops|Crops]] during [[Summer]]. | ||
|- | |- | ||
| − | |{{ | + | |{{name|Blueberry|link=Blueberry}} |
|[[crops|Crops]] during [[Summer]]. | |[[crops|Crops]] during [[Summer]]. | ||
|- | |- | ||
| − | |{{ | + | |{{name|Melon|link=Melon}} |
|[[crops|Crops]] during [[Summer]]. | |[[crops|Crops]] during [[Summer]]. | ||
|- | |- | ||
| colspan=2 id="cellcenter" |[[File:Bundle Reward.png|18px|link=]] Reward: | | colspan=2 id="cellcenter" |[[File:Bundle Reward.png|18px|link=]] Reward: | ||
| − | | colspan=2 | {{ | + | | colspan=2 | {{name|Quality Sprinkler|link=Quality Sprinkler}} |
|} | |} | ||
{| class="wikitable" | {| class="wikitable" | ||
| Line 226: | Line 229: | ||
| rowspan=4 |[[File:Fall Crops Bundle.png|center]] | | rowspan=4 |[[File:Fall Crops Bundle.png|center]] | ||
| rowspan=4 id="cellmiddle" |[[File:Bundle Slot.png|center|link=]][[File:Bundle Slot.png|center|link=]][[File:Bundle Slot.png|center|link=]][[File:Bundle Slot.png|center|link=]] | | rowspan=4 id="cellmiddle" |[[File:Bundle Slot.png|center|link=]][[File:Bundle Slot.png|center|link=]][[File:Bundle Slot.png|center|link=]][[File:Bundle Slot.png|center|link=]] | ||
| − | |{{ | + | |{{name|Corn|link=Corn}} |
| id="cellstretch" |[[crops|Crops]] during [[Summer]] and [[Fall]]. | | id="cellstretch" |[[crops|Crops]] during [[Summer]] and [[Fall]]. | ||
|- | |- | ||
| − | |{{ | + | |{{name|Eggplant|link=Eggplant}} |
|[[crops|Crops]] during [[Fall]]. | |[[crops|Crops]] during [[Fall]]. | ||
|- | |- | ||
| − | |{{ | + | |{{name|Pumpkin|link=Pumpkin}} |
|[[crops|Crops]] during [[Fall]]. | |[[crops|Crops]] during [[Fall]]. | ||
|- | |- | ||
| − | |{{ | + | |{{name|Yam|link=Yam}} |
|[[crops|Crops]] during [[Fall]]. | |[[crops|Crops]] during [[Fall]]. | ||
|- | |- | ||
| colspan=2 id="cellcenter" |[[File:Bundle Reward.png|18px|link=]] Reward: | | colspan=2 id="cellcenter" |[[File:Bundle Reward.png|18px|link=]] Reward: | ||
| − | | colspan=2 | {{ | + | | colspan=2 | {{name|Bee House|link=Bee House}} |
|} | |} | ||
{| class="wikitable" | {| class="wikitable" | ||
| Line 259: | Line 262: | ||
|- | |- | ||
| colspan=2 id="cellcenter" |[[File:Bundle Reward.png|18px|link=]] Reward: | | colspan=2 id="cellcenter" |[[File:Bundle Reward.png|18px|link=]] Reward: | ||
| − | | colspan=2 | {{ | + | | colspan=2 | {{name|Preserves Jar|link=Preserves Jar}} |
|} | |} | ||
{| class="wikitable" | {| class="wikitable" | ||
| Line 266: | Line 269: | ||
| rowspan=6 |[[File:Animal Bundle.png|center]] | | rowspan=6 |[[File:Animal Bundle.png|center]] | ||
| rowspan=6 id="cellmiddle" |[[File:Bundle Slot.png|center|link=]][[File:Bundle Slot.png|center|link=]][[File:Bundle Slot.png|center|link=]][[File:Bundle Slot.png|center|link=]][[File:Bundle Slot.png|center|link=]] | | rowspan=6 id="cellmiddle" |[[File:Bundle Slot.png|center|link=]][[File:Bundle Slot.png|center|link=]][[File:Bundle Slot.png|center|link=]][[File:Bundle Slot.png|center|link=]][[File:Bundle Slot.png|center|link=]] | ||
| − | |{{ | + | |{{name|Large Milk}} |
| id="cellstretch" |[[Cow|Cows]] | | id="cellstretch" |[[Cow|Cows]] | ||
|- | |- | ||
| − | |{{ | + | |{{name|Large Brown Egg|link=Large Egg|Brown}} |
|[[Chicken|Chickens]] | |[[Chicken|Chickens]] | ||
|- | |- | ||
| − | |{{ | + | |{{name|Large Egg}} |
|[[Chicken|Chickens]] | |[[Chicken|Chickens]] | ||
|- | |- | ||
| − | |{{ | + | |{{name|Large Goat Milk}} |
|[[Goat|Goats]] | |[[Goat|Goats]] | ||
|- | |- | ||
| − | |{{ | + | |{{name|Wool}} |
|[[Sheep]], [[Rabbit|Rabbits]] | |[[Sheep]], [[Rabbit|Rabbits]] | ||
|- | |- | ||
| − | |{{ | + | |{{name|Duck Egg}} |
|[[Duck|Ducks]] | |[[Duck|Ducks]] | ||
|- | |- | ||
| colspan=2 id="cellcenter" |[[File:Bundle Reward.png|18px|link=]] Reward: | | colspan=2 id="cellcenter" |[[File:Bundle Reward.png|18px|link=]] Reward: | ||
| − | | colspan=2 | {{ | + | | colspan=2 | {{name|Cheese Press|link=Cheese Press}} |
|} | |} | ||
{| class="wikitable" | {| class="wikitable" | ||
| Line 292: | Line 295: | ||
| rowspan=12 |[[File:Artisan Bundle.png|center]] | | rowspan=12 |[[File:Artisan Bundle.png|center]] | ||
| rowspan=12 |[[File:Bundle Slot.png|center|link=]][[File:Bundle Slot.png|center|link=]][[File:Bundle Slot.png|center|link=]][[File:Bundle Slot.png|center|link=]][[File:Bundle Slot.png|center|link=]][[File:Bundle Slot.png|center|link=]] | | rowspan=12 |[[File:Bundle Slot.png|center|link=]][[File:Bundle Slot.png|center|link=]][[File:Bundle Slot.png|center|link=]][[File:Bundle Slot.png|center|link=]][[File:Bundle Slot.png|center|link=]][[File:Bundle Slot.png|center|link=]] | ||
| − | |{{ | + | |{{name|Truffle Oil|link=Truffle Oil}} |
| id="cellstretch" |Made from Truffles. Requires [[Oil Maker]]. | | id="cellstretch" |Made from Truffles. Requires [[Oil Maker]]. | ||
|- | |- | ||
| − | |{{ | + | |{{name|Cloth|link=Cloth}} |
|Made from Wool. Requires [[Loom]]. Can also be rarely obtained by Recycling [[Soggy Newspaper]]. | |Made from Wool. Requires [[Loom]]. Can also be rarely obtained by Recycling [[Soggy Newspaper]]. | ||
|- | |- | ||
| − | |{{ | + | |{{name|Goat Cheese}} |
|Made from Goat Milk. Requires [[Cheese Press]]. | |Made from Goat Milk. Requires [[Cheese Press]]. | ||
|- | |- | ||
| − | |{{ | + | |{{name|Cheese}} |
|Made from Cow Milk. Requires [[Cheese Press]]. | |Made from Cow Milk. Requires [[Cheese Press]]. | ||
|- | |- | ||
| − | |{{ | + | |{{name|Honey}} |
|Produced by Bees. Requires [[Bee House]]. | |Produced by Bees. Requires [[Bee House]]. | ||
|- | |- | ||
| − | |{{ | + | |{{name|Jelly}} |
|Made from any Fruit. Requires [[Preserves Jar]]. | |Made from any Fruit. Requires [[Preserves Jar]]. | ||
|- | |- | ||
| − | |{{ | + | |{{name|Apple}} |
|Gathered from Apple Trees during [[Fall]] or found in farm cave if fruit perk selected.. | |Gathered from Apple Trees during [[Fall]] or found in farm cave if fruit perk selected.. | ||
|- | |- | ||
| − | |{{ | + | |{{name|Apricot}} |
|Gathered from Apricot Trees during [[Spring]] or found in farm cave if fruit perk selected.. | |Gathered from Apricot Trees during [[Spring]] or found in farm cave if fruit perk selected.. | ||
|- | |- | ||
| − | |{{ | + | |{{name|Orange}} |
|Gathered from Orange Trees during [[Summer]] or found in farm cave if fruit perk selected. | |Gathered from Orange Trees during [[Summer]] or found in farm cave if fruit perk selected. | ||
|- | |- | ||
| − | |{{ | + | |{{name|Peach}} |
|Gathered from Peach Trees during [[Summer]]. | |Gathered from Peach Trees during [[Summer]]. | ||
|- | |- | ||
| − | |{{ | + | |{{name|Pomegranate}} |
|Gathered from Pomegranate Trees during [[Fall]]. | |Gathered from Pomegranate Trees during [[Fall]]. | ||
|- | |- | ||
| − | |{{ | + | |{{name|Cherry}} |
|Gathered from Cherry Trees during [[Spring]] or found in farm cave if fruit perk selected. | |Gathered from Cherry Trees during [[Spring]] or found in farm cave if fruit perk selected. | ||
|- | |- | ||
| colspan=2 id="cellcenter" |[[File:Bundle Reward.png|18px|link=]] Reward: | | colspan=2 id="cellcenter" |[[File:Bundle Reward.png|18px|link=]] Reward: | ||
| − | | colspan=2 |{{ | + | | colspan=2 |{{name|Keg|link=Keg}} |
|} | |} | ||
|} | |} | ||
| − | == Fish Tank == | + | ==Fish Tank== |
| − | + | [[File:Community Center Fish Tank.png|right]] | |
| − | + | [[File:Finished Fish Tank.png|right]] | |
| − | |||
| − | |||
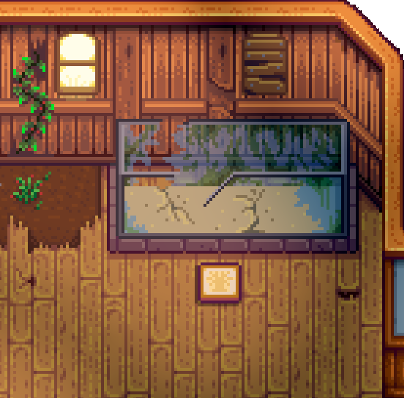
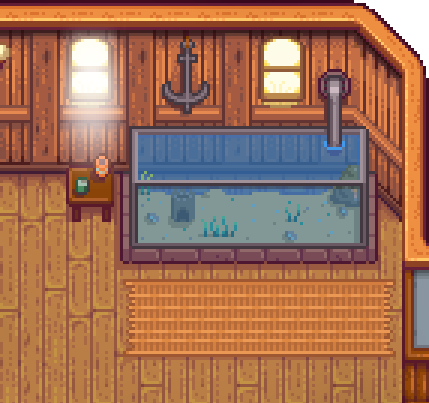
The Fish Tank appears after completing one bundle. These bundles are completed by collecting [[Fish|fish]]. This requires catching fish with a [[Rod]] or [[Crab Pot]]. Different fish can be caught in lakes, rivers, and oceans, as well as different times of day and year. | The Fish Tank appears after completing one bundle. These bundles are completed by collecting [[Fish|fish]]. This requires catching fish with a [[Rod]] or [[Crab Pot]]. Different fish can be caught in lakes, rivers, and oceans, as well as different times of day and year. | ||
| Line 343: | Line 344: | ||
Completing the Fish Tank bundles removes the Glittering Boulder next to the [[mines|mine]] entrance. [[Willy]] will give the player a [[Copper Pan]] which can be used to collect [[Blacksmith|ore]] from lakes and rivers. | Completing the Fish Tank bundles removes the Glittering Boulder next to the [[mines|mine]] entrance. [[Willy]] will give the player a [[Copper Pan]] which can be used to collect [[Blacksmith|ore]] from lakes and rivers. | ||
| − | {| | + | {| |
| − | |||
| − | |||
| | | | ||
| + | {| class="wikitable" | ||
| + | !Collection Reward: | ||
| + | | id="cellstretch" |Glittering Boulder Removed | ||
| + | |} | ||
{| class="wikitable" | {| class="wikitable" | ||
! colspan=4 |[[File:Bundle Teal.png|32px|link=]] <span id="River Fish Bundle">River Fish Bundle</span> | ! colspan=4 |[[File:Bundle Teal.png|32px|link=]] <span id="River Fish Bundle">River Fish Bundle</span> | ||
| Line 352: | Line 355: | ||
| rowspan=4 |[[File:River Fish Bundle.png|center]] | | rowspan=4 |[[File:River Fish Bundle.png|center]] | ||
| rowspan=4 |[[File:Bundle Slot.png|center|link=]][[File:Bundle Slot.png|center|link=]][[File:Bundle Slot.png|center|link=]][[File:Bundle Slot.png|center|link=]] | | rowspan=4 |[[File:Bundle Slot.png|center|link=]][[File:Bundle Slot.png|center|link=]][[File:Bundle Slot.png|center|link=]][[File:Bundle Slot.png|center|link=]] | ||
| − | |{{ | + | |{{name|Sunfish|link=Sunfish}} |
| id="cellstretch" |Found in Rivers, 6:00 AM – 7:00 PM, [[Spring]], and [[Summer]]. | | id="cellstretch" |Found in Rivers, 6:00 AM – 7:00 PM, [[Spring]], and [[Summer]]. | ||
|- | |- | ||
| − | |{{ | + | |{{name|Catfish|link=Catfish}} |
|Found in Rivers, Anytime, [[Spring]] and [[Fall]]. Only when raining. | |Found in Rivers, Anytime, [[Spring]] and [[Fall]]. Only when raining. | ||
|- | |- | ||
| − | |{{ | + | |{{name|Shad|link=Shad}} |
|Found in Rivers, Anytime, [[Spring]], [[Summer]], and [[Fall]]. Only when raining. | |Found in Rivers, Anytime, [[Spring]], [[Summer]], and [[Fall]]. Only when raining. | ||
|- | |- | ||
| − | |{{ | + | |{{name|Tiger Trout|link=Tiger Trout}} |
|Found in Rivers, 6:00 AM – 7:00 PM, [[Fall]] and [[Winter]]. | |Found in Rivers, 6:00 AM – 7:00 PM, [[Fall]] and [[Winter]]. | ||
|- | |- | ||
| Line 372: | Line 375: | ||
| rowspan=4 |[[File:Lake Fish Bundle.png|center]] | | rowspan=4 |[[File:Lake Fish Bundle.png|center]] | ||
| rowspan=4 |[[File:Bundle Slot.png|center|link=]][[File:Bundle Slot.png|center|link=]][[File:Bundle Slot.png|center|link=]][[File:Bundle Slot.png|center|link=]] | | rowspan=4 |[[File:Bundle Slot.png|center|link=]][[File:Bundle Slot.png|center|link=]][[File:Bundle Slot.png|center|link=]][[File:Bundle Slot.png|center|link=]] | ||
| − | |{{ | + | |{{name|Largemouth Bass|link=Largemouth Bass}} |
| id="cellstretch" |Found in Lakes, 6:00 AM – 7:00 PM, All Seasons. | | id="cellstretch" |Found in Lakes, 6:00 AM – 7:00 PM, All Seasons. | ||
|- | |- | ||
| − | |{{ | + | |{{name|Carp|link=Carp}} |
|Found in Lakes, Anytime, [[Spring]], [[Summer]], and [[Fall]]. | |Found in Lakes, Anytime, [[Spring]], [[Summer]], and [[Fall]]. | ||
|- | |- | ||
| − | |{{ | + | |{{name|Bullhead|link=Bullhead}} |
|Found in Lakes, Anytime, All Seasons. | |Found in Lakes, Anytime, All Seasons. | ||
|- | |- | ||
| − | |{{ | + | |{{name|Sturgeon|link=Sturgeon}} |
|Found in Lakes, 6:00 AM – 7:00 PM , [[Summer]] and [[Winter]]. | |Found in Lakes, 6:00 AM – 7:00 PM , [[Summer]] and [[Winter]]. | ||
|- | |- | ||
| colspan=2 id="cellcenter" |[[File:Bundle Reward.png|18px|link=]] Reward: | | colspan=2 id="cellcenter" |[[File:Bundle Reward.png|18px|link=]] Reward: | ||
| − | | colspan=2 | {{ | + | | colspan=2 | {{name|Dressed Spinner|link=Dressed Spinner}} |
|} | |} | ||
{| class="wikitable" | {| class="wikitable" | ||
| Line 392: | Line 395: | ||
| rowspan=4 |[[File:Ocean Fish Bundle.png|center]] | | rowspan=4 |[[File:Ocean Fish Bundle.png|center]] | ||
| rowspan=4 id="cellmiddle" |[[File:Bundle Slot.png|center|link=]][[File:Bundle Slot.png|center|link=]][[File:Bundle Slot.png|center|link=]][[File:Bundle Slot.png|center|link=]] | | rowspan=4 id="cellmiddle" |[[File:Bundle Slot.png|center|link=]][[File:Bundle Slot.png|center|link=]][[File:Bundle Slot.png|center|link=]][[File:Bundle Slot.png|center|link=]] | ||
| − | |{{ | + | |{{name|Sardine|link=Sardine}} |
| id="cellstretch" |Found in the Ocean, 6:00 AM – 7:00 PM, [[Spring]], [[Fall]], and [[Winter]]. | | id="cellstretch" |Found in the Ocean, 6:00 AM – 7:00 PM, [[Spring]], [[Fall]], and [[Winter]]. | ||
|- | |- | ||
| − | |{{ | + | |{{name|Tuna|link=Tuna}} |
|Found in the Ocean, 6:00 AM – 7:00 PM, [[Summer]] and [[Winter]]. | |Found in the Ocean, 6:00 AM – 7:00 PM, [[Summer]] and [[Winter]]. | ||
|- | |- | ||
| − | |{{ | + | |{{name|Red Snapper|link=Red Snapper}} |
|Found in the Ocean, 6:00 AM – 7:00 PM, [[Summer]] and [[Fall]]. Only when raining. | |Found in the Ocean, 6:00 AM – 7:00 PM, [[Summer]] and [[Fall]]. Only when raining. | ||
|- | |- | ||
| − | |{{ | + | |{{name|Tilapia|link=Tilapia}} |
|Found in the Ocean, 6:00 AM – 2:00 PM, [[Summer]] and [[Fall]]. | |Found in the Ocean, 6:00 AM – 2:00 PM, [[Summer]] and [[Fall]]. | ||
|- | |- | ||
| Line 412: | Line 415: | ||
| rowspan=3 |[[File:Night Fishing Bundle.png|center]] | | rowspan=3 |[[File:Night Fishing Bundle.png|center]] | ||
| rowspan=3 id="cellmiddle" |[[File:Bundle Slot.png|center|link=]][[File:Bundle Slot.png|center|link=]][[File:Bundle Slot.png|center|link=]] | | rowspan=3 id="cellmiddle" |[[File:Bundle Slot.png|center|link=]][[File:Bundle Slot.png|center|link=]][[File:Bundle Slot.png|center|link=]] | ||
| − | |{{ | + | |{{name|Walleye|link=Walleye}} |
|Found in Rivers, 12:00 PM – 2:00 AM, [[Fall]]. Only when raining. | |Found in Rivers, 12:00 PM – 2:00 AM, [[Fall]]. Only when raining. | ||
|- | |- | ||
| − | |{{ | + | |{{name|Bream|link=Bream}} |
|Found in Rivers, 6:00 PM – 2:00 AM, All Seasons. | |Found in Rivers, 6:00 PM – 2:00 AM, All Seasons. | ||
|- | |- | ||
| − | |{{ | + | |{{name|Eel|link=Eel}} |
|Found in the Ocean, 4:00 PM – 2:00 AM, [[Spring]] or [[Fall]]. Only when raining. | |Found in the Ocean, 4:00 PM – 2:00 AM, [[Spring]] or [[Fall]]. Only when raining. | ||
|- | |- | ||
| colspan=2 id="cellcenter" |[[File:Bundle Reward.png|18px|link=]] Reward: | | colspan=2 id="cellcenter" |[[File:Bundle Reward.png|18px|link=]] Reward: | ||
| − | | colspan=2 | {{ | + | | colspan=2 | {{name|Small Glow Ring|link=Small Glow Ring}} |
|} | |} | ||
{| class="wikitable" | {| class="wikitable" | ||
| Line 429: | Line 432: | ||
| rowspan=10 |[[File:Crab Pot Bundle.png|center]] | | rowspan=10 |[[File:Crab Pot Bundle.png|center]] | ||
| rowspan=10 id="cellmiddle" |[[File:Bundle Slot.png|center|link=]][[File:Bundle Slot.png|center|link=]][[File:Bundle Slot.png|center|link=]][[File:Bundle Slot.png|center|link=]][[File:Bundle Slot.png|center|link=]] | | rowspan=10 id="cellmiddle" |[[File:Bundle Slot.png|center|link=]][[File:Bundle Slot.png|center|link=]][[File:Bundle Slot.png|center|link=]][[File:Bundle Slot.png|center|link=]][[File:Bundle Slot.png|center|link=]] | ||
| − | |{{ | + | |{{name|Lobster|link=Lobster}} |
| id="cellstretch" |Gathered from Crab Pots. | | id="cellstretch" |Gathered from Crab Pots. | ||
|- | |- | ||
| − | |{{ | + | |{{name|Crayfish|link=Crayfish}} |
|Gathered from Crab Pots. | |Gathered from Crab Pots. | ||
|- | |- | ||
| − | |{{ | + | |{{name|Crab|link=Crab}} |
|Gathered from Crab Pots. Also drops from killing hermit crabs in The Mines. | |Gathered from Crab Pots. Also drops from killing hermit crabs in The Mines. | ||
|- | |- | ||
| − | |{{ | + | |{{name|Cockle|link=Cockle}} |
|Gathered from Crab Pots. Can be foraged from areas with sand. | |Gathered from Crab Pots. Can be foraged from areas with sand. | ||
|- | |- | ||
| − | |{{ | + | |{{name|Mussel|link=Mussel}} |
|Gathered from Crab Pots. Can be foraged from areas with sand. | |Gathered from Crab Pots. Can be foraged from areas with sand. | ||
|- | |- | ||
| − | |{{ | + | |{{name|Shrimp|link=Shrimp}} |
|Gathered from Crab Pots. | |Gathered from Crab Pots. | ||
|- | |- | ||
| − | |{{ | + | |{{name|Snail|link=Snail}} |
|Gathered from Crab Pots. | |Gathered from Crab Pots. | ||
|- | |- | ||
| − | |{{ | + | |{{name|Periwinkle|link=Periwinkle}} |
|Gathered from Crab Pots. | |Gathered from Crab Pots. | ||
|- | |- | ||
| − | |{{ | + | |{{name|Oyster|link=Oyster}} |
|Gathered from Crab Pots. Can be foraged from areas with sand. | |Gathered from Crab Pots. Can be foraged from areas with sand. | ||
|- | |- | ||
| − | |{{ | + | |{{name|Clam|link=Clam}} |
|Gathered from Crab Pots. Can be foraged from areas with sand. | |Gathered from Crab Pots. Can be foraged from areas with sand. | ||
|- | |- | ||
| colspan=2 id="cellcenter" |[[File:Bundle Reward.png|18px|link=]] Reward: | | colspan=2 id="cellcenter" |[[File:Bundle Reward.png|18px|link=]] Reward: | ||
| − | | colspan=2 | {{ | + | | colspan=2 | {{name|Crab Pot|3}} |
|} | |} | ||
{| class="wikitable" | {| class="wikitable" | ||
| Line 467: | Line 470: | ||
| rowspan=4 |[[File:Specialty Fish Bundle.png|center]] | | rowspan=4 |[[File:Specialty Fish Bundle.png|center]] | ||
| rowspan=4 id="cellmiddle" |[[File:Bundle Slot.png|center|link=]][[File:Bundle Slot.png|center|link=]][[File:Bundle Slot.png|center|link=]][[File:Bundle Slot.png|center|link=]] | | rowspan=4 id="cellmiddle" |[[File:Bundle Slot.png|center|link=]][[File:Bundle Slot.png|center|link=]][[File:Bundle Slot.png|center|link=]][[File:Bundle Slot.png|center|link=]] | ||
| − | |{{ | + | |{{name|Pufferfish|link=Pufferfish}} |
| id="cellstretch" |Found in the Ocean, 12:00 PM – 4:00 PM, [[Summer]]. | | id="cellstretch" |Found in the Ocean, 12:00 PM – 4:00 PM, [[Summer]]. | ||
|- | |- | ||
| − | |{{ | + | |{{name|Ghostfish|link=Ghostfish}} |
|Found in ponds in [[The Mines]], Anytime, All Seasons. May also be dropped by [[Ghost|Ghosts]]. | |Found in ponds in [[The Mines]], Anytime, All Seasons. May also be dropped by [[Ghost|Ghosts]]. | ||
|- | |- | ||
| − | |{{ | + | |{{name|Sandfish|link=Sandfish}} |
|Found in the pond at [[Calico Desert]], 6:00 AM – 10:00 PM, All Seasons. | |Found in the pond at [[Calico Desert]], 6:00 AM – 10:00 PM, All Seasons. | ||
|- | |- | ||
| − | |{{ | + | |{{name|Woodskip|link=Woodskip}} |
|Found in the [[Secret Woods]], Anytime, All Seasons. | |Found in the [[Secret Woods]], Anytime, All Seasons. | ||
|- | |- | ||
| colspan=2 id="cellcenter" |[[File:Bundle Reward.png|18px|link=]] Reward: | | colspan=2 id="cellcenter" |[[File:Bundle Reward.png|18px|link=]] Reward: | ||
| − | | colspan=2 | {{ | + | | colspan=2 | {{name|Dish o' The Sea|5}} |
|} | |} | ||
|} | |} | ||
| − | == Boiler Room == | + | ==Boiler Room== |
| − | + | [[File:Community Center Boiler Room.png|right]] | |
| − | + | [[File:Finished Boiler Room.png|right]] | |
| − | |||
| − | |||
The Boiler Room appears after completing two bundles. | The Boiler Room appears after completing two bundles. | ||
| Line 494: | Line 495: | ||
Completing the Boiler Room bundles repairs the [[Mine Cart]]s, allowing the player to fast travel between distant locations in [[Pelican Town]]. | Completing the Boiler Room bundles repairs the [[Mine Cart]]s, allowing the player to fast travel between distant locations in [[Pelican Town]]. | ||
| − | {| | + | {| |
| − | |||
| − | |||
| | | | ||
| + | {| class="wikitable" | ||
| + | !Collection Reward: | ||
| + | | id="cellstretch" |[[Mine Cart]]s Repaired | ||
| + | |} | ||
{| class="wikitable" | {| class="wikitable" | ||
! colspan=4 |[[File:Bundle Orange.png|32px|link=]] <span id="Blacksmiths Bundle">Blacksmith's Bundle</span> | ! colspan=4 |[[File:Bundle Orange.png|32px|link=]] <span id="Blacksmiths Bundle">Blacksmith's Bundle</span> | ||
| Line 503: | Line 506: | ||
| rowspan=3 |[[File:Blacksmith Bundle.png|center]] | | rowspan=3 |[[File:Blacksmith Bundle.png|center]] | ||
| rowspan=3 |[[File:Bundle Slot.png|center|link=]][[File:Bundle Slot.png|center|link=]][[File:Bundle Slot.png|center|link=]] | | rowspan=3 |[[File:Bundle Slot.png|center|link=]][[File:Bundle Slot.png|center|link=]][[File:Bundle Slot.png|center|link=]] | ||
| − | |{{ | + | |{{name|Copper Bar|link=Copper Bar}} |
| id="cellstretch" | Smelting [[Copper Ore]] in the [[furnace]]. | | id="cellstretch" | Smelting [[Copper Ore]] in the [[furnace]]. | ||
|- | |- | ||
| − | |{{ | + | |{{name|Iron Bar|link=Iron Bar}} |
| Smelting [[Iron Ore]] in the [[furnace]]. | | Smelting [[Iron Ore]] in the [[furnace]]. | ||
|- | |- | ||
| − | |{{ | + | |{{name|Gold Bar|link=Gold Bar}} |
| Smelting [[Gold Ore]] in the [[furnace]]. | | Smelting [[Gold Ore]] in the [[furnace]]. | ||
|- | |- | ||
| colspan=2 id="cellcenter" |[[File:Bundle Reward.png|18px|link=]] Reward: | | colspan=2 id="cellcenter" |[[File:Bundle Reward.png|18px|link=]] Reward: | ||
| − | | colspan=2 | {{ | + | | colspan=2 | {{name|Furnace|link=Furnace}} |
|} | |} | ||
{| class="wikitable" | {| class="wikitable" | ||
| Line 520: | Line 523: | ||
| rowspan=4 |[[File:Geologist's Bundle.png|center]] | | rowspan=4 |[[File:Geologist's Bundle.png|center]] | ||
| rowspan=4 |[[File:Bundle Slot.png|center|link=]][[File:Bundle Slot.png|center|link=]][[File:Bundle Slot.png|center|link=]][[File:Bundle Slot.png|center|link=]] | | rowspan=4 |[[File:Bundle Slot.png|center|link=]][[File:Bundle Slot.png|center|link=]][[File:Bundle Slot.png|center|link=]][[File:Bundle Slot.png|center|link=]] | ||
| − | |{{ | + | |{{name|Quartz|link=Quartz}} |
| id="cellstretch" | Found on all levels of [[The Mines]] and in geodes. | | id="cellstretch" | Found on all levels of [[The Mines]] and in geodes. | ||
|- | |- | ||
| − | |{{ | + | |{{name|Earth Crystal|link=Earth Crystal}} |
| Found on levels 1 - 39 of [[The Mines]] and in geodes. | | Found on levels 1 - 39 of [[The Mines]] and in geodes. | ||
|- | |- | ||
| − | |{{ | + | |{{name|Frozen Tear|link=Frozen Tear}} |
|Found on levels 40 - 79 of [[The Mines]] and in geodes. | |Found on levels 40 - 79 of [[The Mines]] and in geodes. | ||
|- | |- | ||
| − | |{{ | + | |{{name|Fire Quartz|link=Fire Quartz}} |
|Found on levels 80 - 120 of [[The Mines]] and in magma geodes. | |Found on levels 80 - 120 of [[The Mines]] and in magma geodes. | ||
|- | |- | ||
| colspan=2 id="cellcenter" |[[File:Bundle Reward.png|18px|link=]] Reward: | | colspan=2 id="cellcenter" |[[File:Bundle Reward.png|18px|link=]] Reward: | ||
| − | | colspan=2 | {{ | + | | colspan=2 | {{name|Omni Geode|5}} |
|} | |} | ||
{| class="wikitable" | {| class="wikitable" | ||
| Line 540: | Line 543: | ||
| rowspan=4 |[[File:Adventurer's Bundle.png|center]] | | rowspan=4 |[[File:Adventurer's Bundle.png|center]] | ||
| rowspan=4 |[[File:Bundle Slot.png|center|link=]][[File:Bundle Slot.png|center|link=]] | | rowspan=4 |[[File:Bundle Slot.png|center|link=]][[File:Bundle Slot.png|center|link=]] | ||
| − | |{{ | + | |{{name|Slime|99}} |
| id="cellstretch" | Dropped by [[Slimes]] in [[The Mines]]. | | id="cellstretch" | Dropped by [[Slimes]] in [[The Mines]]. | ||
|- | |- | ||
| − | |{{ | + | |{{name|Bat Wing|10}} |
| Dropped by [[Bats]] in [[The Mines]]. | | Dropped by [[Bats]] in [[The Mines]]. | ||
|- | |- | ||
| − | |{{ | + | |{{name|Solar Essence|link=Solar Essence}} |
| Dropped by [[Ghost]]s, [[Squid Kid]]s or [[Metal Head]]s in [[The Mines]] or [[Mummy]]s in the [[Skull Cavern]]. | | Dropped by [[Ghost]]s, [[Squid Kid]]s or [[Metal Head]]s in [[The Mines]] or [[Mummy]]s in the [[Skull Cavern]]. | ||
|- | |- | ||
| − | |{{ | + | |{{name|Void Essence|link=Void Essence}} |
|Dropped by [[Shadow Brute]]s in [[The Mines]] or [[Serpent]]s in the [[Skull Cavern]]. | |Dropped by [[Shadow Brute]]s in [[The Mines]] or [[Serpent]]s in the [[Skull Cavern]]. | ||
|- | |- | ||
| colspan=2 id="cellcenter" |[[File:Bundle Reward.png|18px|link=]] Reward: | | colspan=2 id="cellcenter" |[[File:Bundle Reward.png|18px|link=]] Reward: | ||
| − | | colspan=2 | {{ | + | | colspan=2 | {{name|Small Magnet Ring|link=Small Magnet Ring}} |
|} | |} | ||
|} | |} | ||
| − | == Bulletin Board == | + | ==Bulletin Board== |
| − | + | [[File:Community Center Bulletin Board.png|right]] | |
| − | + | [[File:Finished Bulletin Board.png|right]] | |
| − | |||
| − | |||
The Bulletin Board appears after completing three bundles. | The Bulletin Board appears after completing three bundles. | ||
| Line 567: | Line 568: | ||
Completing the Bulletin Board bundles improves the player's [[friendship]] rating with every [[non marriage candidate]] villager by two hearts. The morning after, Mayor [[Lewis]] will send you a mail saying that all the [[villagers]] have been getting items they have wanted for years that they posted on the bulletin board in the community center. He exclaims his gratitude of all your hard work. | Completing the Bulletin Board bundles improves the player's [[friendship]] rating with every [[non marriage candidate]] villager by two hearts. The morning after, Mayor [[Lewis]] will send you a mail saying that all the [[villagers]] have been getting items they have wanted for years that they posted on the bulletin board in the community center. He exclaims his gratitude of all your hard work. | ||
| − | {| | + | {| |
| − | |||
| − | |||
| | | | ||
| + | {| class="wikitable" | ||
| + | !Collection Reward: | ||
| + | | id="cellstretch" |Friendship | ||
| + | |} | ||
{| class="wikitable" | {| class="wikitable" | ||
! colspan=4 |[[File:Bundle Red.png|32px|link=]] <span id="Chefs Bundle">Chef's Bundle</span> | ! colspan=4 |[[File:Bundle Red.png|32px|link=]] <span id="Chefs Bundle">Chef's Bundle</span> | ||
| Line 576: | Line 579: | ||
| rowspan=6 |[[File:Chef's Bundle.png|center]] | | rowspan=6 |[[File:Chef's Bundle.png|center]] | ||
| rowspan=6 |[[File:Bundle Slot.png|center|link=]][[File:Bundle Slot.png|center|link=]][[File:Bundle Slot.png|center|link=]][[File:Bundle Slot.png|center|link=]][[File:Bundle Slot.png|center|link=]][[File:Bundle Slot.png|center|link=]] | | rowspan=6 |[[File:Bundle Slot.png|center|link=]][[File:Bundle Slot.png|center|link=]][[File:Bundle Slot.png|center|link=]][[File:Bundle Slot.png|center|link=]][[File:Bundle Slot.png|center|link=]][[File:Bundle Slot.png|center|link=]] | ||
| − | |{{ | + | |{{name|Maple Syrup|link=Maple Syrup}} |
| id="cellstretch" | Harvested from maple trees using a Tapper. | | id="cellstretch" | Harvested from maple trees using a Tapper. | ||
|- | |- | ||
| − | |{{ | + | |{{name|Fiddlehead Fern|link=Fiddlehead Fern}} |
| Found in the [[Secret Woods]] during Summer. | | Found in the [[Secret Woods]] during Summer. | ||
|- | |- | ||
| − | |{{ | + | |{{name|Truffle|link=Truffle}} |
| Found by [[pigs]] while grazing outdoors. | | Found by [[pigs]] while grazing outdoors. | ||
|- | |- | ||
| − | |{{ | + | |{{name|Poppy|link=Poppy}} |
| [[Crops]] during [[Summer]]. | | [[Crops]] during [[Summer]]. | ||
|- | |- | ||
| − | |{{ | + | |{{name|Maki Roll|link=Maki Roll}} |
| Acquired by [[Cooking]] (recipe necessary). | | Acquired by [[Cooking]] (recipe necessary). | ||
|- | |- | ||
| − | |{{ | + | |{{name|Fried Egg|link=Fried Egg}} |
| Acquired by [[Cooking]] (recipe necessary). | | Acquired by [[Cooking]] (recipe necessary). | ||
|- | |- | ||
| colspan=2 id="cellcenter" |[[File:Bundle Reward.png|18px|link=]] Reward: | | colspan=2 id="cellcenter" |[[File:Bundle Reward.png|18px|link=]] Reward: | ||
| − | | colspan=2 |{{ | + | | colspan=2 |{{name|Pink Cake|x3}} |
|} | |} | ||
{| class="wikitable" | {| class="wikitable" | ||
| Line 602: | Line 605: | ||
| rowspan=6 |[[File:Dye Bundle.png|center]] | | rowspan=6 |[[File:Dye Bundle.png|center]] | ||
| rowspan=6 |[[File:Bundle Slot.png|center|link=]][[File:Bundle Slot.png|center|link=]][[File:Bundle Slot.png|center|link=]][[File:Bundle Slot.png|center|link=]][[File:Bundle Slot.png|center|link=]][[File:Bundle Slot.png|center|link=]] | | rowspan=6 |[[File:Bundle Slot.png|center|link=]][[File:Bundle Slot.png|center|link=]][[File:Bundle Slot.png|center|link=]][[File:Bundle Slot.png|center|link=]][[File:Bundle Slot.png|center|link=]][[File:Bundle Slot.png|center|link=]] | ||
| − | |{{ | + | |{{name|Red Mushroom|link=Red Mushroom}} |
| id="cellstretch" | Found by chopping down giant mushrooms on the farm, by harvesting in [[The Cave]] if you chose the mushroom upgrade for it, or by foraging in the mines. (Frequent in depths 105 to 120) | | id="cellstretch" | Found by chopping down giant mushrooms on the farm, by harvesting in [[The Cave]] if you chose the mushroom upgrade for it, or by foraging in the mines. (Frequent in depths 105 to 120) | ||
|- | |- | ||
| − | |{{ | + | |{{name|Sea Urchin|link=Sea Urchin}} |
| Can be [[Foraging|foraged]] on the far right side of the beach, accessible after using 300 wood to fix the bridge. | | Can be [[Foraging|foraged]] on the far right side of the beach, accessible after using 300 wood to fix the bridge. | ||
|- | |- | ||
| − | |{{ | + | |{{name|Sunflower|link=Sunflower}} |
| [[Crops]] during [[Summer]] and [[Fall]]. | | [[Crops]] during [[Summer]] and [[Fall]]. | ||
|- | |- | ||
| − | |{{ | + | |{{name|Duck Feather|link=Duck Feather}} |
| Produced by [[ducks]] in the [[coop]] (similar to how [[chickens]] and [[ducks]] lay [[Egg|eggs]]) | | Produced by [[ducks]] in the [[coop]] (similar to how [[chickens]] and [[ducks]] lay [[Egg|eggs]]) | ||
|- | |- | ||
| − | |{{ | + | |{{name|Aquamarine|link=Aquamarine}} |
| Can be found in stones and boxes in [[The Mines]]. | | Can be found in stones and boxes in [[The Mines]]. | ||
|- | |- | ||
| − | |{{ | + | |{{name|Red Cabbage|link=Red Cabbage}} |
| [[Crops]] during the [[Summer]]. Seeds can be purchased from Pierre's Year 2 and onward. | | [[Crops]] during the [[Summer]]. Seeds can be purchased from Pierre's Year 2 and onward. | ||
|- | |- | ||
| colspan=2 id="cellcenter" |[[File:Bundle Reward.png|18px|link=]] Reward: | | colspan=2 id="cellcenter" |[[File:Bundle Reward.png|18px|link=]] Reward: | ||
| − | | colspan=2 |{{ | + | | colspan=2 |{{name|Seed Maker|link=Seed Maker}} |
|} | |} | ||
{| class="wikitable" | {| class="wikitable" | ||
| Line 628: | Line 631: | ||
| rowspan=4 |[[File:Field Research Bundle.png|center]] | | rowspan=4 |[[File:Field Research Bundle.png|center]] | ||
| rowspan=4 |[[File:Bundle Slot.png|center|link=]][[File:Bundle Slot.png|center|link=]][[File:Bundle Slot.png|center|link=]][[File:Bundle Slot.png|center|link=]] | | rowspan=4 |[[File:Bundle Slot.png|center|link=]][[File:Bundle Slot.png|center|link=]][[File:Bundle Slot.png|center|link=]][[File:Bundle Slot.png|center|link=]] | ||
| − | |{{ | + | |{{name|Purple Mushroom|link=Purple Mushroom}} |
| id="cellstretch" | Can be found deep in [[The Mines]] (83+) Can also be foraged from the [[Mushroom Cave]] if you chose that upgrade. | | id="cellstretch" | Can be found deep in [[The Mines]] (83+) Can also be foraged from the [[Mushroom Cave]] if you chose that upgrade. | ||
|- | |- | ||
| − | |{{ | + | |{{name|Nautilus Shell|link=Nautilus Shell}} |
|Note: The bundle wants the shell found by foraging on the beach in Winter, NOT the [[Nautilus Fossil]] artifact. | |Note: The bundle wants the shell found by foraging on the beach in Winter, NOT the [[Nautilus Fossil]] artifact. | ||
|- | |- | ||
| − | |{{ | + | |{{name|Chub|link=Chub}} |
|Can be found in the mountain lake and river during all seasons. | |Can be found in the mountain lake and river during all seasons. | ||
|- | |- | ||
| − | |{{ | + | |{{name|Frozen Geode|link=Frozen Geode}} |
|Found on levels 40-79 of [[The Mines]]. | |Found on levels 40-79 of [[The Mines]]. | ||
|- | |- | ||
| colspan=2 id="cellcenter" |[[File:Bundle Reward.png|18px|link=]] Reward: | | colspan=2 id="cellcenter" |[[File:Bundle Reward.png|18px|link=]] Reward: | ||
| − | | colspan=2 |{{ | + | | colspan=2 |{{name|Recycling Machine|link=Recycling Machine}} |
|} | |} | ||
{| class="wikitable" | {| class="wikitable" | ||
| Line 648: | Line 651: | ||
| rowspan=3 |[[File:Fodder Bundle.png|center]] | | rowspan=3 |[[File:Fodder Bundle.png|center]] | ||
| rowspan=3 |[[File:Bundle Slot.png|center|link=]][[File:Bundle Slot.png|center|link=]][[File:Bundle Slot.png|center|link=]] | | rowspan=3 |[[File:Bundle Slot.png|center|link=]][[File:Bundle Slot.png|center|link=]][[File:Bundle Slot.png|center|link=]] | ||
| − | |{{ | + | |{{name|Wheat|10}} |
| id="cellstretch" | [[Crops]] during [[Summer]] and [[Fall]]. | | id="cellstretch" | [[Crops]] during [[Summer]] and [[Fall]]. | ||
|- | |- | ||
| − | |{{ | + | |{{name|Hay|10}} |
| Purchased from Marnie at [[The Ranch]] or created by using the sickle on grass once you have a [[silo]]. | | Purchased from Marnie at [[The Ranch]] or created by using the sickle on grass once you have a [[silo]]. | ||
|- | |- | ||
| − | |{{ | + | |{{name|Apple|3}} |
| Gathered from Apple Trees during [[Fall]]. | | Gathered from Apple Trees during [[Fall]]. | ||
|- | |- | ||
| colspan=2 id="cellcenter" |[[File:Bundle Reward.png|18px|link=]] Reward: | | colspan=2 id="cellcenter" |[[File:Bundle Reward.png|18px|link=]] Reward: | ||
| − | | colspan=2 |{{ | + | | colspan=2 |{{name|Heater|link=Heater}} |
|} | |} | ||
{| class="wikitable" | {| class="wikitable" | ||
| Line 665: | Line 668: | ||
| rowspan=4 |[[File:Enchanter's Bundle.png|center]] | | rowspan=4 |[[File:Enchanter's Bundle.png|center]] | ||
| rowspan=4 |[[File:Bundle Slot.png|center|link=]][[File:Bundle Slot.png|center|link=]][[File:Bundle Slot.png|center|link=]][[File:Bundle Slot.png|center|link=]] | | rowspan=4 |[[File:Bundle Slot.png|center|link=]][[File:Bundle Slot.png|center|link=]][[File:Bundle Slot.png|center|link=]][[File:Bundle Slot.png|center|link=]] | ||
| − | |{{ | + | |{{name|Oak Resin|link=Oak Resin}} |
| id="cellstretch" | Harvested from oak trees using a Tapper. | | id="cellstretch" | Harvested from oak trees using a Tapper. | ||
|- | |- | ||
| − | |{{ | + | |{{name|Wine|link=Wine}} |
| Produced by putting most [[fruits]] into a [[keg]]. | | Produced by putting most [[fruits]] into a [[keg]]. | ||
|- | |- | ||
| − | |{{ | + | |{{name|Rabbit's Foot|link=Rabbit's Foot}} |
| Dropped by Rabbits in the [[Animals#Coops|Coop]], also dropped by a [[Serpent]] in [[Skull Cavern]] (0.8%). | | Dropped by Rabbits in the [[Animals#Coops|Coop]], also dropped by a [[Serpent]] in [[Skull Cavern]] (0.8%). | ||
|- | |- | ||
| − | |{{ | + | |{{name|Pomegranate|link=Pomegranate}} |
| Produced by Pomegranate Trees during [[Fall]] | | Produced by Pomegranate Trees during [[Fall]] | ||
|- | |- | ||
| colspan=2 id="cellcenter" |[[File:Bundle Reward.png|18px|link=]] Reward: | | colspan=2 id="cellcenter" |[[File:Bundle Reward.png|18px|link=]] Reward: | ||
| − | | colspan=2 |{{ | + | | colspan=2 |{{name|Gold Bar|5}} |
|} | |} | ||
|} | |} | ||
| Line 684: | Line 687: | ||
<div id = "Vault"></div> | <div id = "Vault"></div> | ||
| − | == Vault == | + | ==Vault== |
| − | + | [[File:Community Center Vault.png|right]] | |
| − | + | [[File:Finished Vault Room.png|right]] | |
| − | |||
| − | |||
The Vault becomes available after completing four bundles. Each bundle in the vault simply requires gold to complete, and the item slots are replaced with a large purchase button. Pressing 'purchase' will complete the bundle and deduct the gold from the player's total, provided they have enough. | The Vault becomes available after completing four bundles. Each bundle in the vault simply requires gold to complete, and the item slots are replaced with a large purchase button. Pressing 'purchase' will complete the bundle and deduct the gold from the player's total, provided they have enough. | ||
| Line 694: | Line 695: | ||
Completing the Vault bundles, costing a total of {{Price|42500}}, repairs the Bus on the road between your farm and Pelican Town. Taking the Bus grants access to the [[Calico Desert]]. | Completing the Vault bundles, costing a total of {{Price|42500}}, repairs the Bus on the road between your farm and Pelican Town. Taking the Bus grants access to the [[Calico Desert]]. | ||
| − | {| | + | {| |
| − | |||
| − | |||
| | | | ||
| + | {| class="wikitable" | ||
| + | !Collection Reward: | ||
| + | | id="cellstretch" |[[Bus Stop|Bus Repair]] | ||
| + | |} | ||
{| class="wikitable" | {| class="wikitable" | ||
! colspan=4 |[[File:Bundle Red.png|32px|link=]] <span id="g2500 Bundle">2,500 Bundle</span> | ! colspan=4 |[[File:Bundle Red.png|32px|link=]] <span id="g2500 Bundle">2,500 Bundle</span> | ||
| Line 707: | Line 710: | ||
|- | |- | ||
| colspan=2 id="cellcenter" |[[File:Bundle Reward.png|18px|link=]] Reward: | | colspan=2 id="cellcenter" |[[File:Bundle Reward.png|18px|link=]] Reward: | ||
| − | | colspan=2 | {{ | + | | colspan=2 | {{name|Chocolate Cake|3}} |
|} | |} | ||
{| class="wikitable" | {| class="wikitable" | ||
| Line 718: | Line 721: | ||
|- | |- | ||
| colspan=2 id="cellcenter" |[[File:Bundle Reward.png|18px|link=]] Reward: | | colspan=2 id="cellcenter" |[[File:Bundle Reward.png|18px|link=]] Reward: | ||
| − | | colspan=2 | {{ | + | | colspan=2 | {{name|Quality Fertilizer|30}} |
|} | |} | ||
{| class="wikitable" | {| class="wikitable" | ||
| Line 729: | Line 732: | ||
|- | |- | ||
| colspan=2 id="cellcenter" |[[File:Bundle Reward.png|18px|link=]] Reward: | | colspan=2 id="cellcenter" |[[File:Bundle Reward.png|18px|link=]] Reward: | ||
| − | | colspan=2 | {{ | + | | colspan=2 | {{name|Lightning Rod|link=Lightning Rod}} |
|} | |} | ||
{| class="wikitable" | {| class="wikitable" | ||
| Line 740: | Line 743: | ||
|- | |- | ||
| colspan=2 id="cellcenter" |[[File:Bundle Reward.png|18px|link=]] Reward: | | colspan=2 id="cellcenter" |[[File:Bundle Reward.png|18px|link=]] Reward: | ||
| − | | colspan=2 | {{ | + | | colspan=2 | {{name|Crystalarium|link=Crystalarium}} |
|} | |} | ||
|} | |} | ||
[[Category:Gameplay]] | [[Category:Gameplay]] | ||
[[Category:Items]] | [[Category:Items]] | ||
Revision as of 03:55, 28 February 2017
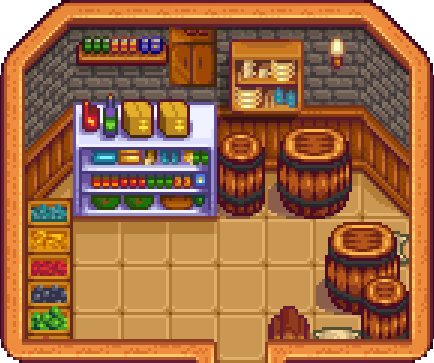
Bundles are community projects completed by the Junimos after the player completes the golden scrolls in the Community Center. By giving the requested offerings, each bundle can be completed with items found throughout the game.
If the player buys a Joja Mart Membership, the Community Center is turned into the Joja Warehouse instead. After this happens, the bundles will be completed by the Joja Corporation for a fee given to Morris through the Joja Community Development Form.
A few bundles show more items than there are positions to fill (e.g. Artisan Bundle: 12 items, 6 positions to fill). These bundles are given an optional variety, and do not require all the items to be completed.
Completing all bundles restores the Community Center back to brand new and unlocks the Local Legend achievement. There is a cut scene showing the Manager of the Joja mart looking for everyone. Pierre confronts him and you are offered a choice to "Be reasonable" or settle things the "Old-Fashioned" way.
Note: While the "minor" bundle rewards are given immediately, the "major" rewards will not be delivered until the end of the day. Each major reward features a cut-scene of the Junimos making the item available.
Travelling Cart
Most of the items required for the bundles have a small chance of appearing in the Travelling Cart stock. The following items will never be sold:
 Melon (gold quality)
 Pumpkin (gold quality)
 Corn (gold quality)
 Earth Crystal
 Frozen Tear
 Fire Quartz
 Frozen Geode
 Hay
Hay
Crafts Room
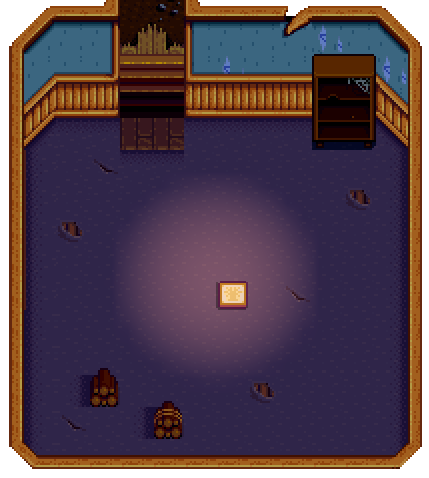
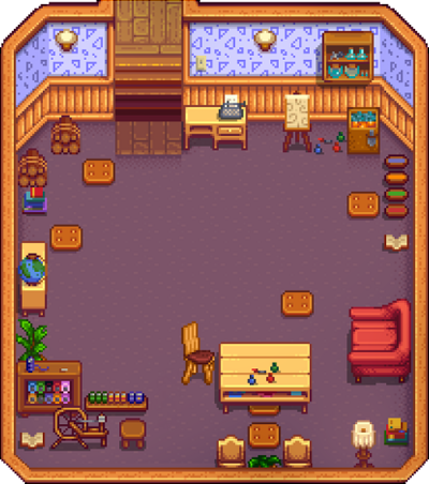
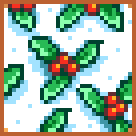
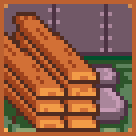
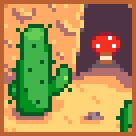
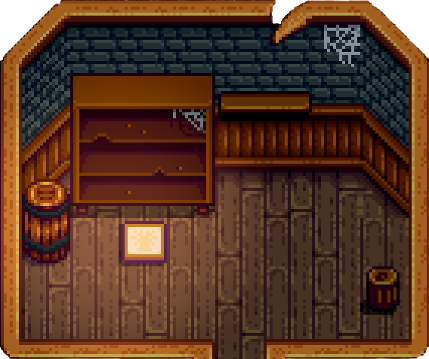
The Crafts Room contains the first group of bundles available. These bundles are completed by collecting foraged items. For each season there are unique plants to forage, all of which are required to complete that season's bundle. The bundles range from basic wood and stone to exotic and rare foraged items.
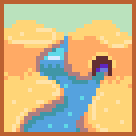
Completing the Crafts Room bundles repairs the bridge east of mines, giving you access to the quarry.
| |||||||||||||||||||||||||||||||||||||||||||||||||||||||||||||||||||||||||||||||||||||||||||||||||||||||||||||||||||||||
Pantry
The Pantry appears after completing one bundle. These bundles are completed by collecting crops. You have to grow several farm crops for spring, summer, and fall to complete three of the bundles. There are also bundles for Artisan Goods, highest quality crops, and animal products such as milk and eggs.
Completing the Pantry bundles rebuilds the dilapidated Greenhouse on your farm back to brand new. The Greenhouse allows for crops inside it to grow year round, never dying to seasonal changes.
| ||||||||||||||||||||||||||||||||||||||||||||||||||||||||||||||||||||||||||||||||||||||||||||||||||||||||||||||||||||||||||||||||||
Fish Tank
The Fish Tank appears after completing one bundle. These bundles are completed by collecting fish. This requires catching fish with a Rod or Crab Pot. Different fish can be caught in lakes, rivers, and oceans, as well as different times of day and year. Note: It may not be possible to finish the Specialty Fish Bundle before finishing the entire Vault section, as you need access to the Desert to get a Sandfish, unless it becomes available at the Traveling Cart. Completing the Fish Tank bundles removes the Glittering Boulder next to the mine entrance. Willy will give the player a Copper Pan which can be used to collect ore from lakes and rivers.
| ||||||||||||||||||||||||||||||||||||||||||||||||||||||||||||||||||||||||||||||||||||||||||||||||||||||||||||||||||||||||
Boiler Room
The Boiler Room appears after completing two bundles.
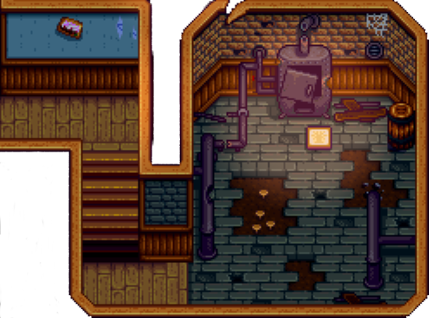
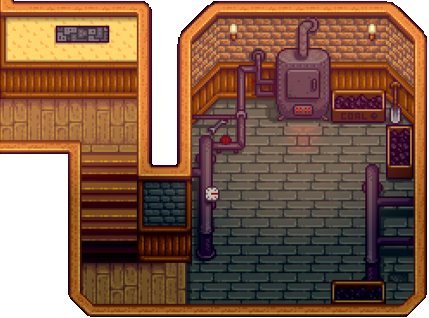
Completing the Boiler Room bundles repairs the Mine Carts, allowing the player to fast travel between distant locations in Pelican Town.
| ||||||||||||||||||||||||||||||||||||||||||||||||||||||
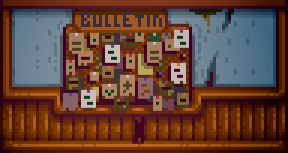
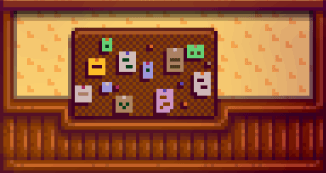
Bulletin Board
The Bulletin Board appears after completing three bundles.
Completing the Bulletin Board bundles improves the player's friendship rating with every non marriage candidate villager by two hearts. The morning after, Mayor Lewis will send you a mail saying that all the villagers have been getting items they have wanted for years that they posted on the bulletin board in the community center. He exclaims his gratitude of all your hard work.
| ||||||||||||||||||||||||||||||||||||||||||||||||||||||||||||||||||||||||||||||||||||||||||||||||||
Vault
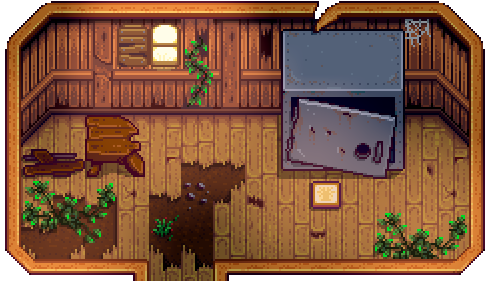
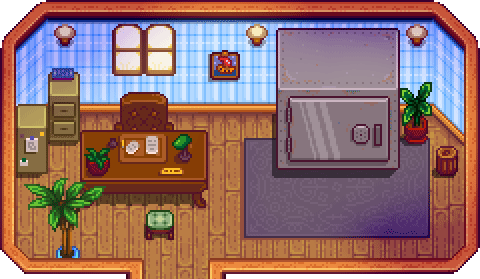
The Vault becomes available after completing four bundles. Each bundle in the vault simply requires gold to complete, and the item slots are replaced with a large purchase button. Pressing 'purchase' will complete the bundle and deduct the gold from the player's total, provided they have enough.
Completing the Vault bundles, costing a total of ![]() 42,500g, repairs the Bus on the road between your farm and Pelican Town. Taking the Bus grants access to the Calico Desert.
42,500g, repairs the Bus on the road between your farm and Pelican Town. Taking the Bus grants access to the Calico Desert.
| ||||||||||||||||||||||||||||||||||||||||||||||||||
