Fishing Strategy
- For a list of fish and their locations, see Fish.
- For information about the Fishing Skill and Mechanics, see Fishing.
- For an index to the completed fish collection, see Collections.
- See also: Tackle, Bait
This page provides fishing strategy information for Stardew Valley.
Basics of Strategy
The availability of many types of fish can depend on various factors: the location of the fishing spot, the season, the time of day, and the weather. Match the fishing location to current conditions as necessary to get a chance to catch certain type(s) of fish.
Locations
Fishing spots are commonly broken up into ocean, lake, and river types. However, while most fishing spots in a similar body of water will share catches, the map also plays a role. For instance, the river in Cindersap Forest is not the same as the river in Pelican Town. Ponds usually have a smaller selection of fish, if any, compared to larger bodies of water and the selection is usually specific to the map where the pond is found.
Keep in mind that the less fish there are in a certain location, the more likely it is that trash will be caught there.
The Sewers
The Sewers are an easy and productive fishing location, especially to level up the fishing skill or farm treasure. Carp is the least difficult fish to catch in the game and it is the only fish in the sewers (except for a legendary fish). Therefore, almost every cast of the line results in either an immediate item reward or a quick Carp catch.
Bobber Position
In general, it is optimal to cast the bobber as far from land as possible to maximize the Fishing Zone. Longer casting distances are important, but also casting east/west instead of north/south can improve the fishing zone, as can fishing in wide-open water. In addition to affecting the quality of the fish, Fishing Zone also affects the chances of catching certain fish over other ones. While all non-Legendary fish can be caught in tiles that have a zone of 1, a lot of the more difficult and profitable fish have a higher chance to be caught at higher-zone locations.
Bubbles greatly increase the rate at which fish bite and can also alter the relative chances of each fish type at the location. Careful placement of the bobber on the edge of the bubbles allows the bubble bonus to be used in any of the adjacent tiles, providing some ability to optimize the Fishing Zone.
Fishing Skill
Fishing level is important because each increase in the fishing level increases the fishing bar size by 8 pixels. The longer the fishing bar is, the easier it is to catch fish. The fishing bar will continue to increase by this amount even as the player goes beyond level 10 (with buffs). This means the bar can get much bigger than it naturally would be even at fishing level 10. Using a fishing rod with the Master enchant will also increase the fishing bar by 8 pixels. A Cork Bobber will increase the fishing bar by 24 pixels.
Catching Difficult Fish
This concept of the fishing bar getting bigger is especially useful when trying to catch extremely hard fish such as the Legendary Fish and the Octopus. Reaching fishing level 10, using an iridium rod with a Cork Bobber and with the Master enchant, and eating food (better prepared with Qi Seasoning) that provides a temporary fishing buff (e.g., Seafoam Pudding) will all help make catching these difficult fish much more manageable.
The Trap Bobber is also a great combination with a large fishing bar, as it significantly reduces the speed at which difficult fish escape.
Fishing Zones
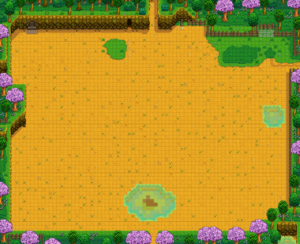
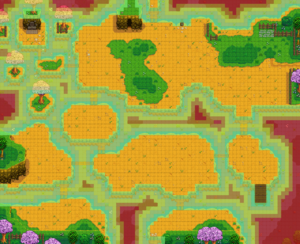
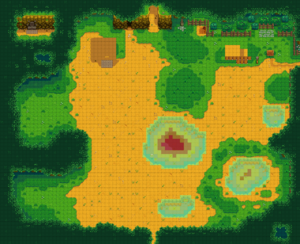
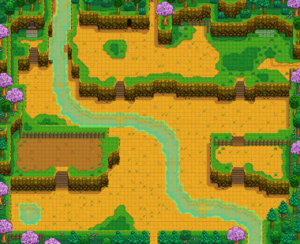
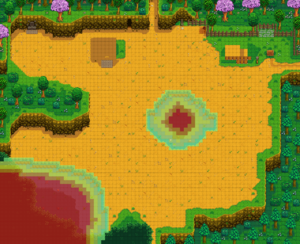
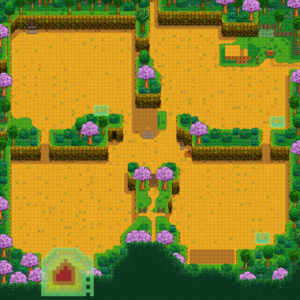
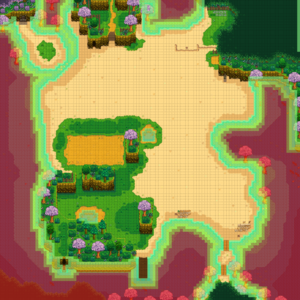
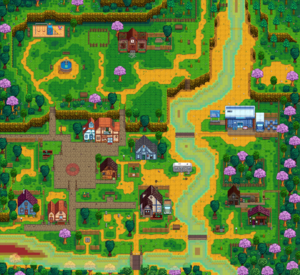
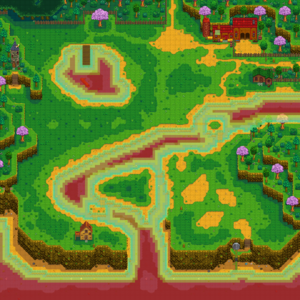
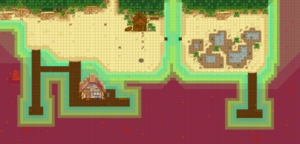
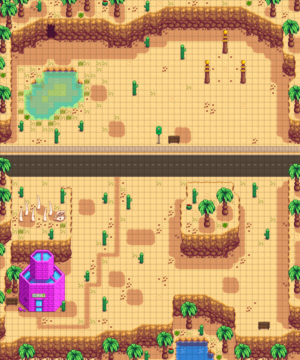
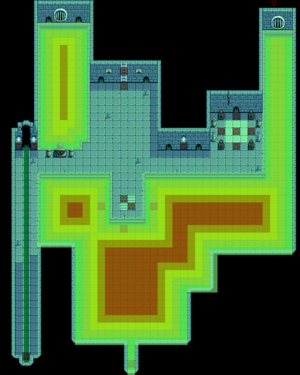
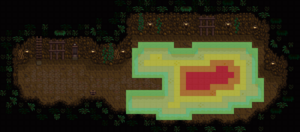
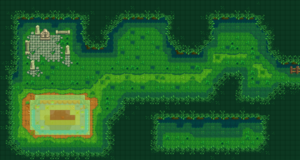
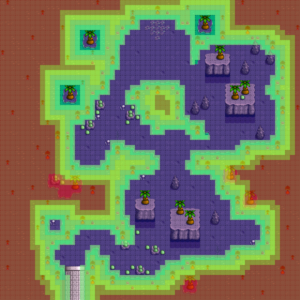
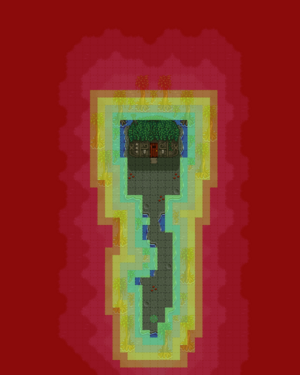
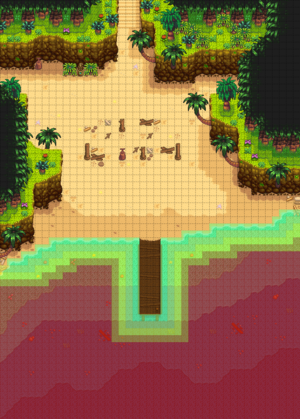
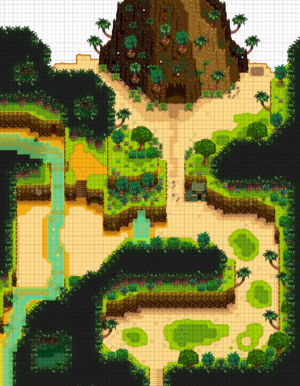
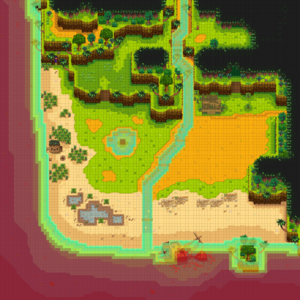
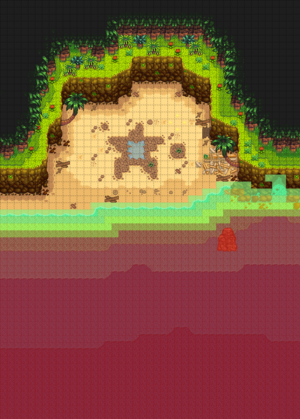
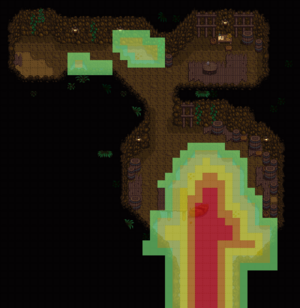
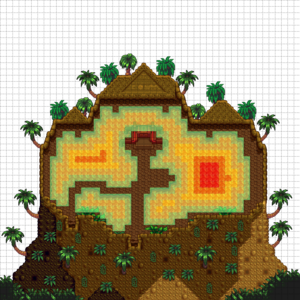
The following images show the Fishing Zone based on the location where the bobber lands, color coded as:
![]()
Note that these maps are not valid on iOS and Android because of a bug.
The Farm
| Standard Farm | Riverland Farm | |
| Forest Farm | Hill-top Farm | |
| Wilderness Farm | Four Corners Farm | |
| Beach Farm | ||
Pelican Town |
Cindersap Forest | |
The Beach |
The Mountain | |
The Desert |
The Sewers | |
The Mines |
Secret Woods | |
Night Market |
Mutant Bug Lair | |
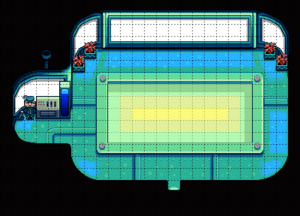 The submarine ride at the Night Market |
||
Witch's Swamp |
Island South | |
Island North |
Island West | |
Island Southeast |
Pirate Cove | |
Caldera |
||
Location Tables
Note that the 5 legendary fish are not included in the tables below. The following tables are based on the data in Content\Locations.xnb.
Pelican Town
| Time | |||||||||||||||||||||
|---|---|---|---|---|---|---|---|---|---|---|---|---|---|---|---|---|---|---|---|---|---|
| 6 | 7 | 8 | 9 | 10 | 11 | 12 | 1 | 2 | 3 | 4 | 5 | 6 | 7 | 8 | 9 | 10 | 11 | 12 | 1 | ||
| Sunny day only | |||||||||||||||||||||
| Rainy day only | |||||||||||||||||||||
| Rainy day only | |||||||||||||||||||||
| 6 | 7 | 8 | 9 | 10 | 11 | 12 | 1 | 2 | 3 | 4 | 5 | 6 | 7 | 8 | 9 | 10 | 11 | 12 | 1 | ||
| Sunny day only | |||||||||||||||||||||
| Sunny day only | |||||||||||||||||||||
| Rainy day only | |||||||||||||||||||||
| 6 | 7 | 8 | 9 | 10 | 11 | 12 | 1 | 2 | 3 | 4 | 5 | 6 | 7 | 8 | 9 | 10 | 11 | 12 | 1 | ||
| Rainy day only | |||||||||||||||||||||
| Rainy day only | |||||||||||||||||||||
| Rainy day only | |||||||||||||||||||||
| 6 | 7 | 8 | 9 | 10 | 11 | 12 | 1 | 2 | 3 | 4 | 5 | 6 | 7 | 8 | 9 | 10 | 11 | 12 | 1 | ||
The Beach
| Time | |||||||||||||||||||||
|---|---|---|---|---|---|---|---|---|---|---|---|---|---|---|---|---|---|---|---|---|---|
| 6 | 7 | 8 | 9 | 10 | 11 | 12 | 1 | 2 | 3 | 4 | 5 | 6 | 7 | 8 | 9 | 10 | 11 | 12 | 1 | ||
| Rainy day only | |||||||||||||||||||||
| 6 | 7 | 8 | 9 | 10 | 11 | 12 | 1 | 2 | 3 | 4 | 5 | 6 | 7 | 8 | 9 | 10 | 11 | 12 | 1 | ||
| Rainy day only | |||||||||||||||||||||
| Sunny day only | |||||||||||||||||||||
| 6 | 7 | 8 | 9 | 10 | 11 | 12 | 1 | 2 | 3 | 4 | 5 | 6 | 7 | 8 | 9 | 10 | 11 | 12 | 1 | ||
| Rainy day only | |||||||||||||||||||||
| Rainy day only | |||||||||||||||||||||
| 6 | 7 | 8 | 9 | 10 | 11 | 12 | 1 | 2 | 3 | 4 | 5 | 6 | 7 | 8 | 9 | 10 | 11 | 12 | 1 | ||
| Rainy day only | |||||||||||||||||||||
Cindersap Forest
Note that there are two fishing spots in the forest, the pond in the middle and the river to the south.
| Time | |||||||||||||||||||||
|---|---|---|---|---|---|---|---|---|---|---|---|---|---|---|---|---|---|---|---|---|---|
| 6 | 7 | 8 | 9 | 10 | 11 | 12 | 1 | 2 | 3 | 4 | 5 | 6 | 7 | 8 | 9 | 10 | 11 | 12 | 1 | ||
| River | Sunny day only | ||||||||||||||||||||
| River | Rainy day only | ||||||||||||||||||||
| River | |||||||||||||||||||||
| Both | |||||||||||||||||||||
| Pond | |||||||||||||||||||||
| River | Rainy day only | ||||||||||||||||||||
| River | |||||||||||||||||||||
| 6 | 7 | 8 | 9 | 10 | 11 | 12 | 1 | 2 | 3 | 4 | 5 | 6 | 7 | 8 | 9 | 10 | 11 | 12 | 1 | ||
| River | |||||||||||||||||||||
| River | Sunny day only | ||||||||||||||||||||
| River | Sunny day only | ||||||||||||||||||||
| River | |||||||||||||||||||||
| Both | |||||||||||||||||||||
| Both | |||||||||||||||||||||
| River | Rainy day only | ||||||||||||||||||||
| River | |||||||||||||||||||||
| 6 | 7 | 8 | 9 | 10 | 11 | 12 | 1 | 2 | 3 | 4 | 5 | 6 | 7 | 8 | 9 | 10 | 11 | 12 | 1 | ||
| River | |||||||||||||||||||||
| River | |||||||||||||||||||||
| River | Rainy day only | ||||||||||||||||||||
| River | |||||||||||||||||||||
| Pond | |||||||||||||||||||||
| Both | |||||||||||||||||||||
| Pond | |||||||||||||||||||||
| River | Rainy day only | ||||||||||||||||||||
| Both | Rainy day only | ||||||||||||||||||||
| River | |||||||||||||||||||||
| 6 | 7 | 8 | 9 | 10 | 11 | 12 | 1 | 2 | 3 | 4 | 5 | 6 | 7 | 8 | 9 | 10 | 11 | 12 | 1 | ||
| River | |||||||||||||||||||||
| River | |||||||||||||||||||||
| Pond | |||||||||||||||||||||
| Both | |||||||||||||||||||||
| River | |||||||||||||||||||||
| Both | |||||||||||||||||||||
| Both | |||||||||||||||||||||
| River | |||||||||||||||||||||
The Mountain
Note that this refers to the lake outside of The Mines.
| Time | |||||||||||||||||||||
|---|---|---|---|---|---|---|---|---|---|---|---|---|---|---|---|---|---|---|---|---|---|
| 6 | 7 | 8 | 9 | 10 | 11 | 12 | 1 | 2 | 3 | 4 | 5 | 6 | 7 | 8 | 9 | 10 | 11 | 12 | 1 | ||
| 6 | 7 | 8 | 9 | 10 | 11 | 12 | 1 | 2 | 3 | 4 | 5 | 6 | 7 | 8 | 9 | 10 | 11 | 12 | 1 | ||
| Sunny day only | |||||||||||||||||||||
| 6 | 7 | 8 | 9 | 10 | 11 | 12 | 1 | 2 | 3 | 4 | 5 | 6 | 7 | 8 | 9 | 10 | 11 | 12 | 1 | ||
| Rainy day only | |||||||||||||||||||||
| 6 | 7 | 8 | 9 | 10 | 11 | 12 | 1 | 2 | 3 | 4 | 5 | 6 | 7 | 8 | 9 | 10 | 11 | 12 | 1 | ||
The Mines
| Time | |||||||||||||||||||||
|---|---|---|---|---|---|---|---|---|---|---|---|---|---|---|---|---|---|---|---|---|---|
| 6 | 7 | 8 | 9 | 10 | 11 | 12 | 1 | 2 | 3 | 4 | 5 | 6 | 7 | 8 | 9 | 10 | 11 | 12 | 1 | ||
| Floors 20, 60 | |||||||||||||||||||||
| Floor 20 | |||||||||||||||||||||
| All | |||||||||||||||||||||
| All | |||||||||||||||||||||
| Floor 60 | |||||||||||||||||||||
| Floor 100 | |||||||||||||||||||||
Secret Woods
| Time | |||||||||||||||||||||
|---|---|---|---|---|---|---|---|---|---|---|---|---|---|---|---|---|---|---|---|---|---|
| 6 | 7 | 8 | 9 | 10 | 11 | 12 | 1 | 2 | 3 | 4 | 5 | 6 | 7 | 8 | 9 | 10 | 11 | 12 | 1 | ||
| Rainy day only | |||||||||||||||||||||
The Desert
| Time | |||||||||||||||||||||
|---|---|---|---|---|---|---|---|---|---|---|---|---|---|---|---|---|---|---|---|---|---|
| 6 | 7 | 8 | 9 | 10 | 11 | 12 | 1 | 2 | 3 | 4 | 5 | 6 | 7 | 8 | 9 | 10 | 11 | 12 | 1 | ||
The Sewers
| Time | |||||||||||||||||||||
|---|---|---|---|---|---|---|---|---|---|---|---|---|---|---|---|---|---|---|---|---|---|
| 6 | 7 | 8 | 9 | 10 | 11 | 12 | 1 | 2 | 3 | 4 | 5 | 6 | 7 | 8 | 9 | 10 | 11 | 12 | 1 | ||
Mutant Bug Lair
| Time | |||||||||||||||||||||
|---|---|---|---|---|---|---|---|---|---|---|---|---|---|---|---|---|---|---|---|---|---|
| 6 | 7 | 8 | 9 | 10 | 11 | 12 | 1 | 2 | 3 | 4 | 5 | 6 | 7 | 8 | 9 | 10 | 11 | 12 | 1 | ||
Witch's Swamp
| Time | |||||||||||||||||||||
|---|---|---|---|---|---|---|---|---|---|---|---|---|---|---|---|---|---|---|---|---|---|
| 6 | 7 | 8 | 9 | 10 | 11 | 12 | 1 | 2 | 3 | 4 | 5 | 6 | 7 | 8 | 9 | 10 | 11 | 12 | 1 | ||
| Rainy day only | |||||||||||||||||||||
Ginger Island North
| Time | |||||||||||||||||||||
|---|---|---|---|---|---|---|---|---|---|---|---|---|---|---|---|---|---|---|---|---|---|
| 6 | 7 | 8 | 9 | 10 | 11 | 12 | 1 | 2 | 3 | 4 | 5 | 6 | 7 | 8 | 9 | 10 | 11 | 12 | 1 | ||
Ginger Island South & Southeast
| Time | |||||||||||||||||||||
|---|---|---|---|---|---|---|---|---|---|---|---|---|---|---|---|---|---|---|---|---|---|
| 6 | 7 | 8 | 9 | 10 | 11 | 12 | 1 | 2 | 3 | 4 | 5 | 6 | 7 | 8 | 9 | 10 | 11 | 12 | 1 | ||
| Sunny day only | |||||||||||||||||||||
Pirate Cove
| Time | |||||||||||||||||||||
|---|---|---|---|---|---|---|---|---|---|---|---|---|---|---|---|---|---|---|---|---|---|
| 6 | 7 | 8 | 9 | 10 | 11 | 12 | 1 | 2 | 3 | 4 | 5 | 6 | 7 | 8 | 9 | 10 | 11 | 12 | 1 | ||
| Sunny day only | |||||||||||||||||||||
Ginger Island West
Note that there are two types of water in Ginger Island West: freshwater and ocean. The southern-most plank bridge in the river is the divider between the two. The ocean is to the west and south; the pond and river north of the southern-most plank bridge are freshwater.
| Time | |||||||||||||||||||||
|---|---|---|---|---|---|---|---|---|---|---|---|---|---|---|---|---|---|---|---|---|---|
| 6 | 7 | 8 | 9 | 10 | 11 | 12 | 1 | 2 | 3 | 4 | 5 | 6 | 7 | 8 | 9 | 10 | 11 | 12 | 1 | ||
| Ocean | |||||||||||||||||||||
| Ocean | |||||||||||||||||||||
| Ocean | |||||||||||||||||||||
| Ocean | Sunny day only | ||||||||||||||||||||
| Ocean | |||||||||||||||||||||
| Ocean | |||||||||||||||||||||
| Freshwater | |||||||||||||||||||||
| Freshwater | |||||||||||||||||||||
| Freshwater | |||||||||||||||||||||
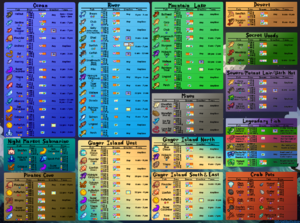
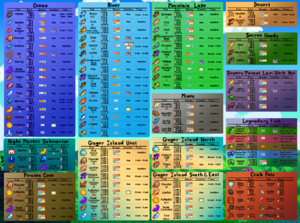
Fish Infograph
Note that the only difference between the two images is the background.
