Difference between revisions of "Fruit Trees"
(→History: moved removed text into history info) |
|||
| (82 intermediate revisions by 28 users not shown) | |||
| Line 1: | Line 1: | ||
{{TOC right|npt=y}} | {{TOC right|npt=y}} | ||
| − | {{For| | + | {{For|Trees that do not yield fruit|Trees}} |
| − | '''Fruit Trees''' require 28 days to mature, after which they produce one fruit per day when in season. Fruit can | + | '''Fruit Trees''' require 28 days to mature, after which they produce one [[Fruits|fruit]] per day when in season. Fruit can accumulate up to three days before harvesting. Fruit trees do not need to be watered, and will not die in the winter. Fruit saplings will grow during any season, allowing players to plant and prepare for upcoming seasons to bear fruit. |
| − | Each Fruit tree must be planted in the center of a clear 3x3 ground area | + | Each Fruit tree must be planted in the center of a clear 3x3 ground area, except that they may be placed next to a permanent structure (''i.e.,'' [[Farmhouse]]). "Clear" means free of objects, flooring/paths, and terrain features including grass, but not including [[Artifact Spot|artifact spots]].<ref name="grow_blocked" /> The 3x3 clear planting area also must not overlap the 3x3 area of another fruit tree. The game prevents planting fruit trees too close to each other, ensuring a minimum distance of two tiles between them in every direction. Fruit tree saplings can be retrieved which was not possible up until the 1.6 update. |
| − | + | While a fruit tree sapling is immature, the 3x3 area around it must remain clear in order for the sapling to grow. If overnight debris spawns too close to it, the game pops up a message the next morning saying the fruit tree could not grow that night. Objects placed next to a sapling cause the same message and growth obstruction. Once a fruit tree is mature, growth is no longer an issue, and one fruit is produced each day in season. Then objects, including flooring/paths, may be placed next to the fruit tree without hindering production. | |
| − | Fruit | + | A Fruit Tree is planted directly into [[Hoes|untilled]] ground. Fruit trees can grow in the [[Greenhouse]], in the center soil or around the border. Fruit trees planted in the greenhouse or on [[Ginger Island]] bear fruit every day after maturity, and will not change color according to the [[Seasons|season]]. |
| − | Fruit trees | + | Fruit trees can be chopped down, yielding normal [[wood]] and a matching sapling of the same quality as the fruit. When chopped at stage 1 of growth, it will instead drop its respective sapling. High-quality saplings mature faster than normal: a silver sapling grows 2 times faster, a gold sapling grows 3 times faster, and an iridium sapling grows 5 times faster.<ref name="growth_rate" /> |
| − | A complete set of all six fruit tree saplings costs a total of {{ | + | A complete set of all six fruit tree saplings costs a total of {{Price|25400}} if purchased from [[Pierre's General Store]]. |
==Fruit Quality & Price== | ==Fruit Quality & Price== | ||
| − | A tree's fruit increases in quality by one star per year of tree age after reaching maturity. Fruit trees will produce silver star fruit after one year, gold after two years, and iridium after three. | + | A tree's fruit increases in quality by one star per year of tree age after reaching maturity. Fruit trees will produce silver star fruit after one year, gold after two years, and iridium after three. Once the tree is fully grown, the surrounding area does not need to be kept clear for the tree's fruit to increase in quality.<ref name="quality" /> |
| − | Fruit Tree fruit receives the [[Farming#Farming Skill|Tiller Profession]] price bonus when sold, and [[Jellies and Pickles|jelly]] or [[wine]] made from fruit tree | + | Fruit Tree fruit receives the [[Farming#Farming Skill|Tiller Profession]] price bonus when sold, and [[Jellies and Pickles|jelly]] or [[wine]] made from fruit tree fruit receives the [[Farming#Farming Skill|Artisan Profession]] price bonus when sold. |
==Spring== | ==Spring== | ||
===[[Apricot Tree]]=== | ===[[Apricot Tree]]=== | ||
{{#lst:Apricot Tree|stages}} | {{#lst:Apricot Tree|stages}} | ||
| − | {| class=wikitable style="text-align:center; | + | {|class="wikitable roundedborder" style="text-align:center;" |
!Sapling | !Sapling | ||
![[File:Pierre Icon.png|link=]] [[Pierre's General Store|Pierre's]] Price | ![[File:Pierre Icon.png|link=]] [[Pierre's General Store|Pierre's]] Price | ||
![[File:Traveling Cart Icon.png|link=]] [[Traveling Cart]] Price | ![[File:Traveling Cart Icon.png|link=]] [[Traveling Cart]] Price | ||
| − | !Fruit | + | !Fruit |
!Fruit Sell Price | !Fruit Sell Price | ||
| − | !Fruit | + | !Fruit Restores |
!Fruit Used In | !Fruit Used In | ||
|- | |- | ||
| Line 34: | Line 34: | ||
|{{tprice|500}} | |{{tprice|500}} | ||
|{{name|Apricot}} | |{{name|Apricot}} | ||
| − | |{{Qualityprice|Apricot|50| | + | |{{Qualityprice|Apricot|50|dsv=false}} |
| − | |{{ | + | |{{EdibilityGrid|Apricot|15}} |
|style="text-align:left;"|<p>{{Bundle|Artisan}}</p>{{name|Fruit Salad}}<p class="no-wrap">[[File:Quests Icon.png|28px|link=]] [[Quests#Fresh Fruit|Fresh Fruit Quest]]</p> | |style="text-align:left;"|<p>{{Bundle|Artisan}}</p>{{name|Fruit Salad}}<p class="no-wrap">[[File:Quests Icon.png|28px|link=]] [[Quests#Fresh Fruit|Fresh Fruit Quest]]</p> | ||
|} | |} | ||
| Line 41: | Line 41: | ||
===[[Cherry Tree]]=== | ===[[Cherry Tree]]=== | ||
{{#lst:Cherry Tree|stages}} | {{#lst:Cherry Tree|stages}} | ||
| − | {| class=wikitable style="text-align:center; | + | {|class="wikitable roundedborder" style="text-align:center;" |
!Sapling | !Sapling | ||
![[File:Pierre Icon.png|link=]] [[Pierre's General Store|Pierre's]] Price | ![[File:Pierre Icon.png|link=]] [[Pierre's General Store|Pierre's]] Price | ||
| Line 54: | Line 54: | ||
|{{tprice|850}} | |{{tprice|850}} | ||
|{{name|Cherry}} | |{{name|Cherry}} | ||
| − | |{{Qualityprice|Cherry|80| | + | |{{Qualityprice|Cherry|80|dsv=false}} |
| − | |{{ | + | |{{EdibilityGrid|Cherry|15}} |
|style="text-align:left;"|{{Bundle|Artisan}} | |style="text-align:left;"|{{Bundle|Artisan}} | ||
|} | |} | ||
==Summer== | ==Summer== | ||
| + | Banana and Mango Trees will grow and produce fruit year-round on [[Ginger Island]]. In the valley, they produce fruit only in Summer. | ||
| + | |||
| + | Note that [[Banana]]s and [[Mango]]s are not considered "Fruit Tree Fruit" for gifting purposes, but instead follow the villager's preferences for "non-Fruit Tree Fruit". | ||
| + | ===[[Banana Tree]]=== | ||
| + | {{#lst:Banana Tree|stages}} | ||
| + | {|class="wikitable roundedborder" style="text-align:center;" | ||
| + | !Sapling | ||
| + | ![[File:Island Trader Icon.png|24px|link=]] [[Island Trader]] Price | ||
| + | !Fruit | ||
| + | !Fruit Sell Price | ||
| + | !Fruit Restores | ||
| + | !Fruit Used In | ||
| + | |- | ||
| + | |[[File:Banana Sapling.png|center]][[Banana Sapling]] | ||
| + | |{{name|Dragon Tooth|5}} | ||
| + | |{{name|Banana}} | ||
| + | |{{Qualityprice|Banana|150|dsv=false}} | ||
| + | |{{EdibilityGrid|Banana|30}} | ||
| + | |style="text-align:left;"|{{name|Island Obelisk|size=24|class=inline}}<p>{{name|Banana Pudding}}</p> | ||
| + | |} | ||
| + | |||
| + | ===[[Mango Tree]]=== | ||
| + | {{#lst:Mango Tree|stages}} | ||
| + | {|class="wikitable roundedborder" style="text-align:center;" | ||
| + | !Sapling | ||
| + | ![[File:Island Trader Icon.png|24px|link=]] [[Island Trader]] Price | ||
| + | !Fruit | ||
| + | !Fruit Sell Price | ||
| + | !Fruit Restores | ||
| + | !Fruit Used In | ||
| + | |- | ||
| + | |[[File:Mango Sapling.png|center]][[Mango Sapling]] | ||
| + | |{{name|Mussel|75}} | ||
| + | |{{name|Mango}} | ||
| + | |{{Qualityprice|Mango|130|dsv=false}} | ||
| + | |{{EdibilityGrid|Mango|40}} | ||
| + | |style="text-align:left;"|<p class="no-wrap">[[File:Leo Icon.png|30px|link=]] [[Leo]] (Loved Gift)</p><p>{{name|Mango Sticky Rice}}</p> | ||
| + | |} | ||
| + | |||
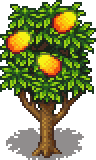
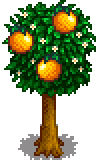
===[[Orange Tree]]=== | ===[[Orange Tree]]=== | ||
{{#lst:Orange Tree|stages}} | {{#lst:Orange Tree|stages}} | ||
| − | {| class=wikitable style="text-align:center; | + | {|class="wikitable roundedborder" style="text-align:center;" |
!Sapling | !Sapling | ||
![[File:Pierre Icon.png|link=]] [[Pierre's General Store|Pierre's]] Price | ![[File:Pierre Icon.png|link=]] [[Pierre's General Store|Pierre's]] Price | ||
| Line 75: | Line 114: | ||
|{{tprice|1000}} | |{{tprice|1000}} | ||
|{{name|Orange}} | |{{name|Orange}} | ||
| − | |{{Qualityprice|Orange|100| | + | |{{Qualityprice|Orange|100|dsv=false}} |
| − | |{{ | + | |{{EdibilityGrid|Orange|15}} |
|style="text-align:left;"|{{Bundle|Artisan}}<p class="no-wrap">[[File:Gus Icon.png|30px|link=]] [[Gus]] (Loved Gift)</p> | |style="text-align:left;"|{{Bundle|Artisan}}<p class="no-wrap">[[File:Gus Icon.png|30px|link=]] [[Gus]] (Loved Gift)</p> | ||
|} | |} | ||
| Line 82: | Line 121: | ||
===[[Peach Tree]]=== | ===[[Peach Tree]]=== | ||
{{#lst:Peach Tree|stages}} | {{#lst:Peach Tree|stages}} | ||
| − | {| class=wikitable style="text-align:center; | + | {|class="wikitable roundedborder" style="text-align:center;" |
!Sapling | !Sapling | ||
![[File:Pierre Icon.png|link=]] [[Pierre's General Store|Pierre's]] Price | ![[File:Pierre Icon.png|link=]] [[Pierre's General Store|Pierre's]] Price | ||
| Line 95: | Line 134: | ||
|{{tprice|1500}} | |{{tprice|1500}} | ||
|{{name|Peach}} | |{{name|Peach}} | ||
| − | |{{Qualityprice|Peach|140| | + | |{{Qualityprice|Peach|140|dsv=false}} |
| − | |{{ | + | |{{EdibilityGrid|Peach|15}} |
|style="text-align:left;"|{{Bundle|Artisan}}<p class="no-wrap">[[File:Robin Icon.png|30px|link=]] [[Robin]] (Loved Gift)</p> | |style="text-align:left;"|{{Bundle|Artisan}}<p class="no-wrap">[[File:Robin Icon.png|30px|link=]] [[Robin]] (Loved Gift)</p> | ||
|} | |} | ||
| Line 103: | Line 142: | ||
===[[Apple Tree]]=== | ===[[Apple Tree]]=== | ||
{{#lst:Apple Tree|stages}} | {{#lst:Apple Tree|stages}} | ||
| − | {| class=wikitable style="text-align:center; | + | {|class="wikitable roundedborder" style="text-align:center;" |
!Sapling | !Sapling | ||
![[File:Pierre Icon.png|link=]] [[Pierre's General Store|Pierre's]] Price | ![[File:Pierre Icon.png|link=]] [[Pierre's General Store|Pierre's]] Price | ||
| Line 116: | Line 155: | ||
|{{tprice|1000}} | |{{tprice|1000}} | ||
|{{name|Apple}} | |{{name|Apple}} | ||
| − | |{{Qualityprice|Apple|100| | + | |{{Qualityprice|Apple|100|dsv=false}} |
| − | |{{ | + | |{{EdibilityGrid|Apple|15}} |
|style="text-align:left;"|<p>{{Bundle|Artisan}}</p>{{name|Cranberry Candy}}<p>{{Bundle|Fodder}}</p> | |style="text-align:left;"|<p>{{Bundle|Artisan}}</p>{{name|Cranberry Candy}}<p>{{Bundle|Fodder}}</p> | ||
|} | |} | ||
| Line 123: | Line 162: | ||
===[[Pomegranate Tree]]=== | ===[[Pomegranate Tree]]=== | ||
{{#lst:Pomegranate Tree|stages}} | {{#lst:Pomegranate Tree|stages}} | ||
| − | {| class=wikitable style="text-align:center; | + | {|class="wikitable roundedborder" style="text-align:center;" |
!Sapling | !Sapling | ||
![[File:Pierre Icon.png|link=]] [[Pierre's General Store|Pierre's]] Price | ![[File:Pierre Icon.png|link=]] [[Pierre's General Store|Pierre's]] Price | ||
![[File:Traveling Cart Icon.png|link=]] [[Traveling Cart]] Price | ![[File:Traveling Cart Icon.png|link=]] [[Traveling Cart]] Price | ||
!Fruit | !Fruit | ||
| − | !Fruit | + | !Fruit Sell Price |
!Fruit Restores | !Fruit Restores | ||
!Fruit Used In | !Fruit Used In | ||
| Line 136: | Line 175: | ||
|{{tprice|1500}} | |{{tprice|1500}} | ||
|{{name|Pomegranate}} | |{{name|Pomegranate}} | ||
| − | |{{Qualityprice|Pomegranate|140| | + | |{{Qualityprice|Pomegranate|140|dsv=false}} |
| − | |{{ | + | |{{EdibilityGrid|Pomegranate|15}} |
|style="text-align:left;"|<p>{{Bundle|Artisan}}</p><p class="no-wrap">{{Bundle|Enchanter's}}</p>[[File:Elliott Icon.png|30px|link=]] [[Elliott]] (Loved Gift) | |style="text-align:left;"|<p>{{Bundle|Artisan}}</p><p class="no-wrap">{{Bundle|Enchanter's}}</p>[[File:Elliott Icon.png|30px|link=]] [[Elliott]] (Loved Gift) | ||
|} | |} | ||
| − | == | + | ==Weather== |
| − | + | Fruit trees will not be affected by weather, ''i.e.,'' fruit will keep producing one per day whether it is raining, windy, or sunny. | |
| − | |||
| − | |||
| − | |||
| − | |||
| − | + | However, during storms, fruit trees can be struck by [[Weather|lightning]], causing them to become burnt for 4 days. During this time, they will not produce fruit, but will instead produce [[coal]]. After the 4 days are up, they will return to normal. Shown below are fruit trees after being struck by lightning. | |
| − | Shown below are fruit trees after being struck by lightning. | ||
<gallery mode="nolines"> | <gallery mode="nolines"> | ||
AppleTreeLightning.png|Apple Tree | AppleTreeLightning.png|Apple Tree | ||
ApricotTreeLightning.png|Apricot Tree | ApricotTreeLightning.png|Apricot Tree | ||
| + | BananaTreeLightning.png|Banana Tree | ||
CherryTreeLightning.png|Cherry Tree | CherryTreeLightning.png|Cherry Tree | ||
| + | MangoTreeLightning.png|Mango Tree | ||
OrangeTreeLightning.png|Orange Tree | OrangeTreeLightning.png|Orange Tree | ||
PeachTreeLightning.png|Peach Tree | PeachTreeLightning.png|Peach Tree | ||
PomegranateTreeLightning.png|Pomegranate Tree | PomegranateTreeLightning.png|Pomegranate Tree | ||
</gallery> | </gallery> | ||
| + | |||
| + | ==Bugs== | ||
| + | It should be possible to plant a [[Trees|common tree]] seed (''i.e.,'' [[Acorn]], [[Mahogany Seed]], [[Maple Seed]], or [[Pine Cone]]) and a Fruit Tree sapling (in either order) two tiles away from each other. A bug prevents the player from planting a common tree seed exactly two tiles away from an existing Fruit Tree sapling and from planting a Fruit Tree sapling two tiles away from a common tree seed. The common tree seed is treated as though it were another Fruit Tree sapling. | ||
| + | |||
| + | ==References== | ||
| + | <references> | ||
| + | <ref name="grow_blocked">See <samp>FruitTree::IsGrowthBlocked</samp> in the game code.</ref> | ||
| + | <ref name="growth_rate">See <samp>Object::placementAction</samp> in the game code.</ref> | ||
| + | <ref name="quality">See <samp>FruitTree::GetQuality</samp> in the game code.</ref> | ||
| + | </references> | ||
==History== | ==History== | ||
| − | {{ | + | {{History|1.0|Introduced.}} |
| − | {{ | + | {{History|1.1|Fruit trees can now produce iridium quality fruit. Trees increase fruit quality by 1 star per year of age after reaching maturity.}} |
| − | {{ | + | {{History|1.4|Removed prior condition where fruits grown by fruit trees would not increase in quality if the trees' 3x3 grid was not kept clear of objects, flooring, and terrain features (including grass). Fruit trees are no longer blocked from growing by [[Artifact Spot|artifact spots]]. Common tree seeds can no longer be placed one or two tiles away from a fruit tree sapling.}} |
| + | {{History|1.5|Added [[Banana Sapling]] and [[Mango Sapling]].}} | ||
| + | {{History|1.6|Cutting down a fruit tree now yields the appropriate fruit sapling of the same quality as the fruit. The sapling will mature faster when replanted at higher qualities.}} | ||
{{NavboxTree}} | {{NavboxTree}} | ||
[[Category:Fruit trees]] | [[Category:Fruit trees]] | ||
| + | [[Category:Bugs tested in 1.4]] | ||
[[de:Obstbäume]] | [[de:Obstbäume]] | ||
| Line 173: | Line 222: | ||
[[it:Alberi da frutta]] | [[it:Alberi da frutta]] | ||
[[ja:果樹]] | [[ja:果樹]] | ||
| − | [[ko: | + | [[ko:과일나무]] |
[[hu:Gyümölcsfák]] | [[hu:Gyümölcsfák]] | ||
[[pt:Árvores frutíferas]] | [[pt:Árvores frutíferas]] | ||
Latest revision as of 19:17, 6 April 2024
- For Trees that do not yield fruit, see Trees.
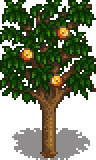
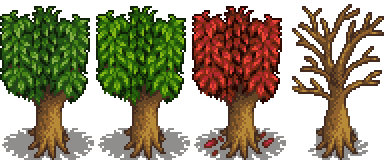
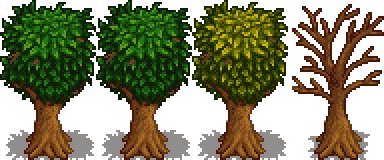
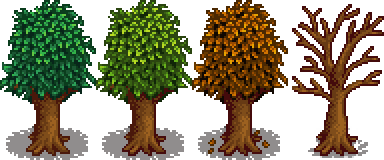
Fruit Trees require 28 days to mature, after which they produce one fruit per day when in season. Fruit can accumulate up to three days before harvesting. Fruit trees do not need to be watered, and will not die in the winter. Fruit saplings will grow during any season, allowing players to plant and prepare for upcoming seasons to bear fruit.
Each Fruit tree must be planted in the center of a clear 3x3 ground area, except that they may be placed next to a permanent structure (i.e., Farmhouse). "Clear" means free of objects, flooring/paths, and terrain features including grass, but not including artifact spots.[1] The 3x3 clear planting area also must not overlap the 3x3 area of another fruit tree. The game prevents planting fruit trees too close to each other, ensuring a minimum distance of two tiles between them in every direction. Fruit tree saplings can be retrieved which was not possible up until the 1.6 update.
While a fruit tree sapling is immature, the 3x3 area around it must remain clear in order for the sapling to grow. If overnight debris spawns too close to it, the game pops up a message the next morning saying the fruit tree could not grow that night. Objects placed next to a sapling cause the same message and growth obstruction. Once a fruit tree is mature, growth is no longer an issue, and one fruit is produced each day in season. Then objects, including flooring/paths, may be placed next to the fruit tree without hindering production.
A Fruit Tree is planted directly into untilled ground. Fruit trees can grow in the Greenhouse, in the center soil or around the border. Fruit trees planted in the greenhouse or on Ginger Island bear fruit every day after maturity, and will not change color according to the season.
Fruit trees can be chopped down, yielding normal wood and a matching sapling of the same quality as the fruit. When chopped at stage 1 of growth, it will instead drop its respective sapling. High-quality saplings mature faster than normal: a silver sapling grows 2 times faster, a gold sapling grows 3 times faster, and an iridium sapling grows 5 times faster.[2]
A complete set of all six fruit tree saplings costs a total of ![]() 25,400g if purchased from Pierre's General Store.
25,400g if purchased from Pierre's General Store.
Fruit Quality & Price
A tree's fruit increases in quality by one star per year of tree age after reaching maturity. Fruit trees will produce silver star fruit after one year, gold after two years, and iridium after three. Once the tree is fully grown, the surrounding area does not need to be kept clear for the tree's fruit to increase in quality.[3]
Fruit Tree fruit receives the Tiller Profession price bonus when sold, and jelly or wine made from fruit tree fruit receives the Artisan Profession price bonus when sold.
Spring
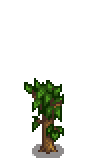
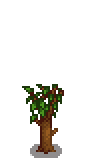
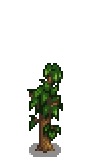
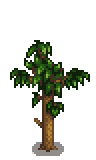
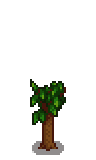
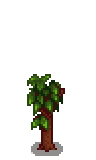
Apricot Tree
| Stage 1 | Stage 2 | Stage 3 | Stage 4 | Stage 5 - Spring, Summer, Fall, Winter | Harvest |
|---|---|---|---|---|---|
 |
 |
 |
 |
 |
 |
| 7 Days | 7 Days | 7 Days | 7 Days | Total: 28 Days |
| Sapling | Fruit | Fruit Sell Price | Fruit Restores | Fruit Used In | ||||||||||||||||||||||||||
|---|---|---|---|---|---|---|---|---|---|---|---|---|---|---|---|---|---|---|---|---|---|---|---|---|---|---|---|---|---|---|
|
|
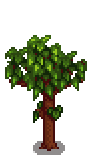
Cherry Tree
| Stage 1 | Stage 2 | Stage 3 | Stage 4 | Stage 5 - Spring, Summer, Fall, Winter | Harvest |
|---|---|---|---|---|---|
 |
 |
 |
 |
 |
 |
| 7 Days | 7 Days | 7 Days | 7 Days | Total: 28 Days |
| Sapling | Fruit | Fruit Sell Price | Fruit Restores | Fruit Used In | ||||||||||||||||||||||||||
|---|---|---|---|---|---|---|---|---|---|---|---|---|---|---|---|---|---|---|---|---|---|---|---|---|---|---|---|---|---|---|
|
|
Summer
Banana and Mango Trees will grow and produce fruit year-round on Ginger Island. In the valley, they produce fruit only in Summer.
Note that Bananas and Mangos are not considered "Fruit Tree Fruit" for gifting purposes, but instead follow the villager's preferences for "non-Fruit Tree Fruit".
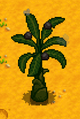
Banana Tree
| Stage 1 | Stage 2 | Stage 3 | Stage 4 | Stage 5 - Spring, Summer, Fall, Winter | Harvest |
|---|---|---|---|---|---|
 |
 |
 |
 |
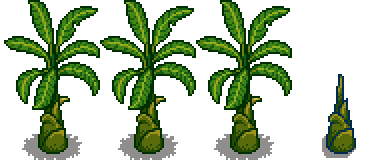 |
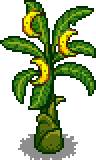 |
| 7 Days | 7 Days | 7 Days | 7 Days | Total: 28 Days |
| Sapling | Fruit | Fruit Sell Price | Fruit Restores | Fruit Used In | |||||||||||||||||||||||||
|---|---|---|---|---|---|---|---|---|---|---|---|---|---|---|---|---|---|---|---|---|---|---|---|---|---|---|---|---|---|
|
|
Mango Tree
| Stage 1 | Stage 2 | Stage 3 | Stage 4 | Stage 5 - Spring, Summer, Fall, Winter | Harvest |
|---|---|---|---|---|---|
 |
 |
 |
 |
 |
 |
| 7 Days | 7 Days | 7 Days | 7 Days | Total: 28 Days |
| Sapling | Fruit | Fruit Sell Price | Fruit Restores | Fruit Used In | |||||||||||||||||||||||||
|---|---|---|---|---|---|---|---|---|---|---|---|---|---|---|---|---|---|---|---|---|---|---|---|---|---|---|---|---|---|
|
|
|
Orange Tree
| Stage 1 | Stage 2 | Stage 3 | Stage 4 | Stage 5 - Spring, Summer, Fall, Winter | Harvest |
|---|---|---|---|---|---|
 |
 |
 |
 |
 |
 |
| 7 Days | 7 Days | 7 Days | 7 Days | Total: 28 Days |
| Sapling | Fruit | Fruit Sell Price | Fruit Restores | Fruit Used In | ||||||||||||||||||||||||||
|---|---|---|---|---|---|---|---|---|---|---|---|---|---|---|---|---|---|---|---|---|---|---|---|---|---|---|---|---|---|---|
|
|
|
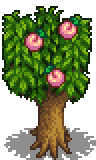
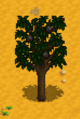
Peach Tree
| Stage 1 | Stage 2 | Stage 3 | Stage 4 | Stage 5 - Spring, Summer, Fall, Winter | Harvest |
|---|---|---|---|---|---|
 |
 |
 |
 |
 |
 |
| 7 Days | 7 Days | 7 Days | 7 Days | Total: 28 Days |
| Sapling | Fruit | Fruit Sell Price | Fruit Restores | Fruit Used In | ||||||||||||||||||||||||||
|---|---|---|---|---|---|---|---|---|---|---|---|---|---|---|---|---|---|---|---|---|---|---|---|---|---|---|---|---|---|---|
|
|
|
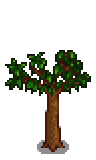
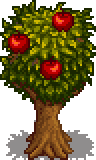
Fall
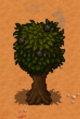
Apple Tree
| Stage 1 | Stage 2 | Stage 3 | Stage 4 | Stage 5 - Spring, Summer, Fall, Winter | Harvest |
|---|---|---|---|---|---|
 |
 |
 |
 |
 |
 |
| 7 Days | 7 Days | 7 Days | 7 Days | Total: 28 Days |
| Sapling | Fruit | Fruit Sell Price | Fruit Restores | Fruit Used In | ||||||||||||||||||||||||||
|---|---|---|---|---|---|---|---|---|---|---|---|---|---|---|---|---|---|---|---|---|---|---|---|---|---|---|---|---|---|---|
|
|
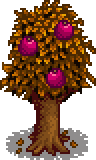
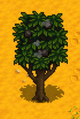
Pomegranate Tree
| Stage 1 | Stage 2 | Stage 3 | Stage 4 | Stage 5 - Spring, Summer, Fall, Winter | Harvest |
|---|---|---|---|---|---|
 |
 |
 |
 |
 |
 |
| 7 Days | 7 Days | 7 Days | 7 Days | Total: 28 Days |
| Sapling | Fruit | Fruit Sell Price | Fruit Restores | Fruit Used In | ||||||||||||||||||||||||||
|---|---|---|---|---|---|---|---|---|---|---|---|---|---|---|---|---|---|---|---|---|---|---|---|---|---|---|---|---|---|---|
|
|
Weather
Fruit trees will not be affected by weather, i.e., fruit will keep producing one per day whether it is raining, windy, or sunny.
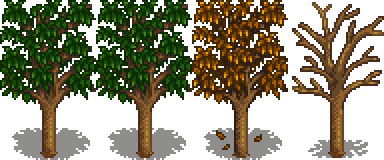
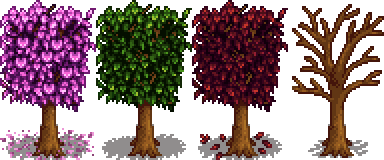
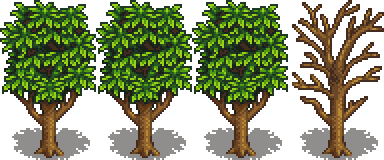
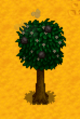
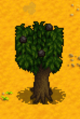
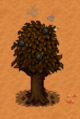
However, during storms, fruit trees can be struck by lightning, causing them to become burnt for 4 days. During this time, they will not produce fruit, but will instead produce coal. After the 4 days are up, they will return to normal. Shown below are fruit trees after being struck by lightning.
Apple Tree
Apricot Tree
Banana Tree

Cherry Tree
Mango Tree
Orange Tree
Peach Tree
Pomegranate Tree


Bugs
It should be possible to plant a common tree seed (i.e., Acorn, Mahogany Seed, Maple Seed, or Pine Cone) and a Fruit Tree sapling (in either order) two tiles away from each other. A bug prevents the player from planting a common tree seed exactly two tiles away from an existing Fruit Tree sapling and from planting a Fruit Tree sapling two tiles away from a common tree seed. The common tree seed is treated as though it were another Fruit Tree sapling.
References
History
- 1.0: Introduced.
- 1.1: Fruit trees can now produce iridium quality fruit. Trees increase fruit quality by 1 star per year of age after reaching maturity.
- 1.4: Removed prior condition where fruits grown by fruit trees would not increase in quality if the trees' 3x3 grid was not kept clear of objects, flooring, and terrain features (including grass). Fruit trees are no longer blocked from growing by artifact spots. Common tree seeds can no longer be placed one or two tiles away from a fruit tree sapling.
- 1.5: Added Banana Sapling and Mango Sapling.
- 1.6: Cutting down a fruit tree now yields the appropriate fruit sapling of the same quality as the fruit. The sapling will mature faster when replanted at higher qualities.
| Trees | |
|---|---|
| Trees | Green Rain Trees • Mahogany Tree • Maple Tree • Mushroom Tree • Mystic Tree • Oak Tree • Palm Tree • Pine Tree |
| Fruit Trees | Apple Tree • Apricot Tree • Banana Tree • Cherry Tree • Mango Tree • Orange Tree • Peach Tree • Pomegranate Tree |
| Seeds | Acorn • Mahogany Seed • Maple Seed • Mossy Seed • Mushroom Tree Seed • Pine Cone • Mystic Tree Seed |
| Fruit | Apple • Apricot • Banana • Cherry • Mango • Orange • Peach • Pomegranate |
| Misc | Large Log • Large Stump • Tea Bush |