Difference between revisions of "Fruit Trees"
Margotbean (talk | contribs) |
Margotbean (talk | contribs) |
||
| (3 intermediate revisions by the same user not shown) | |||
| Line 25: | Line 25: | ||
![[File:Pierre Icon.png|link=]] [[Pierre's General Store|Pierre's]] Price | ![[File:Pierre Icon.png|link=]] [[Pierre's General Store|Pierre's]] Price | ||
![[File:Traveling Cart Icon.png|link=]] [[Traveling Cart]] Price | ![[File:Traveling Cart Icon.png|link=]] [[Traveling Cart]] Price | ||
| − | ! | + | !Fruit |
| − | ! | + | !Fruit Sell Price |
| − | ! | + | !Fruit Restores |
| − | ! | + | !Fruit Used In |
|- | |- | ||
| − | | | + | |[[File:Apricot Sapling.png|center]][[Apricot Sapling]] |
|{{price|2000}} | |{{price|2000}} | ||
|{{tprice|500}} | |{{tprice|500}} | ||
| Line 45: | Line 45: | ||
![[File:Pierre Icon.png|link=]] [[Pierre's General Store|Pierre's]] Price | ![[File:Pierre Icon.png|link=]] [[Pierre's General Store|Pierre's]] Price | ||
![[File:Traveling Cart Icon.png|link=]] [[Traveling Cart]] Price | ![[File:Traveling Cart Icon.png|link=]] [[Traveling Cart]] Price | ||
| − | ! | + | !Fruit |
| − | ! | + | !Fruit Sell Price |
| − | ! | + | !Fruit Restores |
| − | ! | + | !Fruit Used In |
|- | |- | ||
| − | | | + | |[[File:Cherry Sapling.png|center]][[Cherry Sapling]] |
|{{price|3400}} | |{{price|3400}} | ||
|{{tprice|850}} | |{{tprice|850}} | ||
| Line 66: | Line 66: | ||
![[File:Pierre Icon.png|link=]] [[Pierre's General Store|Pierre's]] Price | ![[File:Pierre Icon.png|link=]] [[Pierre's General Store|Pierre's]] Price | ||
![[File:Traveling Cart Icon.png|link=]] [[Traveling Cart]] Price | ![[File:Traveling Cart Icon.png|link=]] [[Traveling Cart]] Price | ||
| − | ! | + | !Fruit |
| − | ! | + | !Fruit Sell Price |
| − | ! | + | !Fruit Restores |
| − | ! | + | !Fruit Used In |
|- | |- | ||
| − | | | + | |[[File:Orange Sapling.png|center]][[Orange Sapling]] |
|{{price|4000}} | |{{price|4000}} | ||
|{{tprice|1000}} | |{{tprice|1000}} | ||
| Line 86: | Line 86: | ||
![[File:Pierre Icon.png|link=]] [[Pierre's General Store|Pierre's]] Price | ![[File:Pierre Icon.png|link=]] [[Pierre's General Store|Pierre's]] Price | ||
![[File:Traveling Cart Icon.png|link=]] [[Traveling Cart]] Price | ![[File:Traveling Cart Icon.png|link=]] [[Traveling Cart]] Price | ||
| − | ! | + | !Fruit |
| − | ! | + | !Fruit Sell Price |
| − | ! | + | !Fruit Restores |
| − | ! | + | !Fruit Used In |
|- | |- | ||
| − | | | + | |[[File:Peach Sapling.png|center]][[Peach Sapling]] |
|{{price|6000}} | |{{price|6000}} | ||
|{{tprice|1500}} | |{{tprice|1500}} | ||
| Line 107: | Line 107: | ||
![[File:Pierre Icon.png|link=]] [[Pierre's General Store|Pierre's]] Price | ![[File:Pierre Icon.png|link=]] [[Pierre's General Store|Pierre's]] Price | ||
![[File:Traveling Cart Icon.png|link=]] [[Traveling Cart]] Price | ![[File:Traveling Cart Icon.png|link=]] [[Traveling Cart]] Price | ||
| − | ! | + | !Fruit |
| − | ! | + | !Fruit Sell Price |
| − | ! | + | !Fruit Restores |
| − | ! | + | !Fruit Used In |
|- | |- | ||
| − | | | + | |[[File:Apple Sapling.png|center]][[Apple Sapling]] |
|{{price|4000}} | |{{price|4000}} | ||
|{{tprice|1000}} | |{{tprice|1000}} | ||
| Line 127: | Line 127: | ||
![[File:Pierre Icon.png|link=]] [[Pierre's General Store|Pierre's]] Price | ![[File:Pierre Icon.png|link=]] [[Pierre's General Store|Pierre's]] Price | ||
![[File:Traveling Cart Icon.png|link=]] [[Traveling Cart]] Price | ![[File:Traveling Cart Icon.png|link=]] [[Traveling Cart]] Price | ||
| − | ! | + | !Fruit |
| − | ! | + | !Fruit Sell Price |
| − | ! | + | !Fruit Restores |
| − | ! | + | !Fruit Used In |
|- | |- | ||
| − | | | + | |[[File:Pomegranate Sapling.png|center]][[Pomegranate Sapling]] |
|{{price|6000}} | |{{price|6000}} | ||
|{{tprice|1500}} | |{{tprice|1500}} | ||
| Line 145: | Line 145: | ||
Be sure your layout will allow the planting of all your intended fruit trees where you want them to be, especially if you plant them at various times, since otherwise, this anomaly can disrupt your plans and layout. Remember that, once planted, a fruit tree cannot be removed except by cutting it down (destroying it and sacrificing the investment). | Be sure your layout will allow the planting of all your intended fruit trees where you want them to be, especially if you plant them at various times, since otherwise, this anomaly can disrupt your plans and layout. Remember that, once planted, a fruit tree cannot be removed except by cutting it down (destroying it and sacrificing the investment). | ||
| − | |||
| − | |||
==History== | ==History== | ||
Revision as of 22:34, 15 September 2018
- For trees that are chopped down for wood, see Trees.
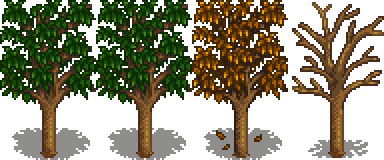
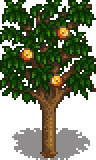
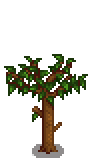
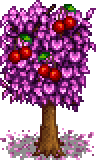
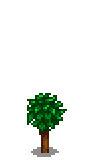
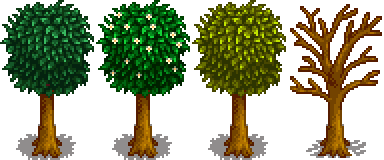
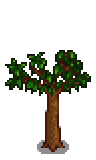
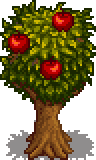
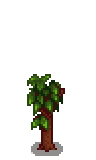
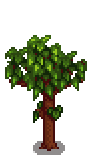
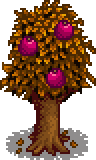
Fruit Trees require 28 days to mature, after which they produce one fruit per day when in season. Fruit can be allowed to accumulate up to three days before harvesting. Fruit trees do not need to be watered, and will not die in the winter. Fruit saplings will grow during any season, allowing players to plant and prepare for upcoming season to bear fruit.
Each Fruit tree must be planted in the center of a clear 3x3 ground area in order to grow. The 3x3 area must remain clear of objects, flooring, and terrain features (including grass); otherwise the tree will not grow or mature. This 3x3 area also cannot overlap the area for another fruit tree. Thus, the nearest you can plant saplings next to each other is with two tiles between them in every direction.
A Fruit Tree is planted directly into untilled ground. Fruit trees can grow in the Greenhouse, in the center soil or around the border. Fruit trees planted in the greenhouse will bear fruit every day after maturity, and will not change color according to the season.
Fruit trees can be chopped down, and yield normal wood. Fruit trees can be struck by lightning, causing them to become burnt for 4 days. During this time, they will not produce fruit, but will instead produce coal. After the 4 days are up, they will return to normal.
Fruit trees cannot be easily moved or relocated, they must be chopped down and replanted, unless editing game files. Take extra caution in planning and placing saplings, because the expensive sapling cannot be retrieved, and mature trees will take years to age again.
A complete set of all six fruit tree saplings costs a total of ![]() 25,400g if purchased from Pierre's General Store.
25,400g if purchased from Pierre's General Store.
Fruit Quality & Price
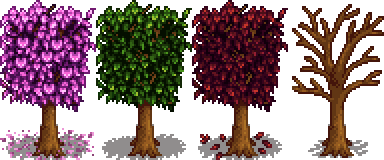
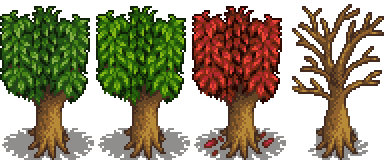
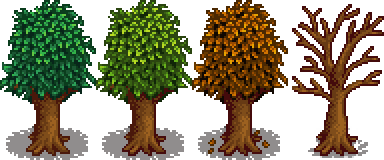
A tree's fruit increases in quality by one star per year of tree age after reaching maturity. Fruit trees will produce silver star fruit after one year, gold after two years, and iridium after three. Note that fruit trees will not age if their 3x3 grid is not kept clear of objects, flooring, and terrain features (including grass).
Fruit Tree fruit receives the Tiller Profession price bonus when sold, and jelly or wine made from fruit tree fruits receives the Artisan Profession price bonus when sold.
Spring
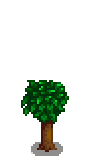
Apricot Tree
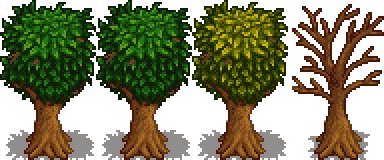
| Stage 1 | Stage 2 | Stage 3 | Stage 4 | Stage 5 - Spring, Summer, Fall, Winter | Harvest |
|---|---|---|---|---|---|
 |
 |
 |
 |
 |
 |
| 7 Days | 7 Days | 7 Days | 7 Days | Total: 28 Days |
| Sapling | Fruit | Fruit Sell Price | Fruit Restores | Fruit Used In | ||||||||||
|---|---|---|---|---|---|---|---|---|---|---|---|---|---|---|
|
Template:Qualityenergy |
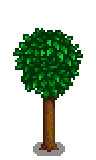
Cherry Tree
| Stage 1 | Stage 2 | Stage 3 | Stage 4 | Stage 5 - Spring, Summer, Fall, Winter | Harvest |
|---|---|---|---|---|---|
 |
 |
 |
 |
 |
 |
| 7 Days | 7 Days | 7 Days | 7 Days | Total: 28 Days |
| Sapling | Fruit | Fruit Sell Price | Fruit Restores | Fruit Used In | ||||||||||
|---|---|---|---|---|---|---|---|---|---|---|---|---|---|---|
|
Template:Qualityenergy |
Summer
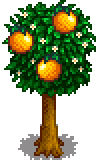
Orange Tree
| Stage 1 | Stage 2 | Stage 3 | Stage 4 | Stage 5 - Spring, Summer, Fall, Winter | Harvest |
|---|---|---|---|---|---|
 |
 |
 |
 |
 |
 |
| 7 Days | 7 Days | 7 Days | 7 Days | Total: 28 Days |
| Sapling | Fruit | Fruit Sell Price | Fruit Restores | Fruit Used In | ||||||||||
|---|---|---|---|---|---|---|---|---|---|---|---|---|---|---|
|
Template:Qualityenergy |
|
Peach Tree
| Stage 1 | Stage 2 | Stage 3 | Stage 4 | Stage 5 - Spring, Summer, Fall, Winter | Harvest |
|---|---|---|---|---|---|
 |
 |
 |
 |
 |
 |
| 7 Days | 7 Days | 7 Days | 7 Days | Total: 28 Days |
| Sapling | Fruit | Fruit Sell Price | Fruit Restores | Fruit Used In | ||||||||||
|---|---|---|---|---|---|---|---|---|---|---|---|---|---|---|
|
Template:Qualityenergy |
|
Fall
Apple Tree
| Stage 1 | Stage 2 | Stage 3 | Stage 4 | Stage 5 - Spring, Summer, Fall, Winter | Harvest |
|---|---|---|---|---|---|
 |
 |
 |
 |
 |
 |
| 7 Days | 7 Days | 7 Days | 7 Days | Total: 28 Days |
| Sapling | Fruit | Fruit Sell Price | Fruit Restores | Fruit Used In | ||||||||||
|---|---|---|---|---|---|---|---|---|---|---|---|---|---|---|
|
Template:Qualityenergy |
Pomegranate Tree
| Stage 1 | Stage 2 | Stage 3 | Stage 4 | Stage 5 - Spring, Summer, Fall, Winter | Harvest |
|---|---|---|---|---|---|
 |
 |
 |
 |
 |
 |
| 7 Days | 7 Days | 7 Days | 7 Days | Total: 28 Days |
| Sapling | Fruit | Fruit Sell Price | Fruit Restores | Fruit Used In | ||||||||||
|---|---|---|---|---|---|---|---|---|---|---|---|---|---|---|
|
Template:Qualityenergy |
Planning and Planting Tips
If you intend to plant fruit trees to the east of the Greenhouse, take extra care to plan your layout. To the north of the Greenhouse there is one row of tiles, directly south of the rockface, that is darker-colored and untillable, but can be used as a walkway. The second row is ordinary tillable farmland. The Greenhouse sits atop the third row of tiles. To the east of the Greenhouse, two columns of tiles have grass and are untillable, and the third is ordinary tillable farmland, directly south of the cave entrance. In the fourth column east of the Greenhouse, and the third row south of the rockface then, you would expect to be able to plant a fruit tree, according to the normal spacing rules. However, the game refuses to allow a fruit tree planting on the particular tile at their intersection. Either of the tiles to the east or south of this one are allowable. (Ordinary trees can be planted on that tile.)
Be sure your layout will allow the planting of all your intended fruit trees where you want them to be, especially if you plant them at various times, since otherwise, this anomaly can disrupt your plans and layout. Remember that, once planted, a fruit tree cannot be removed except by cutting it down (destroying it and sacrificing the investment).
History
- 1.0: Introduced.
- 1.1: Fruit trees can now produce iridium quality fruit. Trees increase quality by 1 star per year of age after reaching maturity.
| Trees | |
|---|---|
| Trees | Green Rain Trees • Mahogany Tree • Maple Tree • Mushroom Tree • Mystic Tree • Oak Tree • Palm Tree • Pine Tree |
| Fruit Trees | Apple Tree • Apricot Tree • Banana Tree • Cherry Tree • Mango Tree • Orange Tree • Peach Tree • Pomegranate Tree |
| Seeds | Acorn • Mahogany Seed • Maple Seed • Mossy Seed • Mushroom Tree Seed • Pine Cone • Mystic Tree Seed |
| Fruit | Apple • Apricot • Banana • Cherry • Mango • Orange • Peach • Pomegranate |
| Misc | Large Log • Large Stump • Tea Bush |