Difference between revisions of "Modding:Installing SMAPI on Mac Pictorial Guide"
Pathoschild (talk | contribs) (remove Mono section (no longer applies for Stardew Valley 1.5.5+), standardize headers to match rest of modding namespace) |
|||
| Line 1: | Line 1: | ||
This guide is meant to be a supplement to the page that tells you how to install SMAPI on a Mac, with pictures to help guide the process. | This guide is meant to be a supplement to the page that tells you how to install SMAPI on a Mac, with pictures to help guide the process. | ||
| − | == | + | __TOC__ |
| − | + | ==Install .NET 5== | |
| − | + | From the instructions page: Install [https://dotnet.microsoft.com/download/dotnet/5.0/runtime .NET 5]. | |
| − | |||
| − | |||
| − | |||
| − | |||
| − | |||
| − | |||
| − | |||
| − | |||
| − | |||
| − | |||
| − | |||
| − | |||
| − | |||
| − | |||
| − | |||
| − | |||
| − | |||
| − | |||
| − | |||
| − | |||
| − | |||
| − | |||
| − | |||
| − | |||
| − | |||
| − | From the instructions page: | ||
The following image is what the .NET 5 link in the instructions takes you to. Click the download circled in red. | The following image is what the .NET 5 link in the instructions takes you to. Click the download circled in red. | ||
| Line 49: | Line 23: | ||
[[File:1e NET installer success.png|500px]] | [[File:1e NET installer success.png|500px]] | ||
| − | == | + | ==Install SMAPI== |
| − | |||
From the instructions page: Download the [https://smapi.io/ latest version of SMAPI]. | From the instructions page: Download the [https://smapi.io/ latest version of SMAPI]. | ||
| Line 91: | Line 64: | ||
[[File:16 SMAPI terminal light.png|500px]] | [[File:16 SMAPI terminal light.png|500px]] | ||
| − | == | + | ==Find and save your Mods folder== |
| − | |||
On a Mac, if you've saved where SMAPI installed mods, you can use Finder functions to get to your Mods folder, then save an alias of your Mods folder somewhere convenient. | On a Mac, if you've saved where SMAPI installed mods, you can use Finder functions to get to your Mods folder, then save an alias of your Mods folder somewhere convenient. | ||
Revision as of 04:00, 1 December 2021
This guide is meant to be a supplement to the page that tells you how to install SMAPI on a Mac, with pictures to help guide the process.
Install .NET 5
From the instructions page: Install .NET 5.
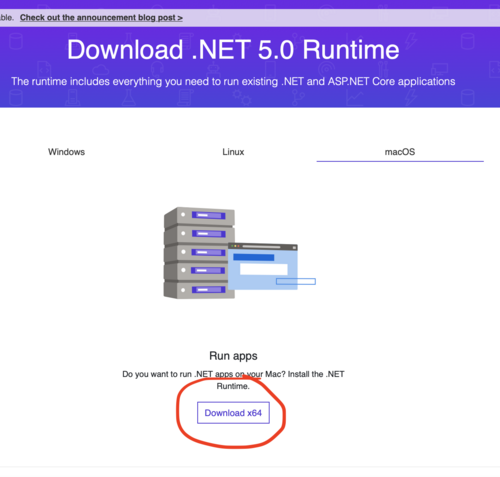
The following image is what the .NET 5 link in the instructions takes you to. Click the download circled in red.
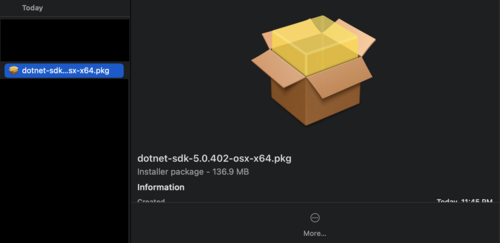
Once you download the installer, it will look like this. You should double click on it to open, or right click and select open.
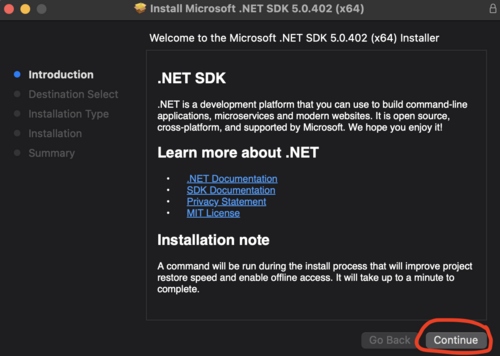
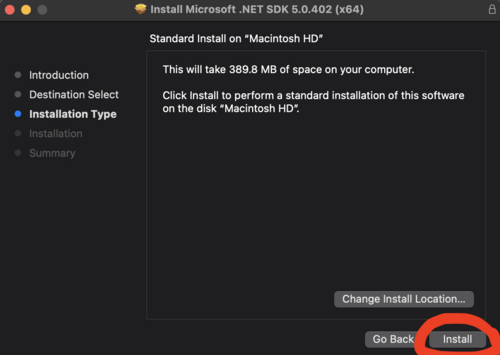
When you open the installer, it will have a series of steps to walk you through the installation. The following pictures circle which buttons to click along the way.
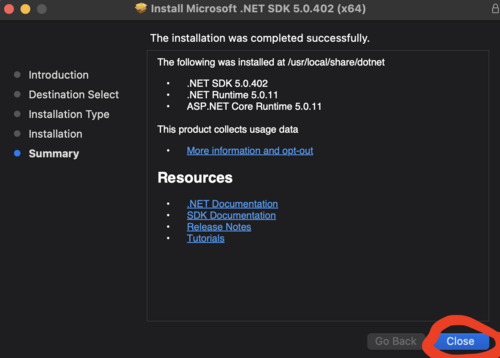
Once it finishes, it should look like this. You can delete the .NET 5 installer package if you like.
Install SMAPI
From the instructions page: Download the latest version of SMAPI.
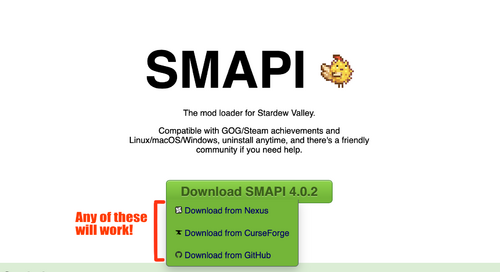
To start with, you need to pick which option for downloading. The direct download is faster and easier, but you will eventually need to figure out Nexus anyways, so either option is a good option. Please be sure to check which version of SMAPI you need! This screenshot was taken in October 2021 and the latest version number may have changed since then, or you may want a specific version for other purposes.
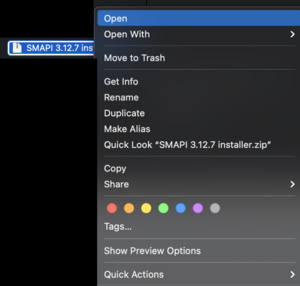
Once you have the zip file downloaded, it may need to be unzipped or it may automatically unzip, depending on your OS version and your settings. If you need to unzip, just double click on the zip file or right click and select open.
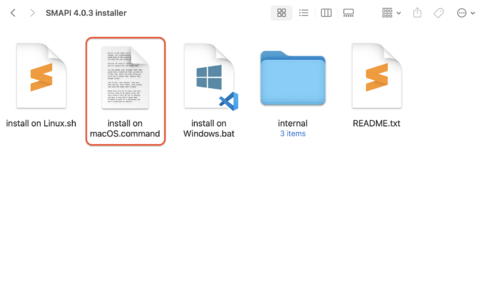
Once it's unzipped, the folder should look something like this. You will need to find the "install on macOS.command" file in the folder.
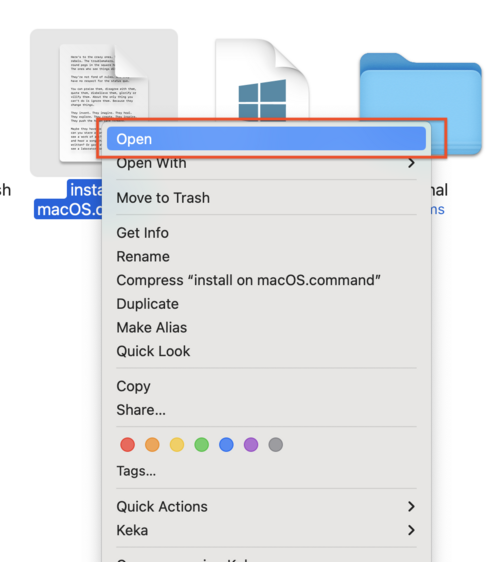
Once you find the "install on macOS.command" file, you will need to right click (on a trackpad, two finger click) on the file, and select open.
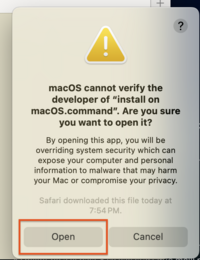
After you select open by right clicking, it will warn you that SMAPI was not made by a big company that registered the app with Apple. This is okay, so press open.
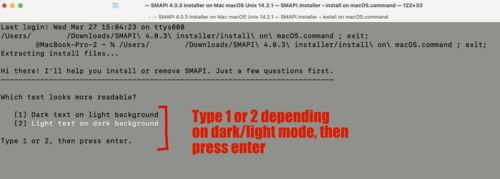
Once you tell it that it's fine to open, it should open a window in Terminal. If it doesn't, or if the window doesn't look like the next image, just quit Terminal and re-open.
SMAPI's terminal window will guide you through how to install. The following pictures should be helpful if you get confused at any point.
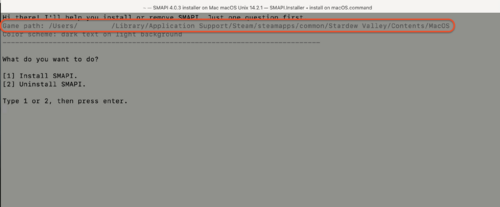
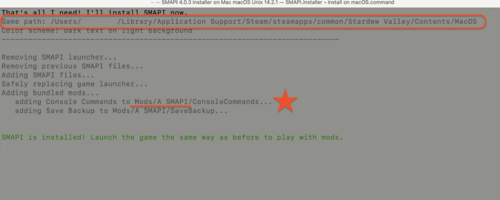
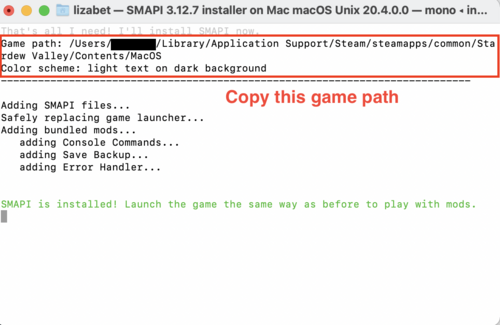
Once you've successfully installed SMAPI, you should get a window that looks like this. This final window includes the game path, so it will be very helpful to copy that and save it for when you want to find your Mods folder. The game path is almost invisible in dark mode, so it's helpful to change to light mode.
Here is the light mode view of the same window.
Find and save your Mods folder
On a Mac, if you've saved where SMAPI installed mods, you can use Finder functions to get to your Mods folder, then save an alias of your Mods folder somewhere convenient.
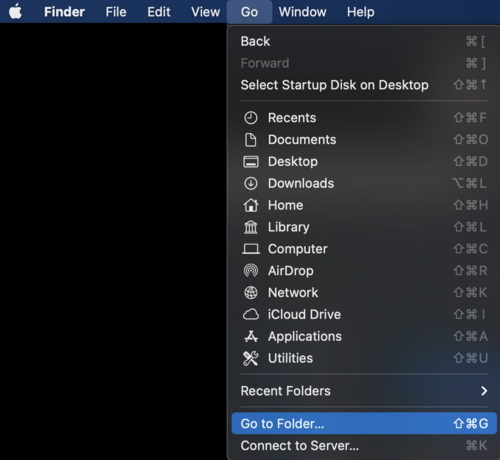
Start by going to the Finder menu and going to Go, then Go to Folder.
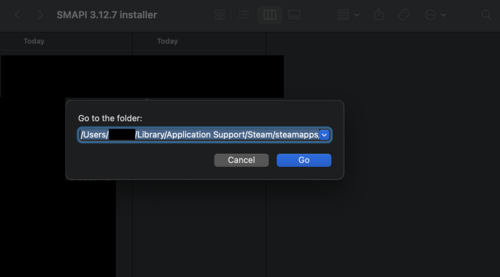
Once you have the menu open, paste in the game path you saved from earlier. If you didn't save it, you can guess it using the pattern from the finding your mods folder page.
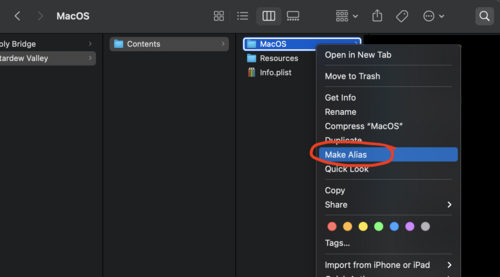
Once you hit return, it will take you to your Mods folder. It's inside a folder named MacOS, which is helpful to be able to navigate to later, especially if you want to switch between different sets of mods. To make your life easier, you can make an alias of this folder by right clicking and selecting Make Alias, then moving the alias somewhere convenient like your Documents or Desktop.
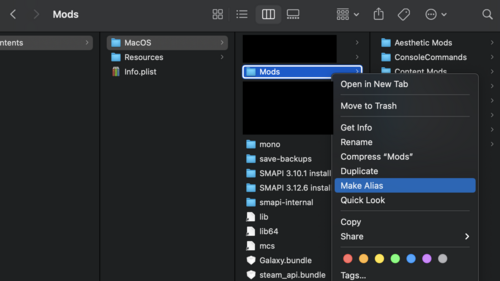
If you prefer to keep things simple, you can make an alias of just your mods folder. Then all you have to do to add mods is drag and drop their unzipped folders into this folder. It is very important to put mods in this folder and not anywhere else, or they will not work because SMAPI will not find them!
