|
|
| Line 2: |
Line 2: |
| | | | |
| | This page explains how to create a mod which replaces game files in order to change game data, images, and maps. | | This page explains how to create a mod which replaces game files in order to change game data, images, and maps. |
| − |
| |
| − |
| |
| | | | |
| | ==Intro== | | ==Intro== |
| Line 40: |
Line 38: |
| | ::* '''[https://www.mediafire.com/?b86xecd27yti6f6 XNB Extract 0.2.2]''' to unpack and pack the game's XNB files. <small>(See [http://community.playstarbound.com/threads/beginners-guide-to-xnb-node-and-graphics-editing.110976/ forum post].)</small> | | ::* '''[https://www.mediafire.com/?b86xecd27yti6f6 XNB Extract 0.2.2]''' to unpack and pack the game's XNB files. <small>(See [http://community.playstarbound.com/threads/beginners-guide-to-xnb-node-and-graphics-editing.110976/ forum post].)</small> |
| | ::* '''[http://www.getpaint.net/download.html Paint.NET]''' to edit image files (or use your favourite image editor). | | ::* '''[http://www.getpaint.net/download.html Paint.NET]''' to edit image files (or use your favourite image editor). |
| − | ::* '''[https://thorbjorn.itch.io/tiled/devlog/5540/small-snapshot-update Tiled snapshot 2017.07.17] <!--[http://www.mapeditor.org/ Tiled 1.0.2 or later]-->''' to edit maps. ('''Note:''' once installed, go to ''Edit > Preferences > Plugins'' and enable the <tt>tbin.dll</tt> plugin.)
| |
| | | | |
| | :; on Linux/Mac | | :; on Linux/Mac |
| Line 47: |
Line 44: |
| | ::* '''[https://www.dropbox.com/s/oj5tch8np74nk4d/XNBExtract0.2.2.zip?dl=0 XNB Extract 0.2.2 for Linux/Mac]''' to unpack and pack the game's XNB files. | | ::* '''[https://www.dropbox.com/s/oj5tch8np74nk4d/XNBExtract0.2.2.zip?dl=0 XNB Extract 0.2.2 for Linux/Mac]''' to unpack and pack the game's XNB files. |
| | ::* '''[https://www.gimp.org/downloads/ GIMP]''' to edit image files (or use your favourite image editor). | | ::* '''[https://www.gimp.org/downloads/ GIMP]''' to edit image files (or use your favourite image editor). |
| − | ::* '''[https://thorbjorn.itch.io/tiled/devlog/5540/small-snapshot-update Tiled snapshot 2017.07.17]''' to edit maps.
| |
| | | | |
| | You should also back up your game's <tt>Content</tt> folder, so you can recover the original files if you make a mistake. | | You should also back up your game's <tt>Content</tt> folder, so you can recover the original files if you make a mistake. |
| Line 66: |
Line 62: |
| | ## Move the repacked <tt>.xnb</tt> file back to the original location. | | ## Move the repacked <tt>.xnb</tt> file back to the original location. |
| | | | |
| − | ==Editing a spritesheet== | + | ==Making changes== |
| − | ===Basic concepts=== | + | ===Spritesheets, tilesheets, or portraits=== |
| − | A spritesheet is just an image file that contains many smaller images in a regular grid pattern:
| + | [[File:Modding - creating an XNB mod - example tilesheet.png|thumb|An example tilesheet, which consists of a grid of tiles like this: [[File:Modding - creating an XNB mod - example tile 1.png]]]] |
| − | | + | Definitions: |
| − | [[File:Modding - creating an XNB mod - example tilesheet.png]] | + | * A '''spritesheet''' is a PNG file containing small images in a regular grid pattern. Each square in the spritesheet's grid pattern is called a '''sprite'''. For example, each in-game item has a sprite in <tt>Content\Maps\spring_objects.xnb</tt>. |
| − | | + | * A '''tilesheet''' is a synonym for spritesheet when used for map tiles. In a tilesheet, each square is called a ''tile'' and is 16×16 pixels. |
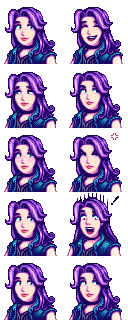
| − | Each square in the spritesheet's grid pattern is called a ''sprite'', and is typically 16×16 pixels. For example, here's a single sprite from the above spritesheet: | + | * A '''portrait''' is a sprite from the <tt>Content\Characters\*.xnb</tt> spritesheets. |
| − | | |
| − | [[File:Modding - creating an XNB mod - example tile 1.png]]
| |
| − | | |
| − | Note that sprites might be drawn next to each other to create the illusion of a larger object:
| |
| − | | |
| − | [[File:Modding - creating an XNB mod - example tile 2.png]]
| |
| | | | |
| − | ===Making changes===
| |
| | Spritesheets are easy to edit: | | Spritesheets are easy to edit: |
| − |
| |
| | # [[#unpacking|Unpack the file]] you want to change. | | # [[#unpacking|Unpack the file]] you want to change. |
| − | # Open the unpacked <tt>.png</tt> file in Paint.NET (or your preferred image editor). | + | # Open the unpacked <tt>.png</tt> file in an image editor (see [[#Getting started]]). |
| | # Make changes directly to the image. | | # Make changes directly to the image. |
| | # [[#unpacking|Repack the file]] and copy it back to the original location. | | # [[#unpacking|Repack the file]] and copy it back to the original location. |
| Line 90: |
Line 78: |
| | That's it! You can launch the game to see your changes. | | That's it! You can launch the game to see your changes. |
| | | | |
| − | ==Editing a map== | + | ===Maps=== |
| − | ===Basic concepts===
| + | See [[Modding:Maps]]. |
| − | <ul>
| |
| − | <li>A '''map''' is the layout of the terrain (like water, cliffs, and land), terrain features (like bushes), buildings, paths, and triggers for a particular area. When you reach the edge of an area or enter a building, and the screen fades to black during the transition, you're moving between maps.</li>
| |
| − | | |
| − | <li>Each map consists of several '''layers''' stacked one in front of the other. Objects in a layer closer to the front will hide objects in layers behind them. From back to front, the standard layers are...
| |
| − | | |
| − | {| class="wikitable"
| |
| − | |-
| |
| − | ! layer name
| |
| − | ! typical contents
| |
| − | |-
| |
| − | | Back
| |
| − | | Terrain, water, and basic features (like permanent paths).
| |
| − | |-
| |
| − | | Buildings
| |
| − | | Placeholders for buildings (like the farmhouse).
| |
| − | |-
| |
| − | | Paths
| |
| − | | Flooring, paths, grass, and debris (like stones, weeds, and stumps) which can be removed by the player.
| |
| − | |-
| |
| − | | Front
| |
| − | | Objects that are drawn on top of things behind them, like most trees.
| |
| − | |-
| |
| − | | AlwaysFront
| |
| − | | Objects that are always drawn on top of other layers. This is typically used for foreground effects like foliage cover.
| |
| − | |}</li>
| |
| − | | |
| − | <li>Each layer consists of many '''tiles''', which are 16×16 pixel squares placed in a grid to form the visible map. Each tile can have properties (e.g. passable / blocked), special logic (e.g. an action to perform when the player steps on them), and a picture to show. The picture is represented by a sprite index (or tile index), which is its position in an associated spritesheet (see next).</li>
| |
| − | | |
| − | <li>Each map has one or more [spritesheets](#editing-a-spritesheet) (also known as tilesheets when talking about mods), which contains the available tiles that are put together to form the visible map.</li>
| |
| − | </ul>
| |
| − | | |
| − | ===Recommended Tiled settings===
| |
| − | The following settings in Tiled are strongly recommended:
| |
| − | | |
| − | {| class="wikitable"
| |
| − | |-
| |
| − | ! setting
| |
| − | ! value
| |
| − | ! reason
| |
| − | |-
| |
| − | | ''View > Snap to Grid''
| |
| − | | ✓ enabled
| |
| − | | This is required to convert objects back into the game's format.
| |
| − | |-
| |
| − | | ''Highlight Current Layer''
| |
| − | | ✓ enabled
| |
| − | | This makes it more clear which tile you're editing.
| |
| − | |}
| |
| − | | |
| − | ===Making changes===
| |
| − | Here's how to edit a Stardew Valley map:
| |
| − | | |
| − | # [[#unpacking|Unpack the file]] you want to change.
| |
| − | # Open the unpacked <tt>.tbin</tt> file in Tiled.
| |
| − | # Make the desired changes (see the [http://doc.mapeditor.org/ Tiled documentation] and next sections) and save.
| |
| − | # [[#unpacking|Repack the file]] and copy it back to the original location.
| |
| − | | |
| − | The [http://doc.mapeditor.org/ Tiled documentation] might help with questions about using it.
| |
| − | | |
| − | ===Tile coordinates===
| |
| − | Each tile has an (x, y) coordinate which represents its position on the map, where (0, 0) is the top-left tile. The ''x'' value increases towards the right, and ''y'' increases downwards. For example:
| |
| − | | |
| − | [[File:Modding - creating an XNB mod - tile coordinates.png]]
| |
| − | | |
| − | ===Using custom sprites===
| |
| − | You can add custom sprites (images) to a map:
| |
| − | | |
| − | # Create your spritesheet. This should be a PNG image with images divided into 16x16 tiles (see [[#Basic concepts]] for examples).
| |
| − | # Open the map in Tiled.
| |
| − | # Add the custom spritesheet:
| |
| − | ## In the ''Tilesets'' pane, click the [[File:Modding - creating an XNB mod - Tiled 'new tilesheet' button.png]] button.
| |
| − | ## Give it a descriptive name (like 'cute bugs') and choose the image source.
| |
| − | ## Keep the default settings and click ''OK''.
| |
| − | # Add custom sprites to the map:
| |
| − | ## In the ''Layers'' pane, click the layer you want to edit.
| |
| − | ## In the ''Tilesets'' pane, click the tab for your custom spritesheet.
| |
| − | ## In the ''Tilesets'' pane, click one tile to select it. To choose multiple, click and drag the cursor.
| |
| − | ## Move the cursor to the map, and you'll see an overlay with the tiles you selected.
| |
| − | ## Click the map to place those tiles on the selected layer.
| |
| − | | |
| − | ===Map properties===
| |
| − | Each map can have multiple map properties, which define attributes and behaviour associated with the map like lighting, music, warp points, etc. Each property has a name (which defines the type of property) and value (which configures the property).
| |
| − | | |
| − | To view and edit map properties in Tiled, click ''Map'' on the toolbar and choose ''Map Properties''.
| |
| − | | |
| − | Known map properties¹:
| |
| − | | |
| − | {| class="wikitable"
| |
| − | |-
| |
| − | ! property
| |
| − | ! explanation
| |
| − | |-
| |
| − | | <tt>AmbientLight {{t|int r}} {{t|int g}} {{t|int b}}</tt>
| |
| − | | Sets the [[wikipedia:RGB color model|RGB colour]] of the ambient light.<br />''Example: <tt>AmbientLight 95 95 95</tt> for a normal indoor daytime lighting.''
| |
| − | |-
| |
| − | | <tt>BrookSounds [{{t|int x}} {{t|int y}} {{t|int sound}}]</tt>
| |
| − | | Adds sound sources. The {{t|x}} {{t|y}} fields are the tile coordinates, and {{t|sound}} is the ambient sound ID.
| |
| − | |-
| |
| − | | <tt>DayTiles [{{t|string layer}} {{t|int x}} {{t|int y}} {{t|int type}}]+</tt>
| |
| − | | Sets which tiles should glow during the day to simulate sunlight streaming through windows. The {{t|layer}} field is the map layer name, {{t|x}} {{t|y}} are the tile coordinates, and {{t|type}} specifies the glow type (e.g. 256 and 288 for an upper and lower window).<br />''Example: <tt>DayTiles Front 3 1 256 Front 3 2 288</tt>.''
| |
| − | |-
| |
| − | | <tt>Doors {{t|int x}} {{t|int y}} {{t|string sheetID}} {{t|int tileID}}</tt>
| |
| − | | Adds a door. The {{t|x}} {{t|y}} fields are the tile coordinates, {{t|sheetID}} is the name of the sheet containing the door sprite, and {{t|tileID}} is the tile index in the spritesheet.
| |
| − | |-
| |
| − | | <tt>Fall_Objects T</tt>²<br /><tt>Spring_Objects T</tt>²<br /><tt>Summer_Objects T</tt>²<br /><tt>Winter_Objects T</tt>²
| |
| − | | Whether to spawn seasonal objects on spawnable tiles based on the data in <tt>Data\Locations.xnb</tt>.<br />''Example: <tt>Fall_Objects</tt>.''
| |
| − | |-
| |
| − | | <tt>Light [{{t|int x}} {{t|int y}} {{t|int type}}]+</tt>
| |
| − | | Adds light sources. The {{t|type}} field is the kind of light source (e.g. 4 for twin candles), and {{t|x}} {{t|y}} are the tile coordinates.<br />''Example: <tt>Light 3 8 4 6 8 4 11 8 4 3 2 5 10 2 5 6 19 5 5 15 5 5 11 5 11 12 5</tt> (Adventurer's Guild).''
| |
| − | |-
| |
| − | | <tt>Music {{t|string name}}</tt>
| |
| − | | Sets the music that plays when the player enters, where {{t|name}} is the cue name in the audio files.<br />''Example: <tt>Music MarlonsTheme</tt>.''
| |
| − | |-
| |
| − | | <tt>NightTiles [{{t|string layer}} {{t|int x}} {{t|int y}} {{t|int type}}]+</tt>
| |
| − | | Like <tt>DayTiles</tt>, but for moonlight at night.
| |
| − | |-
| |
| − | | <tt>Outdoors T</tt>²
| |
| − | | Sets whether the location is outdoors.<br />''Example: <tt>Outdoors true</tt>.''
| |
| − | |-
| |
| − | | <tt>TreatAsOutdoors T</tt>²
| |
| − | | ?
| |
| − | |-
| |
| − | | <tt>Trees [{{t|int x}} {{t|int y}} {{t|int type}}]+</tt>
| |
| − | | Adds trees to the map. The {{t|x}} {{t|y}} fields are the tile coordinates, and {{t|type}} is the tree type (1: oak, 2: maple, 3: pine, 6: palm, 7: mushroom tree).<br />''Example: <tt>Trees 17 18 2 20 31 2</tt>.''
| |
| − | |-
| |
| − | | <tt>UniquePortrait [{{t|str name}}]+</tt>
| |
| − | | ?
| |
| − | |-
| |
| − | | <tt>UniqueSprite [{{t|str name}}]+</tt>
| |
| − | | ?
| |
| − | |-
| |
| − | | <tt>ViewportFollowPlayer T</tt>²
| |
| − | | Forces the viewport to stay centered on the player.<br />''Example: <tt>ViewportFollowPlayer</tt>.''
| |
| − | |-
| |
| − | | <tt>Warp [{{t|int fromX}} {{t|int fromY}} {{t|string toArea}} {{t|int toX}} {{t|int toY}}]+</tt>
| |
| − | | Sets the tiles which warp the player to another map (e.g. doors). The {{t|fromX}} {{t|fromY}} fields are the tile coordinates that initiate the warp, and {{t|toArea}} {{t|toX}} {{t|toY}} are the name of the in-game location to warp to and the tile coordinates within it.<br />''Example: 6 20 Mountain 76 9.''
| |
| − | |}
| |
| − | | |
| − | The following properties are used but apparently have no effect:
| |
| − | | |
| − | * <tt>Arch</tt>
| |
| − | * <tt>Debris</tt>
| |
| − | * <tt>Fish</tt>
| |
| − | | |
| − | <small>¹ Map properties are handled in <tt>GameLocation::resetForPlayerEntry</tt> and <tt>GameLocation::loadObjects</tt>.</small>
| |
| − | <small>² The <tt>T</tt> value (short for ''true'') is conventional, but any non-empty value will work too.</small>
| |
| − | | |
| − | ===Tile properties===
| |
| − | You can set tile properties to perform actions when the player steps on the tile or interacts with it. Each property has a name (which defines the type of property) and value (which configures the property).
| |
| − | | |
| − | In Tiled these are represented by two types: ''object properties'' only apply to the selected tile, while ''tile properties'' apply to every instance of that tile. In general you'll always set ''object properties'', so we'll only cover those.
| |
| − | | |
| − | ====View & edit properties====
| |
| − | To view object properties in Tiled:
| |
| − | | |
| − | # Select the object layer in the ''Layers'' pane.
| |
| − | # Choose the [[File:Modding - creating an XNB mod - Tiled 'select object' button.png]] ''select object'' tool in the toolbar.
| |
| − | # Click the object whose properties you want to view. Objects are represented with a gray selection box on the map:<br />[[File:Modding - creating an XNB mod - map object.png]]
| |
| − | # The object properties will be shown in the ''Properties'' pane.<br />[[File:Modding - creating an XNB mod - Tiled tile properties pane.png]]
| |
| − | | |
| − | To edit properties for an existing object:
| |
| − | * Change a value: click the value field and enter the new value.
| |
| − | * Change a name: select the property and click the [[File:Modding - creating an XNB mod - Tiled 'edit' button.png]] icon.
| |
| − | * Add a property: click the [[File:Modding - creating an XNB mod - Tiled 'add' button.png]] icon, enter the property name, make sure the selected type is "string", and click OK.
| |
| − | | |
| − | To add a new object:
| |
| − | | |
| − | # Select the object layer in the ''Layers'' pane.<br />''There should be one object layer for each tile layer. If the object layer is missing, create one with the same name as the right tile layer.''
| |
| − | # Choose the [[File:Modding - creating an XNB mod - Tiled 'insert rectangle' button.png]] ''insert rectangle'' tool from the toolbar.
| |
| − | # Click and drag the rectangle over the tile you want to edit. Make sure it snaps to the tile grid (see [[#Recommended Tiled settings]]), and only one tile is selected.
| |
| − | ## See previous for how to edit its properties.
| |
| − | | |
| − | ====Known properties====
| |
| − | Known tile properties (excluding specialised properties like <tt>TouchAction WomensLocker</tt>):¹
| |
| − | | |
| − | {| class="wikitable"
| |
| − | |-
| |
| − | ! layer
| |
| − | ! property
| |
| − | ! explanation
| |
| − | |-
| |
| − | | <tt>Back</tt>
| |
| − | | <tt>Diggable T</tt>²
| |
| − | | Marks the tile as diggable with the hoe and enables planting crops.
| |
| − | |-
| |
| − | | <tt>Back</tt>
| |
| − | | <tt>NoFurniture T</tt>²
| |
| − | | Prevents the player from placing furniture on this tile.
| |
| − | |-
| |
| − | | <tt>Back</tt>
| |
| − | | <tt>NoSpawn All</tt><br /><tt>NoSpawn True</tt>
| |
| − | | Combines <tt>NoSpawn Grass</tt> and <tt>NoSpawn Tree</tt>.
| |
| − | |-
| |
| − | | <tt>Back</tt>
| |
| − | | <tt>NoSpawn Grass</tt>
| |
| − | | Prevents debris (e.g. weeds or stones) from spawning on this tile.
| |
| − | |-
| |
| − | | <tt>Back</tt>
| |
| − | | <tt>NoSpawn Tree</tt>
| |
| − | | Prevents trees from spawning on this tile. Prevents the player from planting trees on this tile, except on the farm. If a tree is already on this tile, prevents it from growing.
| |
| − | |-
| |
| − | | <tt>Back</tt>
| |
| − | | <tt>NPCBarrier T</tt>²
| |
| − | | Prevents NPCs from crossing this tile.
| |
| − | |-
| |
| − | | <tt>Back</tt>
| |
| − | | <tt>Type {{t|str type}}</tt>
| |
| − | | Sets the tile type for various game logic (e.g. step sounds or planting crops), where {{t|type}} is one of ''Dirt'', ''Stone'', ''Grass'', or ''Wood''.
| |
| − | |-
| |
| − | | <tt>Back</tt>
| |
| − | | <tt>Water T</tt>²
| |
| − | | Marks the tile as a water tile for various game logic (e.g. items splash into it, can refill watering can from it, can't walk on it, etc).
| |
| − | |-
| |
| − | | <tt>Back</tt>
| |
| − | | <tt>WaterSource T</tt>²
| |
| − | | Lets the player refill the watering can from this tile.
| |
| − | |}
| |
| − | | |
| − | The <tt>TouchAction</tt> property makes something happen when the player steps on the tile:
| |
| − | | |
| − | {| class="wikitable"
| |
| − | |-
| |
| − | ! layer
| |
| − | ! property
| |
| − | ! explanation
| |
| − | |-
| |
| − | | <tt>Back</tt>
| |
| − | | <tt>TouchAction ChangeIntoSwimsuit</tt>
| |
| − | | Changes the player into their swimsuit and disables running.
| |
| − | |-
| |
| − | | <tt>Back</tt>
| |
| − | | <tt>TouchAction ChangeOutOfSwimsuit</tt>
| |
| − | | Changes the player into their regular clothes and enables running.
| |
| − | |-
| |
| − | | <tt>Back</tt>
| |
| − | | <tt>TouchAction Door {{t|string npc}}</tt>
| |
| − | | If the player doesn't have 2+ friendship hearts with the villager named by the {{t|npc}} field: stops the player, marks the tile as impassible, and displays a door-locked message.
| |
| − | |-
| |
| − | | <tt>Back</tt>
| |
| − | | <tt>TouchAction Emote {{t|string npc}} {{t|int emoteID}}</tt>
| |
| − | | Finds the NPC whose name matches the {{t|npc}} field, and causes them to show the given {{t|emoteID}} above their head (4: empty can, 8: question mark, 12: angry, 16: exclamation, 20: heart, 24: sleep, 28: sad, 32: happy, 36: x, 40: pause, 52: videogame, 56: music note, 60: blush).
| |
| − | |-
| |
| − | | <tt>Back</tt>
| |
| − | | <tt>TouchAction FacingDirection {{t|string npc}} {{t|int direction}}</tt>
| |
| − | | Finds the NPC whose name matches the {{t|npc}} field, and make them face the given direction (0: up, 1: right, 2: down, 3: left).
| |
| − | |-
| |
| − | | <tt>Back</tt>
| |
| − | | <tt>TouchAction MagicWarp {{t|string area}} {{t|int x}} {{t|int y}} {{o|string prerequisite}}</tt>
| |
| − | | Warps the player to the {{t|x}} {{t|y}} tile coordinates in the given {{t|area}} with a magic sound and effects. If the {{o|prerequisite}} field is specified, only occurs if that flag is set via <tt>Game1.player.mailReceived</tt>.
| |
| − | |-
| |
| − | | <tt>Back</tt>
| |
| − | | <tt>TouchAction PoolEntrance</tt>
| |
| − | | Switches the player between swimming and walking mode.
| |
| − | |-
| |
| − | | <tt>Back</tt>
| |
| − | | <tt>TouchAction Sleep</tt>
| |
| − | | Ends the day if the player confirms.
| |
| − | |}
| |
| − | | |
| − | The <tt>Action</tt> property makes something happen when the player interacts (e.g. clicks) with the tile:
| |
| − | | |
| − | {| class="wikitable"
| |
| − | |-
| |
| − | ! layer
| |
| − | ! property
| |
| − | ! explanation
| |
| − | |-
| |
| − | | <tt>Buildings</tt>
| |
| − | | <tt>Action AdventureShop</tt>
| |
| − | | Shows the Adventurer's Guild shop screen.
| |
| − | |-
| |
| − | | <tt>Buildings</tt>
| |
| − | | <tt>Action Arcade_Prairie</tt>
| |
| − | | Shows the ''Journey of the Prairie King'' arcade game.
| |
| − | |-
| |
| − | | <tt>Buildings</tt>
| |
| − | | <tt>Action Arcade_Minecart</tt>
| |
| − | | Shows the ''Junimo Kart'' arcade game.
| |
| − | |-
| |
| − | | <tt>Buildings</tt>
| |
| − | | <tt>Action BuyBackpack</tt>
| |
| − | | Shows a menu which lets the player upgrade their backpack if an upgrade is available.
| |
| − | |-
| |
| − | | <tt>Buildings</tt>
| |
| − | | <tt>Action Billboard</tt>
| |
| − | | Shows the calendar menu.
| |
| − | |-
| |
| − | | <tt>Buildings</tt>
| |
| − | | <tt>Action BuyQiCoins</tt>
| |
| − | | Shows a dialogue which lets the player buy 100 Casino club coins.
| |
| − | |-
| |
| − | | <tt>Buildings</tt>
| |
| − | | <tt>Action ColaMachine</tt>
| |
| − | | Offers to let the player buy a Joja cola.
| |
| − | |-
| |
| − | | <tt>Buildings</tt>
| |
| − | | <tt>Action ClubCards</tt><br /><tt>Action Blackjack</tt>
| |
| − | | Shows the casino blackjack minigame.
| |
| − | |-
| |
| − | | <tt>Buildings</tt>
| |
| − | | <tt>Action ClubComputer</tt><br /><tt>Action FarmerFile</tt>
| |
| − | | Shows a dialogue with play stats (steps taken, gifts given, dirt hoed, etc).
| |
| − | |-
| |
| − | | <tt>Buildings</tt>
| |
| − | | <tt>Action ClubSeller</tt>
| |
| − | | Shows a dialogue which lets the player buy a [[Statue of Endless Fortune]] for one million gold.
| |
| − | |-
| |
| − | | <tt>Buildings</tt>
| |
| − | | <tt>Action ClubShop</tt>
| |
| − | | Shows the casino shop menu.
| |
| − | |-
| |
| − | | <tt>Buildings</tt>
| |
| − | | <tt>Action ClubSlots</tt>
| |
| − | | Shows the casino slots minigame.
| |
| − | |-
| |
| − | | <tt>Buildings</tt>
| |
| − | | <tt>Action Dialogue {{t|text}}</tt>
| |
| − | | Shows a generic dialogue box with the given text. See [[Modding:Dialogue|dialogue format]].<br />''Example: Action Dialogue Hi there @!''
| |
| − | |-
| |
| − | | <tt>Buildings</tt>
| |
| − | | <tt>Action DivorceBook</tt>
| |
| − | | Shows divorce options for the player's current marriage status (as if they clicked the [[Marriage#Divorce|divorce book]]).
| |
| − | |-
| |
| − | | <tt>Buildings</tt>
| |
| − | | <tt>Action JojaShop</tt>
| |
| − | | Shows the Joja shopping screen.
| |
| − | |-
| |
| − | | <tt>Buildings</tt>
| |
| − | | <tt>Action Jukebox</tt>
| |
| − | | Shows the jukebox menu to choose the ambient music.
| |
| − | |-
| |
| − | | <tt>Buildings</tt>
| |
| − | | <tt>Action kitchen</tt>
| |
| − | | Shows the cooking menu.
| |
| − | |-
| |
| − | | <tt>Buildings</tt>
| |
| − | | <tt>Action Letter {{t|string text}}</tt>
| |
| − | | Shows the letter menu on-screen with the given text, with the syntax used by <tt>Data\mail.xnb</tt>.<br />''Example: <tt>Action Letter Hey there!^I had some extra wood lying around... I thought maybe you could use it. Take care! ^ -Robin %item object 388 50 %%</tt>''
| |
| − | |-
| |
| − | | <tt>Buildings</tt>
| |
| − | | <tt>Action LockedDoorWarp [{{t|int toX}} {{t|int toY}} {{t|string toArea}} {{t|int openTime}} {{t|int closeTime}}]</tt>
| |
| − | | Creates an activation warp normally used on doors with a time window for when it can be used. Note that you must use 24-hour times, i.e. 2000 for 8pm. <br />''Example: 6 29 SeedShop 900 2100''
| |
| − | |-
| |
| − | | <tt>Buildings</tt>
| |
| − | | <tt>Action Mailbox</tt>
| |
| − | | Shows the next letter from the player's mailbox (if any).
| |
| − | |-
| |
| − | | <tt>Buildings</tt>
| |
| − | | <tt>Action Material</tt>
| |
| − | | Shows a summary of the player's stockpiled wood and stone.
| |
| − | |-
| |
| − | | <tt>Buildings</tt>
| |
| − | | <tt>Action Message {{t|string messageKey}}</tt>
| |
| − | | Loads a message with the given key from the ''Content\Strings\StringsFromMaps.xnb'' file and displays it in a dialogue box.
| |
| − | |-
| |
| − | | <tt>Buildings</tt>
| |
| − | | <tt>Action MessageOnce {{t|int eventID}} {{t|string message}}</tt>
| |
| − | | If the player hasn't seen the event with ID {{t|eventID}}, marks that event seen and displays the given message text in a dialogue box. This does ''not'' parse [[Modding:Dialogue|dialogue format]].
| |
| − | |-
| |
| − | | <tt>Buildings</tt>
| |
| − | | <tt>Action MineSign {{t|string message}}</tt>
| |
| − | | Shows a mini-dialogue box with the given raw message text. This does ''not'' parse [[Modding:Dialogue|dialogue format]].
| |
| − | |-
| |
| − | | <tt>Buildings</tt>
| |
| − | | <tt>Action MinecartTransport</tt>
| |
| − | | Shows the minecart destination menu (or a message if not unlocked).
| |
| − | |-
| |
| − | | <tt>Buildings</tt>
| |
| − | | <tt>Action MineElevator</tt>
| |
| − | | Shows the mine elevator menu (to warp to a mine level) if the player has reached mine level 5+, else a mine elevator not working message.
| |
| − | |-
| |
| − | | <tt>Buildings</tt>
| |
| − | | <tt>Action NextMineLevel</tt>
| |
| − | | Warps the player to the next mine level (or level 1 if they're not in the mine).
| |
| − | |-
| |
| − | | <tt>Buildings</tt>
| |
| − | | <tt>Action Notes {{t|int noteID}}</tt>
| |
| − | | If the player has found the specified lost book, displays its museum note text and marks it read.<br />''Example: Action Notes 17''
| |
| − | |-
| |
| − | | <tt>Buildings</tt>
| |
| − | | <tt>Action NPCMessage {{t|str name}} "{{t|str dialogueKey}}"</tt>
| |
| − | | If the named NPC is within 14 tiles of the player, reads dialogue with the given key from the string files and displays a dialogue box. See [[Modding:Dialogue|dialogue format]].<br />''Example: Action NPCMessage Abigail "Strings\\StringsFromCSFiles:Event.cs.1022"''
| |
| − | |-
| |
| − | | <tt>Buildings</tt>
| |
| − | | <tt>Action playSound {{t|str cueName}}</tt>
| |
| − | | Play the sound or music with the given name.
| |
| − | |-
| |
| − | | <tt>Buildings</tt>
| |
| − | | <tt>Action QiCoins</tt>
| |
| − | | Shows a dialogue which lets the player buy 10 Casino club coins if they have none, else shows how many they have.
| |
| − | |-
| |
| − | | <tt>Buildings</tt>
| |
| − | | <tt>Action Warp {{t|int x}} {{t|int y}} {{t|str area}}</tt>
| |
| − | | Warps the player to the {{t|x}} {{t|y}} tile coordinate in the {{t|area}} game location.<br />''Example: Action Warp Mountain 76 9''
| |
| − | |-
| |
| − | | <tt>Buildings</tt>
| |
| − | | <tt>Action WarpCommunityCenter</tt>
| |
| − | | Warps the player to the inside of the Community Center if they have access (else show an "it's locked" message).
| |
| − | |-
| |
| − | | <tt>Buildings</tt>
| |
| − | | <tt>Action WarpGreenhouse</tt>
| |
| − | | Warps the player to the inside of their greenhouse if they've unlocked it, else shows a message about the greenhouse ruins.
| |
| − | |-
| |
| − | | <tt>Buildings</tt>
| |
| − | | <tt>Action WizardShrine</tt>
| |
| − | | Shows the character customisation menu normally available from the Wizard's tower.
| |
| − | |}
| |
| − | | |
| − | <small>¹ Tile properties are handled throughout the codebase using <tt>GameLocation::doesTileHaveProperty</tt>. Actions and touch actions are handled by <tt>GameLocation::performAction</tt> and <tt>GameLocation::performTouchAction</tt> respectively. Emote IDs are listed as <tt>Character</tt> constants.</small><br />
| |
| − | <small>² The <tt>T</tt> value (short for ''true'') is conventional, but any non-empty value will work too.</small>
| |
| − | | |
| − | ===Animating tiles===
| |
| − | You can animate tiles to create effects like Gil in his rocking chair:
| |
| − | | |
| − | [[File:Modding - creating an XNB mod - example animation.gif]]
| |
| − | | |
| − | Here's how to do it in Tiled:
| |
| − | # Select the tile you want to animate in the ''Tilesets'' pane.
| |
| − | # Click ''View > Tile Animation Editor'' in the toolbar to show that pane.
| |
| − | # In the ''Tile Animation Editor'' pane, drag tiles from the tilesheet into the box on the left to create a ''frame'' (one image in the sequence).
| |
| − | # Double-click the numbers to change how long each frame stays on the screen before the next one (in milliseconds). '''Make sure every frame has the same time; the game can't handle variable frame times.''' For example, here's the animation editor showing one of the tiles of Gil rocking:<br />[[File:Modding - creating an XNB mod - Tiled example animation pane.gif]]
| |
| − | ## When you're done, close the pane.
| |
| − | ## The animated tiles in the ''Tilesets'' pane will now have a little symbol in the bottom-right corner:<br />[[File:Modding - creating an XNB mod - Tiled example animation tileset.png]]<br />The animation is now part of that tile. Every instance of that tile on the map will now have the same animation.
| |
| − | | |
| − | ===Editing maps from a SMAPI mod===
| |
| − | The previous sections describe how to edit a map by editing its file, but you can also edit it programmatically at runtime in a [[Modding:Creating a SMAPI mod|SMAPI mod]]:
| |
| − | | |
| − | <source lang="c#">
| |
| − | GameLocation location = Game1.currentLocation;
| |
| − | | |
| − | /*********
| |
| − | ** Manage map properties
| |
| − | *********/
| |
| − | // get
| |
| − | string value = location.map.Properties.ContainsKey("Music")
| |
| − | ? location.map.Properties["Music"].ToString()
| |
| − | : null;
| |
| − | | |
| − | // set
| |
| − | location.map.Properties["Music"] = "MarlonsTheme";
| |
| − | | |
| − | /*********
| |
| − | ** Manage tile properties
| |
| − | *********/
| |
| − | // get
| |
| − | string value = location.doesTileHaveProperty(tileX, tileY, "Diggable", "Back");
| |
| − | | |
| − | // set
| |
| − | location.setTileProperty(tileX, tileY, "Back", "Diggable", "T");
| |
| − | | |
| − | /*********
| |
| − | ** Edit tiles
| |
| − | *********/
| |
| − | // remove tile
| |
| − | location.removeTile(tileX, tileY, "Back");
| |
| − | location.waterTiles[tileX, tilyY] = false;
| |
| − | | |
| − | // add tile
| |
| − | var layer = location.map.GetLayer("Back");
| |
| − | var tilesheet = location.map.GetTilesheet("tilesheet name");
| |
| − | layer.Tiles[tileX, tileY] = new StaticTile(layer, tilesheet, BlendMode.Alpha, tileID);
| |
| − | </source>
| |
| | | | |
| | [[Category:Modding]] | | [[Category:Modding]] |