Difference between revisions of "Harvey's Clinic"
Margotbean (talk | contribs) (+pt) |
(Remove disclaimer) |
||
| (54 intermediate revisions by 18 users not shown) | |||
| Line 1: | Line 1: | ||
| − | {{ | + | {{Infobox location |
| − | |name=Clinic | + | |name = Clinic |
| − | |mapx =218 | + | |mapx = 218 |
| − | |mapy =92 | + | |mapy = 92 |
| − | |building=Medical Clinic.png | + | |building = Medical Clinic.png |
| − | |openhours=9: | + | |openhours = 9:00am to 3:00pm |
|closed = | |closed = | ||
| − | |address= | + | |address = |
| − | |occupants={{NPC|Harvey}} | + | |occupants = {{NPC|Harvey}} |
| − | |width=160px | + | |width = 160px |
}} | }} | ||
| − | [[Harvey's Clinic]] is located in the center of [[Pelican Town]], next to [[Pierre's General Store]]. [[Harvey]] lives and works at the clinic. [[Maru]] | + | [[Harvey's Clinic]] is located in the center of [[Pelican Town]], next to [[Pierre's General Store]]. [[Harvey]] lives and works at the clinic. [[Maru]] works there on [[Days of the Week#Tuesday|Tuesday]] and [[Days of the Week#Thursday|Thursday]]. Both of them often complain about the lack of patients. |
| − | + | Most [[villagers]] will visit the clinic for their annual checkup. [[George]] and [[Evelyn]] visit the clinic once per season. | |
| + | |||
| + | Although you can enter the Clinic most days between 9am and 3pm, you cannot purchase medical supplies unless [[Maru]] or [[Harvey]] is behind the supplies counter. | ||
==Medical Supplies== | ==Medical Supplies== | ||
| − | {| class="wikitable | + | Gifting medical supplies is possible, but both items are [[Friendship#Universal hates|universally hated]]. |
| + | {|class="wikitable roundedborder" | ||
!Image | !Image | ||
!Name | !Name | ||
| − | !Description | + | !style="width: 10em;"|Description |
!Effects | !Effects | ||
!Purchase Price | !Purchase Price | ||
!Sell Price | !Sell Price | ||
| + | !Other Sources | ||
|- | |- | ||
|[[File:Energy Tonic.png]] | |[[File:Energy Tonic.png]] | ||
|Energy Tonic | |Energy Tonic | ||
| − | + | |{{Description|Energy Tonic}} | |
| − | |{{ | + | |{{name|Energy|500}} |
|{{price|1000}} | |{{price|1000}} | ||
|{{price|500}} | |{{price|500}} | ||
| + | |<ul><li>[[Bats|Iridium Bat]] drop (5%)</li><li>Gift from [[Pam]] in the mail</li><li>[[Skull Cavern#Treasure Rooms|Treasure Rooms]] in the Skull Cavern</li></ul> | ||
|- | |- | ||
|[[File:Muscle Remedy.png]] | |[[File:Muscle Remedy.png]] | ||
|Muscle Remedy | |Muscle Remedy | ||
| − | | | + | |{{Description|Muscle Remedy}} |
|{{name|Energy|50}}{{name|Health|22}} | |{{name|Energy|50}}{{name|Health|22}} | ||
| + | *Removes the [[Energy|Exhaustion]] indicator | ||
|{{price|1000}} | |{{price|1000}} | ||
|{{price|500}} | |{{price|500}} | ||
| + | | | ||
| + | |} | ||
| + | |||
| + | ==Tailoring== | ||
| + | Energy Tonic is used in the spool of the [[2 Willow Lane#Sewing Machine|Sewing Machine]] to create the [[Tailoring|Letterman Jacket]]. [[File:Shirt137.png|24px]] It can be also used as a red dye color at the dye pots in [[Emily]]'s and [[Haley]]'s house, [[2 Willow Lane]]. | ||
| + | |||
| + | Muscle Remedy is used in the spool of the [[2 Willow Lane#Sewing Machine|Sewing Machine]] to create the dyeable [[Tailoring|Fake Muscles Shirt]]. [[File:Shirt153.png|24px]] It can be also used as a yellow dye color at the dye pots in [[Emily]]'s and [[Haley]]'s house, [[2 Willow Lane]]. | ||
| + | |||
| + | ==Appointments== | ||
| + | Note that the start times are when the villager leaves home to travel to the clinic. The end times are when the villager leaves the clinic. | ||
| + | {| | ||
| + | |- | ||
| + | | | ||
| + | ===Spring=== | ||
| + | {|class="wikitable sortable roundedborder" | ||
| + | !scope="col"|Day | ||
| + | !scope="col"|Villager | ||
| + | !scope="col"|Time | ||
| + | |- | ||
| + | |02||[[File:Evelyn Icon.png|link=]] [[Evelyn]]||10:30am - 4:00pm | ||
| + | |- | ||
| + | |04||[[File:Abigail Icon.png|link=]] [[Abigail]]||12:30pm - 4:00pm | ||
| + | |- | ||
| + | |09||[[File:Willy Icon.png|link=]] [[Willy]]||10:10am - 4:00pm | ||
| + | |- | ||
| + | |11||[[File:Vincent Icon.png|link=]] [[Vincent]]||11:30am - 4:00pm | ||
| + | |- | ||
| + | |11||[[File:Jodi Icon.png|link=]] [[Jodi]] (with Vincent)||11:30am - 4:00pm | ||
| + | |- | ||
| + | |16||[[File:Leah Icon.png|link=]] [[Leah]]||10:30am - 4:00pm | ||
| + | |- | ||
| + | |18||[[File:Jodi Icon.png|link=]] [[Jodi]]||11:30am - 4:00pm | ||
| + | |- | ||
| + | |23||[[File:George Icon.png|link=]] [[George]]||10:30am - 4:00pm | ||
| + | |- | ||
| + | |23||[[File:Evelyn Icon.png|link=]] [[Evelyn]] (with George)||10:40am - 4:10pm | ||
| + | |- | ||
| + | |25||[[File:Pam Icon.png|link=]] [[Pam]]||11:30am - 4:00pm | ||
| + | |} | ||
| + | |style="width: 18px;"| | ||
| + | |style="vertical-align: top;"| | ||
| + | |||
| + | ===Summer=== | ||
| + | {|class="wikitable sortable roundedborder" | ||
| + | !scope="col"|Day | ||
| + | !scope="col"|Villager | ||
| + | !scope="col"|Time | ||
| + | |- | ||
| + | |02||[[File:Evelyn Icon.png|link=]] [[Evelyn]]||10:30am - 4:00pm | ||
| + | |- | ||
| + | |04||[[File:Sebastian Icon.png|link=]] [[Sebastian]]||10:00am - 4:00pm | ||
| + | |- | ||
| + | |09||[[File:Elliott Icon.png|link=]] [[Elliott]]||10:30am - 4:00pm | ||
| + | |- | ||
| + | |16||[[File:Alex Icon.png|link=]] [[Alex]]||10:30am - 4:00pm | ||
| + | |- | ||
| + | |18||[[File:Robin Icon.png|link=]] [[Robin]]||8:00am - 4:00pm | ||
| + | |- | ||
| + | |23||[[File:George Icon.png|link=]] [[George]]||10:30am - 4:00pm | ||
| + | |- | ||
| + | |23||[[File:Evelyn Icon.png|link=]] [[Evelyn]] (with George)||10:40am - 4:10pm | ||
| + | |- | ||
| + | |25||[[File:Demetrius Icon.png|link=]] [[Demetrius]]||8:20am - 4:00pm | ||
| + | |} | ||
| + | |} | ||
| + | |||
| + | {| | ||
| + | |- | ||
| + | |style="vertical-align: top;"| | ||
| + | ===Fall=== | ||
| + | {|class="wikitable sortable roundedborder" | ||
| + | !scope="col"|Day | ||
| + | !scope="col"|Villager | ||
| + | !scope="col"|Time | ||
| + | |- | ||
| + | |02||[[File:Evelyn Icon.png|link=]] [[Evelyn]]||10:30am - 4:00pm | ||
| + | |- | ||
| + | |04||[[File:Gus Icon.png|link=]] [[Gus]]||10:30am - 4:00pm | ||
| + | |- | ||
| + | |09||[[File:Lewis Icon.png|link=]] [[Lewis]]||10:30am - 4:00pm | ||
| + | |- | ||
| + | |11||[[File:Sam Icon.png|link=]] [[Sam]]||11:30am - 4:00pm | ||
| + | |- | ||
| + | |18||[[File:Marnie Icon.png|link=]] [[Marnie]]||10:30am - 4:00pm | ||
| + | |- | ||
| + | |23||[[File:George Icon.png|link=]] [[George]]||10:30am - 4:00pm | ||
| + | |- | ||
| + | |23||[[File:Evelyn Icon.png|link=]] [[Evelyn]] (with George)||10:40am - 4:10pm | ||
| + | |- | ||
| + | |25||[[File:Caroline Icon.png|link=]] [[Caroline]]||12:00pm - 4:00pm | ||
|} | |} | ||
| + | |style="width: 18px;"| | ||
| + | |style="vertical-align: top;"| | ||
| + | ===Winter=== | ||
| + | {|class="wikitable sortable roundedborder" | ||
| + | !scope="col"|Day | ||
| + | !scope="col"|Villager | ||
| + | !scope="col"|Time | ||
| + | |- | ||
| + | |02||[[File:Evelyn Icon.png|link=]] [[Evelyn]]||10:30am - 4:00pm | ||
| + | |- | ||
| + | |04||[[File:Penny Icon.png|link=]] [[Penny]]||11:30am - 4:00pm | ||
| + | |- | ||
| + | |09||[[File:Haley Icon.png|link=]] [[Haley]]||10:30am - 4:00pm | ||
| + | |- | ||
| + | |11||[[File:Emily Icon.png|link=]] [[Emily]]||10:30am - 4:00pm | ||
| + | |- | ||
| + | |16||[[File:Clint Icon.png|link=]] [[Clint]]||10:30am - 4:00pm | ||
| + | |- | ||
| + | |18||[[File:Jas Icon.png|link=]] [[Jas]]||10:30am - 4:00pm | ||
| + | |- | ||
| + | |18||[[File:Marnie Icon.png|link=]] [[Marnie]] (with Jas)||10:40am - 4:00pm | ||
| + | |- | ||
| + | |23||[[File:George Icon.png|link=]] [[George]]||10:30am - 4:00pm | ||
| + | |- | ||
| + | |23||[[File:Evelyn Icon.png|link=]] [[Evelyn]] (with George)||11:00am - 4:00pm | ||
| + | |} | ||
| + | |} | ||
| + | |||
| + | ==Gallery== | ||
| + | <gallery> | ||
| + | Clinic Interior.png|Clinic Interior | ||
| + | Clinic Upstairs.png|Harvey's apartment | ||
| + | </gallery> | ||
| + | |||
| + | ==Glitches== | ||
| + | If you pass out from low [[health]] while on your horse, both you and the horse will be transported to Harvey's Clinic. Your horse will be stuck inside the Clinic until the morning when it is transported to its stable. | ||
| + | |||
| + | ==History== | ||
| + | {{History|1.3.32|Red plus sign on front of building changed to blue. Interior red plus signs changed to green or desaturated.}} | ||
| + | {{History|1.4|Energy Tonic and Muscle Remedy can now be used in [[Tailoring]].}} | ||
| + | {{History|1.6.4|Energy Tonic no longer restores health when consumed.}} | ||
| + | |||
{{NavboxBuildings}} | {{NavboxBuildings}} | ||
| − | [[Category:Town Locations]][[Category:Stores]] | + | |
| + | [[Category:Town Locations]] | ||
| + | [[Category:Stores]] | ||
| + | [[Category:Bugs tested in 1.4]] | ||
[[de:Harveys Klinik]] | [[de:Harveys Klinik]] | ||
[[es:Clínica de Harvey]] | [[es:Clínica de Harvey]] | ||
| + | [[fr:Clinique d’Harvey]] | ||
| + | [[it:Clinica di Harvey]] | ||
[[ja:ハーヴィーの診療所]] | [[ja:ハーヴィーの診療所]] | ||
| + | [[ko:하비의 병원]] | ||
| + | [[hu:Harvey Klinikája]] | ||
[[pt:Clínica do Harvey]] | [[pt:Clínica do Harvey]] | ||
| + | [[ru:Клиника Харви]] | ||
| + | [[tr:Harvey'nin Sağlık Ocağı]] | ||
[[zh:哈维的诊所]] | [[zh:哈维的诊所]] | ||
Latest revision as of 10:14, 20 April 2024
| Clinic | |
 | |
| Open Hours: | 9:00am to 3:00pm |
| Occupants: | |
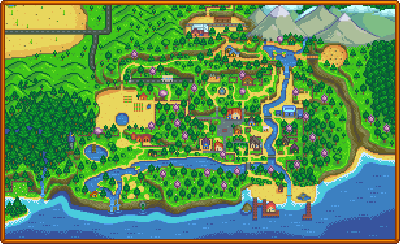
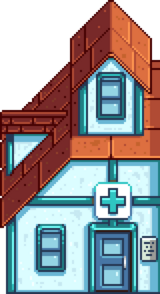
Harvey's Clinic is located in the center of Pelican Town, next to Pierre's General Store. Harvey lives and works at the clinic. Maru works there on Tuesday and Thursday. Both of them often complain about the lack of patients.
Most villagers will visit the clinic for their annual checkup. George and Evelyn visit the clinic once per season.
Although you can enter the Clinic most days between 9am and 3pm, you cannot purchase medical supplies unless Maru or Harvey is behind the supplies counter.
Medical Supplies
Gifting medical supplies is possible, but both items are universally hated.
| Image | Name | Description | Effects | Purchase Price | Sell Price | Other Sources |
|---|---|---|---|---|---|---|
| Energy Tonic | Restores a lot of energy. |
| ||||
| Muscle Remedy | When you've pushed your body too hard, drink this to remove 'Exhaustion'. |
|
Tailoring
Energy Tonic is used in the spool of the Sewing Machine to create the Letterman Jacket. ![]() It can be also used as a red dye color at the dye pots in Emily's and Haley's house, 2 Willow Lane.
It can be also used as a red dye color at the dye pots in Emily's and Haley's house, 2 Willow Lane.
Muscle Remedy is used in the spool of the Sewing Machine to create the dyeable Fake Muscles Shirt. ![]() It can be also used as a yellow dye color at the dye pots in Emily's and Haley's house, 2 Willow Lane.
It can be also used as a yellow dye color at the dye pots in Emily's and Haley's house, 2 Willow Lane.
Appointments
Note that the start times are when the villager leaves home to travel to the clinic. The end times are when the villager leaves the clinic.
Spring
|
Summer
|
Fall
|
Winter
|
Gallery
Glitches
If you pass out from low health while on your horse, both you and the horse will be transported to Harvey's Clinic. Your horse will be stuck inside the Clinic until the morning when it is transported to its stable.
History
- 1.3.32: Red plus sign on front of building changed to blue. Interior red plus signs changed to green or desaturated.
- 1.4: Energy Tonic and Muscle Remedy can now be used in Tailoring.
- 1.6.4: Energy Tonic no longer restores health when consumed.
| Buildings | ||
|---|---|---|
| Merchants | Abandoned House • Adventurer's Guild • Blacksmith • Bookseller • Carpenter's Shop • Casino • Desert Trader • Fish Shop • Giant Stump • Harvey's Clinic • Ice Cream Stand • Island Trader • JojaMart • Marnie's Ranch • Oasis • Pierre's General Store • Qi's Walnut Room • The Stardrop Saloon • Traveling Cart • Volcano Dwarf • Wizard's Tower | |
| Houses | 1 River Road • 2 River Road • 1 Willow Lane • 2 Willow Lane • 24 Mountain Road • Elliott's Cabin • Farmhouse • Island Farmhouse • Leah's Cottage • Mayor's Manor • Tent • Trailer • Treehouse | |
| Farm Buildings | Farming | Barn • Cabin • Coop • Fish Pond • Greenhouse • Mill • Pet Bowl • Shed • Silo • Slime Hutch • Stable • Well |
| Special | Desert Obelisk • Earth Obelisk • Farm Obelisk • Gold Clock • Island Obelisk • Junimo Hut • Water Obelisk | |
| Other Buildings | Community Center • Dog Pen • Island Field Office • Joja Warehouse • Movie Theater • Museum • Spa • Witch's Hut | |


