|
Tags: Mobile edit Mobile web edit Advanced mobile edit |
| Line 20: |
Line 20: |
| | | | |
| | A [[Minecart]] is located on the entry floor for quick travel to and from the mine. It is unlocked by completing the [[Community Center]] [[Bundles#Boiler Room|boiler room]] bundles or purchased from the [[Joja Community Development Form]]. | | A [[Minecart]] is located on the entry floor for quick travel to and from the mine. It is unlocked by completing the [[Community Center]] [[Bundles#Boiler Room|boiler room]] bundles or purchased from the [[Joja Community Development Form]]. |
| − |
| |
| − | ==Contents==
| |
| − | ===Floors===
| |
| − | The Mines consist of 120 floors (sometimes called levels). These floors are divided into three sections, 40 floors each, with their own themes; the first section has a brown earth theme, the second section has an ice theme, the third and last section has a lava and dark purple theme. The last ten floors of each section has a variation of the main theme; the first section (Floor 31-39) has a shadow theme, the second section (70-79) has a castle theme, and the third section (110-119) has a darker crimson theme.
| |
| − |
| |
| − | The corresponding floors in each section have the same layout. For example, Floor 1, 41, and 81 have the same layout; as does 2, 42, and 82; or Floor 10, 50, and 90; and so on.
| |
| − |
| |
| − | {| class="wikitable sortable"
| |
| − | ! Floor
| |
| − | ! Theme
| |
| − | ! Enemies
| |
| − | ! Treasures
| |
| − | ! Notes
| |
| − | |-
| |
| − | |Entrance
| |
| − | |style="background: #DDDBD4" |Brown Earth
| |
| − | |None
| |
| − | |{{name|Rusty Sword}}
| |
| − | |A [[Minecart]] is located here.<br>The [[Dwarf]] lives through the blocked passage to the east.<br>(A [[Steel Pickaxe]] or a [[Cherry Bomb]] is required to break the obstruction.)
| |
| − | |-
| |
| − | |1 - 9
| |
| − | |style="background: #DDDBD4" |Brown Earth
| |
| − | |{{name|Green Slime|link=Slimes{{!}}Green Slime}}{{name|Duggy}}{{name|Bug}}{{name|Rock Crab}}
| |
| − | |
| |
| − | |[[Copper Ore]] begins to appear on Floor 2 <br> Gems found: [[Amethyst]], [[Topaz]], [[Quartz]], and [[Earth Crystal]]
| |
| − | |-
| |
| − | |10
| |
| − | |style="background: #DDDBD4" |Brown Earth
| |
| − | |None
| |
| − | |{{name|Leather Boots}}
| |
| − | |
| |
| − | |-
| |
| − | |11 - 19
| |
| − | |style="background: #DDDBD4" |Brown Earth, [[Weeds]]
| |
| − | |{{name|Green Slime|link=Slimes{{!}}Green Slime}}{{name|Duggy}}{{name|Bug}}{{name|Rock Crab}}{{name|Grub}}{{name|Cave Fly}}
| |
| − | |
| |
| − | |Floor 12 has a bag of coal at the end of the path.<br> Floor 19 is set in a spiral pattern.
| |
| − | |-
| |
| − | |20
| |
| − | |style="background: #DDDBD4" |Brown Earth, [[Weeds]]
| |
| − | |None
| |
| − | |{{name|Steel Smallsword}}
| |
| − | |[[Fishing]]: [[Ghostfish]] and [[Stonefish]]
| |
| − | |-
| |
| − | |21 - 29
| |
| − | |style="background: #DDDBD4" |Brown Earth, [[Weeds]]
| |
| − | |{{name|Green Slime|link=Slimes{{!}}Green Slime}}{{name|Duggy}}{{name|Bug}}{{name|Rock Crab}}{{name|Grub}}{{name|Cave Fly}}
| |
| − | |
| |
| − | |
| |
| − | |-
| |
| − | |30
| |
| − | |style="background: #DDDBD4" |Brown Earth
| |
| − | |None
| |
| − | |No reward
| |
| − | |
| |
| − | |-
| |
| − | |31 - 39
| |
| − | |style="background: #D0D0D4" |Shadow, Grey Earth
| |
| − | |{{name|Bat|link=Bats{{!}}Bat}}{{name|Stone Golem}}
| |
| − | |
| |
| − | |Abundant [[Copper Ore]], [[Geode]]s are common
| |
| − | |-
| |
| − | |40
| |
| − | |style="background: #F0FFFF"| Frozen Earth
| |
| − | |None
| |
| − | |{{name|Slingshot}}
| |
| − | |
| |
| − | |-
| |
| − | |41 - 49
| |
| − | |style="background: #F0FFFF"| Frozen Earth
| |
| − | |{{name|Frost Jelly|link=Slimes{{!}}Frost Jelly}}{{name|Frost Bat|link=Bats{{!}}Frost Bat}}{{name|Dust Sprite}}
| |
| − | |
| |
| − | |[[Iron Ore]], [[Frozen Geode]]s, [[Aquamarine]], [[Frozen Tear]], and [[Jade]]s begin to appear
| |
| − | |-
| |
| − | |50
| |
| − | |style="background: #F0FFFF"| Frozen Earth
| |
| − | |None
| |
| − | |{{name|Tundra Boots}}
| |
| − | |[[Diamond]]s begin to appear (1 in 500 stones).<br>Each floor after 50 increases frequency by 0.00016 (e.g. 1 in 100 stones on floor 100).
| |
| − | |-
| |
| − | |51 - 59
| |
| − | |style="background: #F0FFFF"| Frozen Earth
| |
| − | |{{name|Frost Jelly|link=Slimes{{!}}Frost Jelly}}{{name|Frost Bat|link=Bats{{!}}Frost Bat}}{{name|Dust Sprite}}{{name|Ghost}}
| |
| − | |
| |
| − | |Abundant [[Dust Sprite]]s ([[Coal]]).<br>Floor 52 has a bag of coal at the end of the path. <br> Floor 59 is set in a spiral pattern.
| |
| − | |-
| |
| − | |60
| |
| − | |style="background: #F0FFFF"| Frozen Earth
| |
| − | |None
| |
| − | |{{name|Crystal Dagger}}
| |
| − | |[[Fishing]]: [[Ice Pip]] and [[Ghostfish]]
| |
| − | |-
| |
| − | |61 - 69
| |
| − | |style="background: #F0FFFF"| Frozen Earth
| |
| − | |{{name|Frost Jelly|link=Slimes{{!}}Frost Jelly}}{{name|Frost Bat|link=Bats{{!}}Frost Bat}}{{name|Dust Sprite}}{{name|Ghost}}
| |
| − | |
| |
| − | |
| |
| − | |-
| |
| − | |70
| |
| − | |style="background: #D0F0FF"| Frozen Castle
| |
| − | |None
| |
| − | |{{name|Master Slingshot}}
| |
| − | |
| |
| − | |-
| |
| − | |71 - 79
| |
| − | |style="background: #D0F0FF"| Frozen Castle
| |
| − | |{{name|Frost Jelly|link=Slimes{{!}}Frost Jelly}}{{name|Frost Bat|link=Bats{{!}}Frost Bat}}{{name|Dust Sprite}}{{name|Ghost}}{{name|Skeleton}}
| |
| − | |
| |
| − | |
| |
| − | |-
| |
| − | |80
| |
| − | |style="background: #E0E0F0"| Lava, Purple Earth
| |
| − | |None
| |
| − | |{{name|Firewalker Boots}}
| |
| − | |
| |
| − | |-
| |
| − | |81 - 89
| |
| − | |style="background: #E0E0F0"| Lava, Purple Earth
| |
| − | |{{name|Red Sludge|link=Slimes{{!}}Red Sludge}}{{name|Lava Bat|link=Bats{{!}}Lava Bat}}{{name|Lava Crab}}{{name|Shadow Brute}}{{name|Shadow Shaman}}{{name|Metal Head}}{{name|Squid Kid}}
| |
| − | |
| |
| − | |[[Gold Ore]] and [[Magma Geode]]s begin to appear.<br>[[Emerald]]s, [[Fire Quartz]], and [[Ruby|Rubies]] are common.
| |
| − | |-
| |
| − | |90
| |
| − | |style="background: #E0E0F0"| Lava, Purple Earth
| |
| − | |None
| |
| − | |{{name|Obsidian Edge}}
| |
| − | |
| |
| − | |-
| |
| − | |91 - 99
| |
| − | |style="background: #E0E0F0"| Lava, Purple Earth
| |
| − | |{{name|Red Sludge|link=Slimes{{!}}Red Sludge}}{{name|Lava Bat|link=Bats{{!}}Lava Bat}}{{name|Lava Crab}}{{name|Shadow Brute}}{{name|Shadow Shaman}}{{name|Metal Head}}{{name|Squid Kid}}
| |
| − | |
| |
| − | |Floor 92 has a bag of coal at the end of the path. <br> Floor 99 is set in a spiral pattern.
| |
| − | |-
| |
| − | |100
| |
| − | |style="background: #E0E0F0"| Lava, Purple Earth, [[Weeds]]
| |
| − | |None
| |
| − | |{{name|Stardrop}}
| |
| − | |[[Fishing]]: [[Lava Eel]]
| |
| − | |-
| |
| − | |101 - 109
| |
| − | |style="background: #E0E0F0"| Lava, Purple Earth, [[Weeds]]
| |
| − | |{{name|Red Sludge|link=Slimes{{!}}Red Sludge}}{{name|Lava Bat|link=Bats{{!}}Lava Bat}}{{name|Lava Crab}}{{name|Shadow Brute}}{{name|Shadow Shaman}}{{name|Metal Head}}{{name|Squid Kid}}
| |
| − | |
| |
| − | |
| |
| − | |-
| |
| − | |110
| |
| − | |style="background: #E8D8D8"| Lava, Crimson Earth
| |
| − | |None
| |
| − | |{{name|Space Boots}}
| |
| − | |
| |
| − | |-
| |
| − | |111 - 119
| |
| − | |style="background: #E8D8D8"| Lava, Crimson Earth
| |
| − | |{{name|Red Sludge|link=Slimes{{!}}Red Sludge}}{{name|Lava Bat|link=Bats{{!}}Lava Bat}}{{name|Lava Crab}}{{name|Shadow Brute}}{{name|Shadow Shaman}}{{name|Metal Head}}{{name|Squid Kid}}
| |
| − | |
| |
| − | |
| |
| − | |-
| |
| − | |120
| |
| − | |style="background: #E0E0F0"| Lava, Purple Earth
| |
| − | |None
| |
| − | |{{name|Skull Key}}
| |
| − | |Final floor
| |
| − | |-
| |
| − | |}
| |
| − |
| |
| − | ===Remixed Rewards===
| |
| − | {{Spoiler}}
| |
| − | Choosing "remixed" mine rewards in [[Options|Advanced Options]] at the start of the game will result in a random reward for each reward floor from the following list. Some floors and unchanged. All floors have the possibility of having their normal reward.
| |
| − | {| class="wikitable sortable"
| |
| − | ! Floor
| |
| − | ! Possible Rewards
| |
| − | ! Notes
| |
| − | |-
| |
| − | |10
| |
| − | |
| |
| − | * {{name|Leather Boots}}
| |
| − | * {{name|Work Boots}}
| |
| − | * {{name|Wooden Blade}}
| |
| − | * {{name|Iron Dirk}}
| |
| − | * {{name|Wind Spire}}
| |
| − | * {{name|Femur}}
| |
| − | |
| |
| − | |-
| |
| − | |20
| |
| − | |
| |
| − | * {{name|Steel Smallsword}}
| |
| − | * {{name|Wood Club}}
| |
| − | * {{name|Elf Blade}}
| |
| − | * {{name|Glow Ring}}
| |
| − | * {{name|Magnet Ring}}
| |
| − | |
| |
| − | |-
| |
| − | |30
| |
| − | |No reward
| |
| − | |Unchanged
| |
| − | |-
| |
| − | |40
| |
| − | |{{name|Slingshot}}
| |
| − | |Unchanged
| |
| − | |-
| |
| − | |50
| |
| − | |
| |
| − | * {{name|Tundra Boots}}
| |
| − | * {{name|Thermal Boots}}
| |
| − | * {{name|Combat Boots}}
| |
| − | * {{name|Silver Saber}}
| |
| − | * {{name|Pirate's Sword}}
| |
| − | |
| |
| − | |-
| |
| − | |60
| |
| − | |
| |
| − | * {{name|Crystal Dagger}}
| |
| − | * {{name|Cutlass}}
| |
| − | * {{name|Iron Edge}}
| |
| − | * {{name|Burglar's Shank}}
| |
| − | * {{name|Wood Mallet}}
| |
| − | |
| |
| − | |-
| |
| − | |70
| |
| − | |{{name|Master Slingshot}}
| |
| − | |Unchanged
| |
| − | |-
| |
| − | |80
| |
| − | |
| |
| − | * {{name|Firewalker Boots}}
| |
| − | * {{name|Dark Boots}}
| |
| − | * {{name|Claymore}}
| |
| − | * {{name|Templar's Blade}}
| |
| − | * {{name|Kudgel}}
| |
| − | * {{name|Shadow Dagger}}
| |
| − | |
| |
| − | |-
| |
| − | |90
| |
| − | |
| |
| − | * {{name|Obsidian Edge}}
| |
| − | * {{name|Tempered Broadsword}}
| |
| − | * {{name|Wicked Kris}}
| |
| − | * {{name|Bone Sword}}
| |
| − | * {{name|Ossified Blade}}
| |
| − | |
| |
| − | |-
| |
| − | |100
| |
| − | |{{name|Stardrop}}
| |
| − | |Unchanged
| |
| − | |-
| |
| − | |110
| |
| − | |
| |
| − | * {{name|Space Boots}}
| |
| − | * {{name|Crystal Shoes}}
| |
| − | * {{name|Steel Falchion}}
| |
| − | * {{name|The Slammer}}
| |
| − | |
| |
| − | |-
| |
| − | |120
| |
| − | |{{name|Skull Key}}
| |
| − | |Unchanged
| |
| − | |}
| |
| − |
| |
| − | ===Ladders===
| |
| − | Ladders can be dropped from Monsters<ref name="laddermonsters" />, Rocks<ref name="ladderrocks" />, or spawned on load<ref name="ladderload" />
| |
| − |
| |
| − | Every monster killed has a flat 15% chance of spawning a ladder, assuming the enemy was killed over an unobstructed tile. This does not prevent ladders spawning from rocks.
| |
| − |
| |
| − | Some floors are preloaded with a ladder (12, 52, 92, treasure floors in skull caverns). These ladders do not prevent ladders spawning from rocks.
| |
| − |
| |
| − | After a floor loads, there is a 95% chance that a ladder will try to spawn. A tile is chosen at random, and if it is unobstructed then a ladder is placed. This will prevent ladders spawning from rocks.
| |
| − |
| |
| − | Every rock hit has a base chance of 2% of spawning a ladder. This is adjusted by daily luck, increasing by 2% at best or decreasing by 2% at worst with the [[Special Charm]] adding 0.5%. Food buffs add 1% for every point of Luck. The inverse of the number of rocks remaining after the rock is hit is added (e.g. if 5 rocks remaining then 1/5 = 0.2 or 20%, if 100 rocks remaining then 1/100 = 0.01 or 1%). If no enemies remain then 4% is added. If this chance hits, then a ladder will spawn, and prevent further ladders spawning from rocks. If you are in the skull caverns there is a 20% chance that a shaft will spawn instead, and this does not prevent further ladders/shafts spawning from rocks.
| |
| − |
| |
| − | ===Crates and Barrels===
| |
| − | Containers in the mines may randomly drop loot when destroyed. Containers are equally likely to be crates or barrels; the possible contents are not affected by the type of container. At most one item will be dropped by a container, although multiple copies of that item are possible.
| |
| − |
| |
| − | Most containers respawn every time you enter a level. Containers on platforms in the Mines, however, are only spawned the first time you enter a level. After those containers are destroyed, no new containers will appear on the platforms.
| |
| − |
| |
| − | Some items replace others depending on if you have reached the bottom of the mines. Where there are two values, the first is before reaching the bottom of the mines, the second is after. The possible items found in containers and their chances are<ref name="barreldrop" />:
| |
| − | {| class="wikitable sortable"
| |
| − | ! Item
| |
| − | ! 0-39
| |
| − | ! 40-79
| |
| − | ! 80+ (including [[Skull Cavern]])
| |
| − | ! Difficult Mines/Skull Cavern
| |
| − | (Can drop multiple items)
| |
| − | |-
| |
| − | |Nothing
| |
| − | |41.42%
| |
| − | |41.42%
| |
| − | |42%
| |
| − | |44%
| |
| − | |-
| |
| − | |{{name|Stone|2-5}}
| |
| − | |9.24%
| |
| − | |9.24%
| |
| − | |5.2%
| |
| − | |8%
| |
| − | |-
| |
| − | |{{name|Wood|2-5}}
| |
| − | |9.24%
| |
| − | |4.62%
| |
| − | |5.2%
| |
| − | |0%
| |
| − | |-
| |
| − | |{{name|Hardwood}}
| |
| − | |2.24%
| |
| − | |2.24%
| |
| − | |1.87%
| |
| − | |0%
| |
| − | |-
| |
| − | |{{name|Sap|2-5}}
| |
| − | |2.31%/0%
| |
| − | |2.31%/0%
| |
| − | |0%
| |
| − | |2%/0%
| |
| − | |-
| |
| − | |{{name|Mixed Seeds}}
| |
| − | |4.62%
| |
| − | |4.62%
| |
| − | |0%
| |
| − | |0%
| |
| − | |-
| |
| − | |{{name|Coal|1-2}}
| |
| − | |4.62%
| |
| − | |4.62%
| |
| − | |5.2%
| |
| − | |4%
| |
| − | |-
| |
| − | |{{name|Copper Ore|1-5}}
| |
| − | |4.62%
| |
| − | |4.62%
| |
| − | |5.2%
| |
| − | |4%
| |
| − | |-
| |
| − | |{{name|Iron Ore|1-5}}
| |
| − | |0%
| |
| − | |4.62%
| |
| − | |5.2%
| |
| − | |4%
| |
| − | |-
| |
| − | |{{name|Gold Ore|1-3}}
| |
| − | |0%
| |
| − | |0%
| |
| − | |5.2%
| |
| − | |4%
| |
| − | |-
| |
| − | |{{name|Iridium Ore|1-3}}
| |
| − | |0%
| |
| − | |0%
| |
| − | |0%
| |
| − | |0.68%
| |
| − | |-
| |
| − | |{{name|Cave Carrot|1-2}}
| |
| − | |7.8%
| |
| − | |7.8%
| |
| − | |7.8%/5.2%
| |
| − | |0%
| |
| − | |-
| |
| − | |{{name|Geode|1-2}}
| |
| − | |4.84%
| |
| − | |0%
| |
| − | |0%
| |
| − | |0%
| |
| − | |-
| |
| − | |{{name|Frozen Geode|1-2}}
| |
| − | |0%
| |
| − | |4.84%
| |
| − | |0%
| |
| − | |0%
| |
| − | |-
| |
| − | |{{name|Magma Geode|1-2}}
| |
| − | |0%
| |
| − | |0%
| |
| − | |2.6%
| |
| − | |0%
| |
| − | |-
| |
| − | |{{name|Omni Geode}}
| |
| − | |0%
| |
| − | |0%
| |
| − | |1.87%
| |
| − | |4%
| |
| − | |-
| |
| − | |{{name|Amethyst}}
| |
| − | |2.24%
| |
| − | |0%
| |
| − | |0%
| |
| − | |0%
| |
| − | |-
| |
| − | |{{name|Topaz}}
| |
| − | |2.24%
| |
| − | |0%
| |
| − | |0%
| |
| − | |0%
| |
| − | |-
| |
| − | |{{name|Aquamarine}}
| |
| − | |0%
| |
| − | |2.24%
| |
| − | |0%
| |
| − | |4%
| |
| − | |-
| |
| − | |{{name|Jade}}
| |
| − | |0%
| |
| − | |2.24%
| |
| − | |0%
| |
| − | |4%
| |
| − | |-
| |
| − | |{{name|Emerald}}
| |
| − | |0%
| |
| − | |0%
| |
| − | |1.87%
| |
| − | |0%
| |
| − | |-
| |
| − | |{{name|Ruby}}
| |
| − | |0%
| |
| − | |0%
| |
| − | |1.87%
| |
| − | |0%
| |
| − | |-
| |
| − | |{{name|Bone Fragment|2-5}}
| |
| − | |0%
| |
| − | |0%
| |
| − | |5.2%
| |
| − | |0%
| |
| − | |-
| |
| − | |[[File:Warp Totem Farm.png|24px|link=]] [[Warp Totem: Farm]]
| |
| − | |0%
| |
| − | |0%
| |
| − | |1.87%
| |
| − | |0%
| |
| − | |-
| |
| − | |{{name|Quartz}}
| |
| − | |0%/4.62%
| |
| − | |0%
| |
| − | |0%
| |
| − | |4%
| |
| − | |-
| |
| − | |{{name|Frozen Tear}}
| |
| − | |0%
| |
| − | |0%/4.62%
| |
| − | |0%
| |
| − | |0%/4%
| |
| − | |-
| |
| − | |{{name|Fire Quartz}}
| |
| − | |0%
| |
| − | |0%
| |
| − | |0%/2.6%
| |
| − | |0%
| |
| − | |-
| |
| − | |{{name|Basic Retaining Soil|(2-3)}}
| |
| − | |2.31%/0%
| |
| − | |0%
| |
| − | |0%
| |
| − | |2%/0%
| |
| − | |-
| |
| − | |{{name|Quality Retaining Soil|(2-3)}}
| |
| − | |0%
| |
| − | |2.31%/0%
| |
| − | |0%
| |
| − | |0%
| |
| − | |-
| |
| − | |{{name|Deluxe Retaining Soil}}
| |
| − | |0%
| |
| − | |0%
| |
| − | |0%
| |
| − | |0.23%
| |
| − | |-
| |
| − | |{{name|Hyper Speed-Gro}}
| |
| − | |0%
| |
| − | |0%
| |
| − | |0%
| |
| − | |0.23%
| |
| − | |-
| |
| − | |{{name|Deluxe Fertilizer}}
| |
| − | |0%
| |
| − | |0%
| |
| − | |0%
| |
| − | |0.23%
| |
| − | |-
| |
| − | |{{name|Cherry Bomb}}
| |
| − | |0%
| |
| − | |0%
| |
| − | |0%
| |
| − | |4%
| |
| − | |-
| |
| − | |{{name|Bomb}}
| |
| − | |0%
| |
| − | |0%
| |
| − | |0%
| |
| − | |4%
| |
| − | |-
| |
| − | |{{name|Tom Kha Soup}}
| |
| − | |0%
| |
| − | |0%
| |
| − | |0%
| |
| − | |0.15%
| |
| − | |-
| |
| − | |{{name|Trout Soup}}
| |
| − | |0%
| |
| − | |0%
| |
| − | |0%
| |
| − | |0.15%
| |
| − | |-
| |
| − | |{{name|Chocolate Cake}}
| |
| − | |0%
| |
| − | |0%
| |
| − | |0%
| |
| − | |0.15%
| |
| − | |-
| |
| − | |{{name|Pink Cake}}
| |
| − | |0%
| |
| − | |0%
| |
| − | |0%
| |
| − | |0.15%
| |
| − | |-
| |
| − | |{{name|Rhubarb Pie}}
| |
| − | |0%
| |
| − | |0%
| |
| − | |0%
| |
| − | |0.15%
| |
| − | |-
| |
| − | |{{name|Cookie}}
| |
| − | |0%
| |
| − | |0%
| |
| − | |0%
| |
| − | |0.15%
| |
| − | |-
| |
| − | |{{name|Spaghetti}}
| |
| − | |0%
| |
| − | |0%
| |
| − | |0%
| |
| − | |0.15%
| |
| − | |-
| |
| − | |{{name|Fried Eel}}
| |
| − | |0%
| |
| − | |0%
| |
| − | |0%
| |
| − | |0.15%
| |
| − | |-
| |
| − | |{{name|Spicy Eel}}
| |
| − | |0%
| |
| − | |0%
| |
| − | |0%
| |
| − | |0.15%
| |
| − | |-
| |
| − | |{{name|Sashimi}}
| |
| − | |0%
| |
| − | |0%
| |
| − | |0%
| |
| − | |0.15%
| |
| − | |-
| |
| − | |{{name|Maki Roll}}
| |
| − | |0%
| |
| − | |0%
| |
| − | |0%
| |
| − | |0.15%
| |
| − | |-
| |
| − | |{{name|Tortilla}}
| |
| − | |0%
| |
| − | |0%
| |
| − | |0%
| |
| − | |0.15%
| |
| − | |-
| |
| − | |{{name|Red Plate}}
| |
| − | |0%
| |
| − | |0%
| |
| − | |0%
| |
| − | |0.15%
| |
| − | |-
| |
| − | |{{name|Eggplant Parmesan}}
| |
| − | |0%
| |
| − | |0%
| |
| − | |0%
| |
| − | |0.15%
| |
| − | |-
| |
| − | |{{name|Rice Pudding}}
| |
| − | |0%
| |
| − | |0%
| |
| − | |0%
| |
| − | |0.15%
| |
| − | |-
| |
| − | |{{name|Ice Cream}}
| |
| − | |0%
| |
| − | |0%
| |
| − | |0%
| |
| − | |0.15%
| |
| − | |-
| |
| − | |{{name|Blueberry Tart}}
| |
| − | |0%
| |
| − | |0%
| |
| − | |0%
| |
| − | |0.15%
| |
| − | |-
| |
| − | |{{name|Autumn's Bounty}}
| |
| − | |0%
| |
| − | |0%
| |
| − | |0%
| |
| − | |0.15%
| |
| − | |-
| |
| − | |{{name|Pumpkin Soup}}
| |
| − | |0%
| |
| − | |0%
| |
| − | |0%
| |
| − | |0.15%
| |
| − | |-
| |
| − | |{{name|Super Meal}}
| |
| − | |0%
| |
| − | |0%
| |
| − | |0%
| |
| − | |0.15%
| |
| − | |-
| |
| − | |{{name|Cranberry Sauce}}
| |
| − | |0%
| |
| − | |0%
| |
| − | |0%
| |
| − | |0.15%
| |
| − | |-
| |
| − | |{{name|Stuffing}}
| |
| − | |0%
| |
| − | |0%
| |
| − | |0%
| |
| − | |0.15%
| |
| − | |-
| |
| − | |{{name|Farmer's Lunch}}
| |
| − | |0%
| |
| − | |0%
| |
| − | |0%
| |
| − | |0.15%
| |
| − | |-
| |
| − | |{{name|Survival Burger}}
| |
| − | |0%
| |
| − | |0%
| |
| − | |0%
| |
| − | |0.15%
| |
| − | |-
| |
| − | |{{name|Dish O' The Sea}}
| |
| − | |0%
| |
| − | |0%
| |
| − | |0%
| |
| − | |0.15%
| |
| − | |-
| |
| − | |{{name|Miner's Treat}}
| |
| − | |0%
| |
| − | |0%
| |
| − | |0%
| |
| − | |0.15%
| |
| − | |-
| |
| − | |{{name|Roots Platter}}
| |
| − | |0%
| |
| − | |0%
| |
| − | |0%
| |
| − | |0.15%
| |
| − | |-
| |
| − | |{{name|Qi Gem}}
| |
| − | |0%
| |
| − | |0%
| |
| − | |0%
| |
| − | |0.54%
| |
| − | |-
| |
| − | |{{name|image=Springobjects071.png|Trimmed Lucky Purple Shorts}}
| |
| − | |0%
| |
| − | |0%
| |
| − | |0%
| |
| − | |0.68%
| |
| − | |-
| |
| − | |Special Item<br />(See [[#Special Items|below]])
| |
| − | |2.24%
| |
| − | |2.24%
| |
| − | |1.87%
| |
| − | |0%
| |
| − | |-
| |
| − | |}
| |
| − |
| |
| − | ===Special Items===
| |
| − | {{Spoiler}}
| |
| − | A small fraction of crates and barrels (2.2%) will drop one of the following special items<ref name="specialitem" />. Visually these crates and barrels are indistinguishable from containers containing standard loot.
| |
| − |
| |
| − | These special items can also be dropped by a small fraction of monsters. About 1.2% of [[Slimes]] are identifiable as [[Slimes#Special Slimes|special Slimes]] by gold stars. For all other monsters, less than 0.2% of monsters will drop special items instead of standard loot, but these special monsters look identical to the standard versions.
| |
| − |
| |
| − | {|
| |
| − | |-
| |
| − | |
| |
| − | |style="vertical-align: top;"|
| |
| − | {| class="wikitable"
| |
| − | |-
| |
| − | !Floor
| |
| − | !Items
| |
| − | |-
| |
| − | |Mines: 0-19
| |
| − | |{{name|Carving Knife|17%}}{{name|Wood Club|17%}}{{name|Sneakers|17%}}{{name|Rubber Boots|17%}}{{name|Small Glow Ring|17%}}{{name|Small Magnet Ring|17%}}
| |
| − | |-
| |
| − | |Mines: 20-39
| |
| − | |{{name|Forest Sword|14%}}{{name|Wind Spire|14%}}{{name|Wood Club|14%}}{{name|Rubber Boots|14%}}{{name|Sneakers|14%}}{{name|Small Glow Ring|14%}}{{name|Small Magnet Ring|14%}}
| |
| − | |-
| |
| − | |Mines: 40-59
| |
| − | |{{name|Forest Sword|14%}}{{name|Iron Edge|14%}}{{name|Lead Rod|14%}}{{name|Wood Mallet|14%}}{{name|Thermal Boots|14%}}{{name|Glow Ring|14%}}{{name|Magnet Ring}}
| |
| − | |-
| |
| − | |}
| |
| − | |style="width: 12px;"|
| |
| − | |style="vertical-align: top;"|
| |
| − | {|class="wikitable"
| |
| − | |-
| |
| − | !Floor
| |
| − | !Items
| |
| − | |-
| |
| − | |Mines: 60-79
| |
| − | |{{name|Lead Rod|14%}}{{name|Shadow Dagger|14%}}{{name|Wood Mallet|14%}}{{name|Combat Boots|14%}}{{name|Thermal Boots|14%}}{{name|Glow Ring|14%}}{{name|Magnet Ring|14%}}
| |
| − | |-
| |
| − | |Mines: 80-99
| |
| − | |{{name|Yeti Tooth|28%}}{{name|Burglar's Shank|14%}}{{name|Tempered Broadsword|14%}}{{name|The Slammer|14%}}{{name|Dark Boots|14%}}{{name|Genie Shoes|14%}}
| |
| − | |-
| |
| − | |Mines: 100-119
| |
| − | |{{name|Burglar's Shank|14%}}{{name|Kudgel|14%}}{{name|Shadow Dagger|14%}}{{name|Steel Falchion|14%}}{{name|Dark Boots|14%}}{{name|Genie Shoes|14%}}{{name|Immunity Band|14%}}
| |
| − | |-
| |
| − | |}
| |
| − | |style="width: 12px;"|
| |
| − | |style="vertical-align: top;"|
| |
| − | {|class="wikitable"
| |
| − | |-
| |
| − | !Floor
| |
| − | !Items
| |
| − | |-
| |
| − | |[[Skull Cavern]]<br />[[Quarry Mine]]
| |
| − | |{{name|Burglar's Shank|8%}}{{name|Steel Falchion|8%}}{{name|Tempered Broadsword|8%}}{{name|The Slammer|8%}}{{name|Wicked Kris|8%}}{{name|Crystal Shoes|8%}}{{name|Dark Boots|8%}}{{name|Genie Shoes|8%}}{{name|Immunity Band|8%}}{{name|Lucky Ring|8%}}{{name|Battery Pack|8%}}{{name|Curiosity Lure|8%}}
| |
| − | |-
| |
| − | |Any floor (Shrine of Challenge active)
| |
| − | |{{name|Iridium Needle|14%}}{{name|Iridium Band|14%}}{{name|Enricher|14%}}{{name|Pressure Nozzle|14%}}{{name|Radioactive Bar|14%}}{{name|Qi Gem|14%}}{{name|Auto-Petter|2%}}A random item from a [[Skull_Cavern#Treasure_Rooms|Treasure Room]] (14%)
| |
| − | |-
| |
| − | |}
| |
| − | |-
| |
| − | |}
| |
| − |
| |
| − | ===Dirt Patches===
| |
| − | The following table lists the chances of finding items available from dirt patches <ref name="itemdigchances" />. It doesn't matter if a [[Hoes|hoe]] or a [[Crafting#Bombs|bomb]] is used to dig the soil.
| |
| − | {| class="wikitable sortable"
| |
| − | !Item
| |
| − | !Chance
| |
| − | |-
| |
| − | |Nothing
| |
| − | |85.9%
| |
| − | |-
| |
| − | |[[Dwarf Scroll I]]
| |
| − | |0.16%
| |
| − | |-
| |
| − | |[[Lost Books|Lost Book]]/[[Mixed Seeds]]
| |
| − | |0.16%
| |
| − | |-
| |
| − | |[[Rusty Spoon]]
| |
| − | |0.16%
| |
| − | |-
| |
| − | |[[Rusty Spur]]
| |
| − | |0.16%
| |
| − | |-
| |
| − | |[[Skeletal Tail]]
| |
| − | |0.16%
| |
| − | |-
| |
| − | |[[Dwarvish Helm]] (Floors 1-40 only)
| |
| − | |0.1%
| |
| − | |-
| |
| − | |[[Dwarf Scroll II]] (Floors 1-40 only)
| |
| − | |0.1%
| |
| − | |-
| |
| − | |[[Dwarf Gadget]] (Floors 41-80 only)
| |
| − | |0.1%
| |
| − | |-
| |
| − | |[[Gold Bar]] (Floors 41-80 only)
| |
| − | |0.1%
| |
| − | |-
| |
| − | |[[Dwarf Scroll IV]] (Floors 81-120 only)
| |
| − | |0.2%
| |
| − | |-
| |
| − | |[[Strange Doll (yellow)]]
| |
| − | |0.03%
| |
| − | |-
| |
| − | |-
| |
| − | |[[Strange Doll (green)]]
| |
| − | |0.03%
| |
| − | |-
| |
| − | |[[Stone]]
| |
| − | |1.33%
| |
| − | |-
| |
| − | |Ore (Floor appropriate)
| |
| − | |1.33%
| |
| − | |-
| |
| − | |[[Clay]]
| |
| − | |4.68%
| |
| − | |-
| |
| − | |[[Omni Geode]]
| |
| − | |0.17%
| |
| − | |-
| |
| − | |[[Minerals#Geodes|Geode]] (Floor appropriate)
| |
| − | |0.51%
| |
| − | |-
| |
| − | |[[Cave Carrot]]
| |
| − | |5.03%
| |
| − | |}
| |
| − |
| |
| − | ===Infested Floors===
| |
| − | [[File:Overrun_Area.png|thumb|right|300px|Entering an infested floor]]
| |
| − | Occasionally you will enter an infested floor filled with slimes or a mix of monsters. Unlike normal floors, there are no rocks and in slime-infested floors the walls and ground are covered in green slime rather than the normal themes. Forage-able items such as quartz or mushrooms may still be found though. To proceed from an infested floor, you must continue to fight until all monsters are killed (this includes [[Duggy|Duggies]] that may be hidden under dirt patches), at which point a ladder will appear either where the last monster was killed or next to the entrance (the player will be notified with a message saying, "A way down has appeared").
| |
| − |
| |
| − | A [[Staircase]] can also be used to escape an infested floor.
| |
| − |
| |
| − | An infested floor will always be on the same floor for each day and goes up one floor the next day. For example, if an infested floor is found on floor 54 one day, it will be on 53 the next day, 52 the day after that, and so on. On some days, an infested floor might not be found because certain floors are excluded from being infested. These include elevator/treasure floors and the first five, last ten, and nineteenth floor of each section (refer back to the information about sections in [[The_Mines#Floors|Floors]]). There can be multiple infested floors at once, each are generally around twenty or more floors apart.
| |
| − |
| |
| − | The [[Buffs|Oil of Garlic Buff]] prevents floors from being infested. [[Oil of Garlic]] must be consumed before entering the floor to prevent infestation.
| |
| − |
| |
| − | Repeatedly visiting infested floors can be an excellent way to quickly achieve some of the [[Adventurer's Guild#Monster Eradication Goals|Monster Eradication Goals]] at the [[Adventurer's Guild]].
| |
| − |
| |
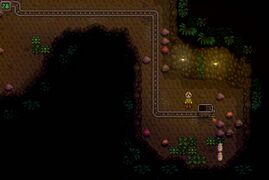
| − | ===The Mushroom Floor===
| |
| − | [[File:The Mushroom Floor.jpg|thumb|right|150px|A mushroom floor.]]
| |
| − | Sometimes a floor in the lower section of the mine (floors 81-119) will have greatly increased spawns of [[Red Mushroom|red]] and [[Purple Mushroom|purple]] mushrooms. These floors will also notably have a variety of colored lanterns which usually includes at least one green lantern.
| |
| − |
| |
| − | Note that no mushrooms will spawn on an elevator floor (floors ending in 0 or 5) or if the floor is infested (see previous section.) Additionally, the mushroom floor is neither unique nor guaranteed -- there may be multiple active mushroom floors or no such floors at all on a given day, and that situation may persist for several days or weeks.
| |
| − |
| |
| − | ===Dungeon Floors===
| |
| − | [[File:DungeonFloor.jpg|thumb|right|300px|A dungeon floor.]]
| |
| − | Dungeon floors are similar in appearance to the single floor of the [[Quarry Mine]]. They may spawn randomly at any floor of the Mines.
| |
| − |
| |
| − | These floors have the same enemies and rocks as the Quarry Mine, which can often be considerably higher level than that of the floors they replace. Players without high-level tools or weapons might benefit from using a [[Staircase]] to skip these floor to save time.
| |
| − |
| |
| − | ===The Bottom of the Mines===
| |
| − | On floor 120 of the Mines is the [[Skull Key]]. The skull key is used to open a door in a cave in [[The Desert]], leading to the [[Skull Cavern]]. It is also used to unlock the [[Junimo Kart]] arcade machine for play in [[The Stardrop Saloon]].
| |
| − |
| |
| − | Furthermore, reaching this floor also changes other parts of the game (introduced in {{version|1.3.27}}):
| |
| − | * prismatic shards and diamonds will now rarely drop from any monster;
| |
| − | * gems and purple mushrooms may now be found when searching trash bins;
| |
| − | * gems and purple mushrooms may now be requested in NPC quests;
| |
| − | * some monsters will be stronger.
| |
| − |
| |
| − | ===Shrine of Challenge===
| |
| − | {{Spoiler}}
| |
| − | [[File:Shrine of Challenge 1.png|thumb|right|180px|The Shrine of Challenge]]
| |
| − | The Shrine of Challenge is not available until the player unlocks it by entering [[Qi's Walnut Room]] on [[Ginger Island]] and completing the "[[Quests#Danger In The Deep|Danger In The Deep]]" quest.
| |
| − |
| |
| − | Thereafter, the Shrine of Challenge is located on floor 120 of the Mines. It acts as a toggle switch, alternating the strengths of [[The Mines]] enemies between normal levels and "dangerous" levels. ''The toggle does not change strength levels until the following day.''
| |
| − |
| |
| − | While the dangerous setting is active, [[Radioactive Node]]s can be found in the Mines, from which [[Radioactive Ore]] can be obtained.
| |
| | | | |
| | ==Strategy== | | ==Strategy== |
|
|
|
|
| Closed:
|
Never
|
| Occupants:
|
 Dwarf Dwarf
|
The Mines are located in the north area of the Mountains (northeast of the Carpenter's Shop and to the west of the Adventurer's Guild). They are blocked by rock debris until the 5th day of Spring (Year 1), when the player receives a letter.
Overview
There are 120 floors (sometimes called levels) in the Mines. Ore type and quantity increases as the player moves deeper into the Mines. The Mines are filled with rocks and dirt patches. Rocks can be mined with a pickaxe in order to obtain stone, ore and geodes. A hoe can be used on dirt patches to collect minerals, artifacts, ore, clay, and cave carrots.
To advance deeper in the Mines, a ladder must be revealed on each floor. The ladder will sometimes appear when rocks are broken or after an enemy is defeated (killing enemies is the stamina-free option to finding ladders). If a floor is "infested" or "overrun" by monsters, all enemies must be defeated on that floor before a ladder will appear.
If you pass out in the Mines from exhaustion (zero energy), or when 2:00AM arrives, you lose 10% of your gold, up to a maximum of data-sort-value="1000"> 1,000g. If you pass out from drained health, you lose the same amount of gold and also various inventory items, including weapons and tools (except for the Galaxy Sword). If tools are lost, they are returned in the mail on the following day, though Fishing poles and weapons will not be returned. You will awaken in the mine entrance, found by one of the villagers.
You can recover lost items by contacting Marlon at the Adventurer's Guild. One lost item (or stack of items) can be purchased there, any time after passing out due to low health. The price is the base sell price of the lost item (i.e., the gold that would be obtained from selling one item or stack of items). Marlon's Item Recovery Service persists until the next time the player loses items in the Mines, when previously lost items are replaced by newly lost items.
A Minecart is located on the entry floor for quick travel to and from the mine. It is unlocked by completing the Community Center boiler room bundles or purchased from the Joja Community Development Form.
Strategy
Swarms
If the screen becomes "misty", "glowy", or "foggy", several of the current floor's flying monsters will spawn and attack. Consuming Oil of Garlic will prevent these infestation fogs.
Staircases
If the player has reached at least Mining skill level 2, floors can be skipped by using a Staircase (crafted from 99 Stone). A Staircase allows instant access to the next floor in the Mines. After every 5 floors, an elevator will be available, allowing access to that floor at any time.
Food
Shown below are foods with buffs that are useful when exploring the Skull Cavern. Note that eating a food with buffs will wipe out any active buffs and replace them with the buffs from the newly eaten food. If the newly eaten food has no buffs, the existing buffs will remain in effect. Coffee, Triple Shot Espresso and Ginger Ale are an exception to this rule; they will stack with other food buffs (but not each other).
Trivia
- The axe, scythe or pickaxe can be used to kill monsters in lieu of the sword.
- Stone can be purchased from the Carpenter's Shop for data-sort-value="20">20g each during game year 1, making it possible to skip all 120 floors using Staircases for just under data-sort-value="250000">250,000g (useful for unlocking all the floors in order to return later).
- Starting in year 2, the price of stone increases to data-sort-value="100">100g, making this a much more expensive technique.
- Monsters become more difficult to kill, increase damage, and may gain a speed boost after reaching the bottom of the Mines[1], so this technique is not without penalties.
- If all monsters on a floor are killed, the chance of finding a ladder under a broken rock is increased by 4%.[2]
- At floor 120, both the Green Serpent Statue and the Purple Serpent Statue are found.
Gallery
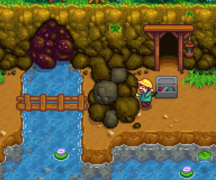
The entrance to the mines
The blocked Mine Entrance before Spring Day 5
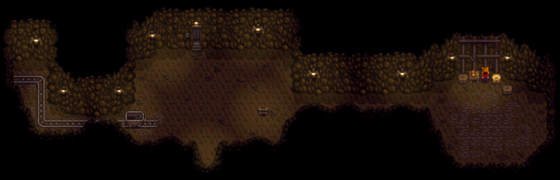
A minecart stash filled with coal
External Links
Players with access to their saved game files may find the "Stardew Predictor" utility helpful for predicting which mine floors will be infested and which floors will be mushroom floors. The utility is located at https://mouseypounds.github.io/stardew-predictor/.
References
- ↑ See Monster::parseMonsterInfo in the game code.
- ↑ See MineShaft::checkStoneForItems in the game code.
Cite error: <ref> tag with name "itemdigchances" defined in <references> is not used in prior text.
Cite error: <ref> tag with name "laddermonsters" defined in <references> is not used in prior text.
Cite error: <ref> tag with name "ladderrocks" defined in <references> is not used in prior text.
Cite error: <ref> tag with name "ladderload" defined in <references> is not used in prior text.
Cite error: <ref> tag with name "barreldrop" defined in <references> is not used in prior text.
Cite error: <ref> tag with name "specialitem" defined in <references> is not used in prior text.
History
- 1.3: Removed exploit that created a ladder to the Skull Cavern on floor 120 by blowing up an item with a bomb.
- 1.4: Added random dungeon (quarry mine) levels. Changed the way mushroom levels are spawned, so they cannot be repeatedly "farmed". Removed exploit where clicking the journal icon would prevent the passing out (from low health) cutscene where items and gold were lost. Mine levels are no longer forgotten when passing out due to low health. Added Marlon's Item Recovery Service. Mine floors now also reset as soon as the player returns to floor 0, instead of only the next 10-minute tick of the game clock when on a lower numbered floor.
- 1.5: In the Advanced Options when starting a farm, there is an option for Mine Rewards to be Default or Remixed. Added Shrine of Challenge to floor 120 after completing Qi quest.